This post was written with OS X 10.10 and Xcode 6.4 in mind. With OS X 10.11 and Xcode 7 just around the corner (as of the time this was written) it's safe to say some of the details in this post will become quickly outdated. If I learn that this is the case I will try and update this post. But if you're reading this in 2021 or something don't expect any of this to be accurate.
A few days ago I set out to create a simple OpenGL program on OS X (10.10.4 to be exact) without using a wrapper library like SDL. It turns out there's lots of information out there on how to go about this. But, I never came across anything that had complete start to finish instructions for the latest versions of OS X, Xcode and OpenGL. By "start to finish" I mean from creating a new project all the way up to creating a .app that can run on another person's computer without them needing to install any dependencies. Every blog post or tutorial I came across had at least one frustrating gap somewhere in it where the author had (most likely unintentionally) assumed either the reader knew what they were doing or that the step(s) in question were easy to figure out without lots of detail. I don't know about you, but I have no idea what I'm doing and I'm real dumb, so figuring new things out ain't easy. My goal here is to document the process in as much detail as possible so you can't mess it up. There's definitely other, probably better, ways to do this; but this way works pretty well for me. I'm going to try and assume that you have very little knowledge of any of the tools involved and that you're goal is the same as mine: start from scratch and end up with something you can send to a friend. I will however assume that you're no stranger to C++ or git since they are way outside of the scope of this post.
Before getting started you'll want to acquire the latest version of Xcode (6.4 (6E35b) as of 7/28/15) and Homebrew. Xcode can be downloaded through the App Store. Detailed instructions for installing Homebrew can be found here but you can probably just use the instructions on the home page. Homebrew doesn't really have versions as far as I know, just run brew update to make sure you're up to date. You'll also want to make sure you've got the Xcode Command Line Tools Package installed; run xcode-select --install and you'll be good to go.
Now that you've got Xcode and Homebrew you're ready to install the two libraries you're going to use to make working with OpenGL a less shitty experience: GLEW and GLFW. The somewhat ironic thing is that getting GLEW and GLFW set up in an Xcode project is itself a real shitty experience.
A quick aside: the last time I touched OpenGL was probably around 2003, maybe early 2004. At the time I was on Windows XP and wasn't using either GLEW or GLFW (or GLUT or any similar library). Instead I used CreateWindow and wglCreateContext (and a shitload of other boilerplate) to create a window and rendering context, switch statements that approached several hundred lines inside a good old fashioned WindowProc for handling input, and I don't think I even had a graphics card capable of using anything past OpenGL 1.3 so I definitely wasn't bothering with GLEW.
All that is to say, when I started reading up on OpenGL again I was kind of confused by the purpose of these libraries. If you've actually been keeping up with OpenGL for the last eleven or twelve years then they're probably not so mysterious. But if you're way out of the loop or totally new to this I think I can shed some light on them and hopefully explain in a convincing way why you'd want to use them. You can skip ahead if this is all familiar territory for you. It wasn't for me so I'm going to provide a brief synopsis of each.
Let's start with GLEW. OpenGL, like most standards and specifications, is an ongoing and living thing. Since it is fundamentally tied to its implimentation and the underlying graphics hardware, care has been taken to introduce new features in a controlled manner. This is done through extensions which allow hardware vendors to implement and expose particular features independently. One fairly large downside to the way extensions are implemented is that each extension function's location has to be determined at run time. For this calls to dlopen and dlsym are necessary (or if you're on Windows: wglGetProcAddress). Doing this for every extension function you intend to call is obviously less than ideal. GLEW takes care of this for you and makes calling OpenGL functions a seamless process. You might wonder, "Is this really necessary?", the answer is no, but boilerplate code is no fun to write.
Like GLEW, GLFW serves the purpose of reducing boilerplate code to a minimum. However the type of boilerplate it focuses on is entirely different. Before you can actually start using OpenGL you need a rendering context. To get a rendering context you need a surface or window to render to. It should go without saying that creating a window is extremely platform dependent. Even when you're targeting just one platform the process can be laborious. GLFW's glfwCreateWindow makes the whole process nice and easy. As an added bonus GLFW also normalizes the process of dealing with multiple monitors and handling input. I'm usually a big believer in DIY, but unless you've got a really good reason you should probably let GLFW or a similar library handle the details of this kind of highly platform specific initialization. If you're curious you will definitely learn something useful by creating windows and handling input without help, but either can be a very deep rabbit hole if you're not careful.
Now that I've expounded some on the why of GLEW and GLFW let's do some real work and look at the how.
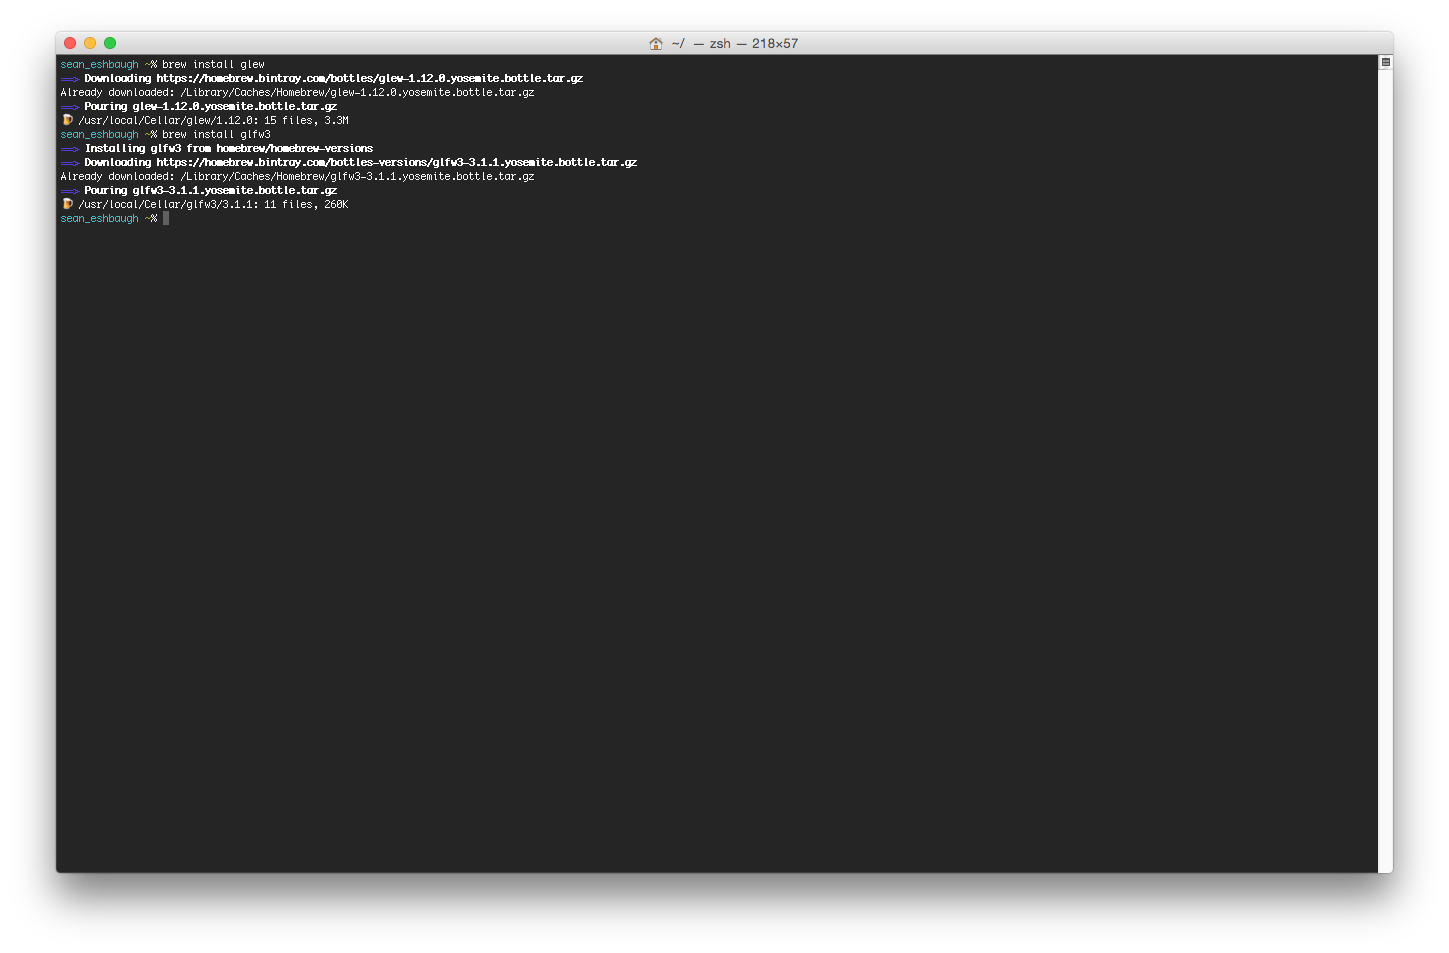
Since you've got Homebrew installing GLEW and GLFW is easy, just brew install glew and brew install glfw3.
Once that's done it's time to open up Xcode and make a new project (File > New > Project). Select "Cocoa Application" as your project template (under OS X > Application).
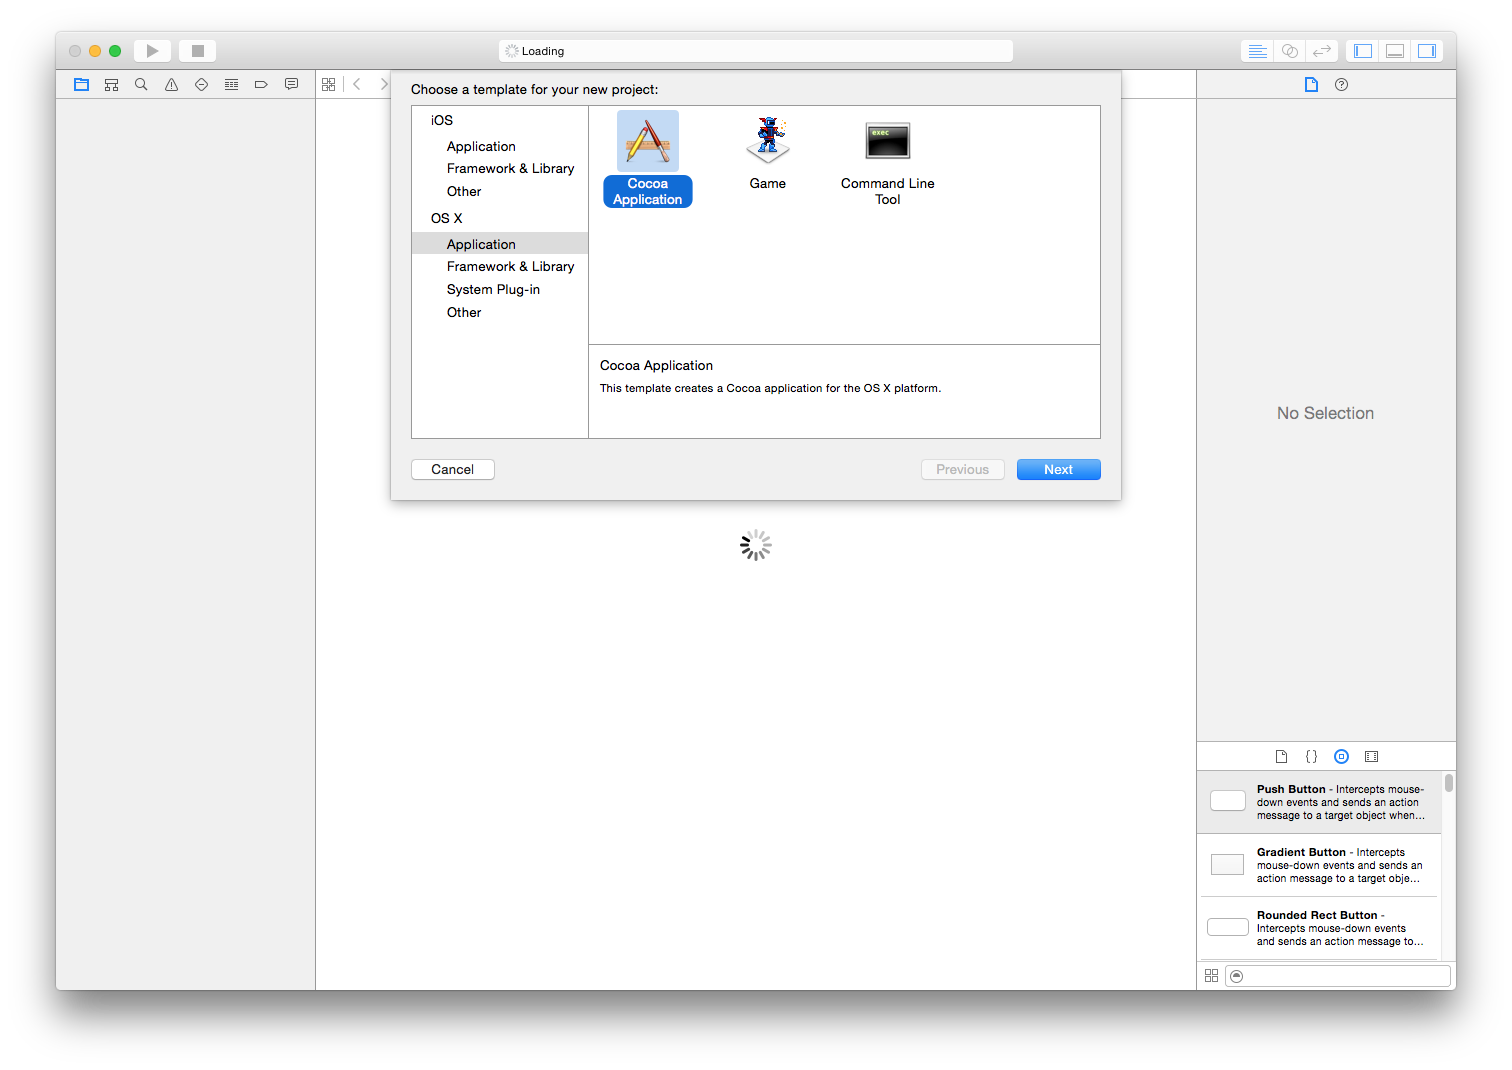
You'll sometimes see tutorials tell you to create a Command Line Tool project. I suspect the reason Command Line Tool is what's typically used is because C++ is an option for the language and with Cocoa Application you can select either Swift or Objective-C. It turns out this is a non-issue. There's one very important reason to not go that route though. Creating a Cocoa Application allows you to easily bundle files with the actual executable in a .app container. I'm sure there's a way to coax Command Line Tool projects into doing that, but it's much easier to just start off with a Cocoa Application that's already set up with that in mind.
Click "Next" and then give your project a name and select Objective-C as the language.

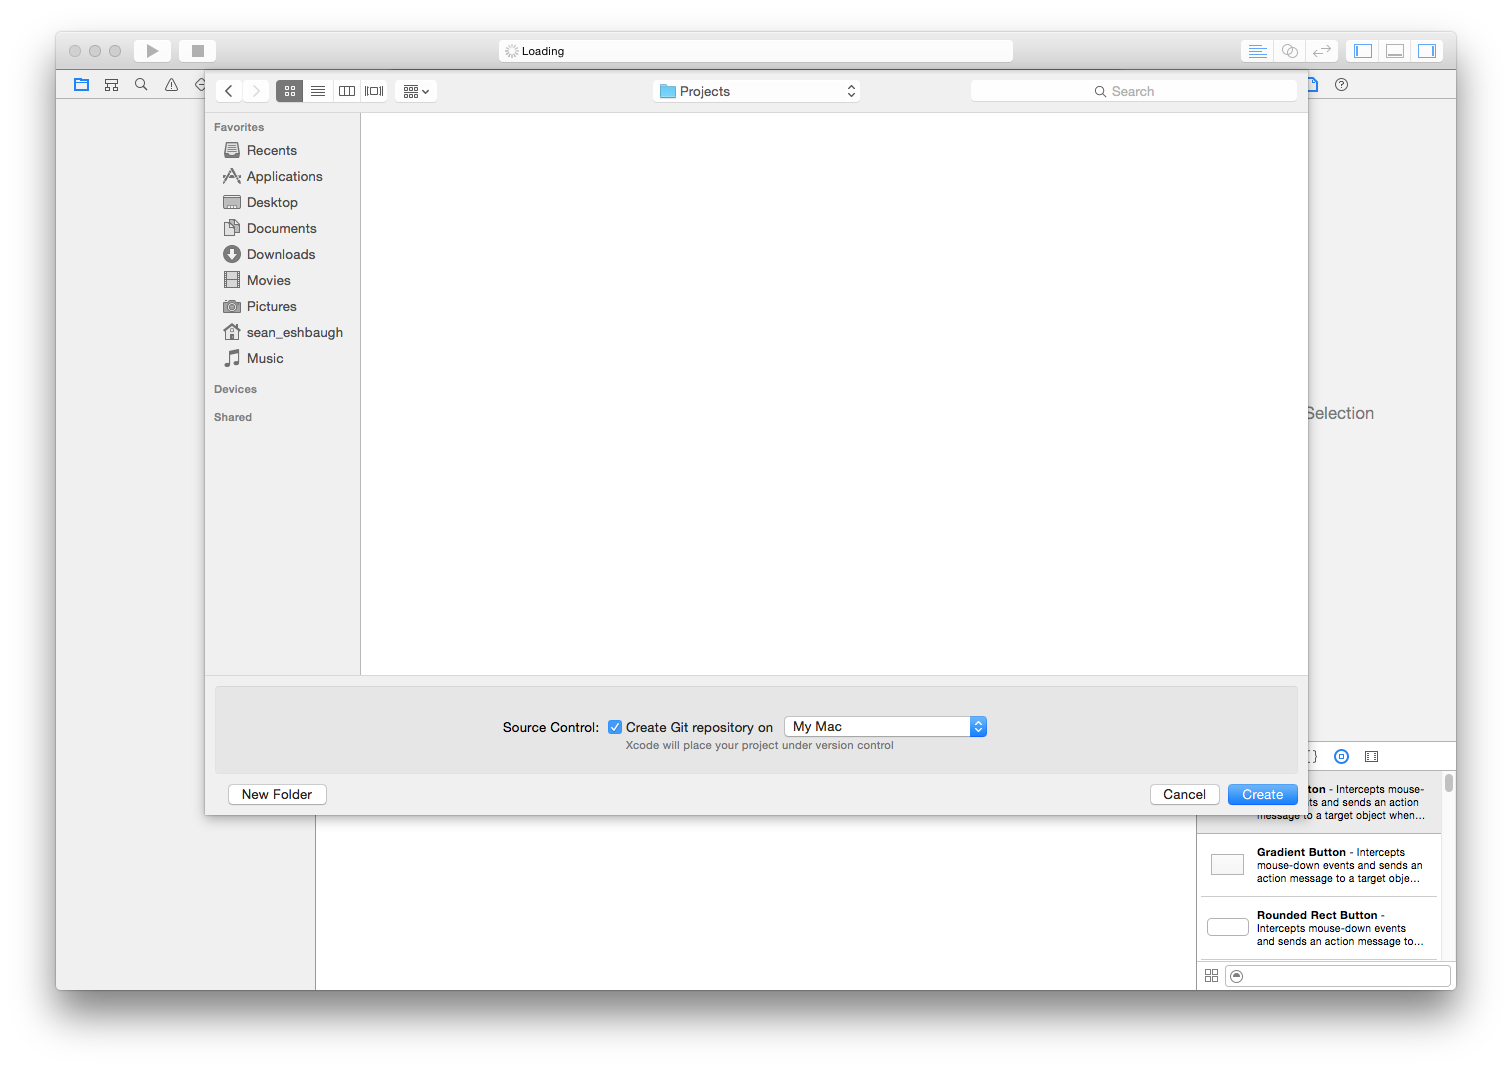
Click "Next" again and then choose a location for your project. Click "Create" when finished.
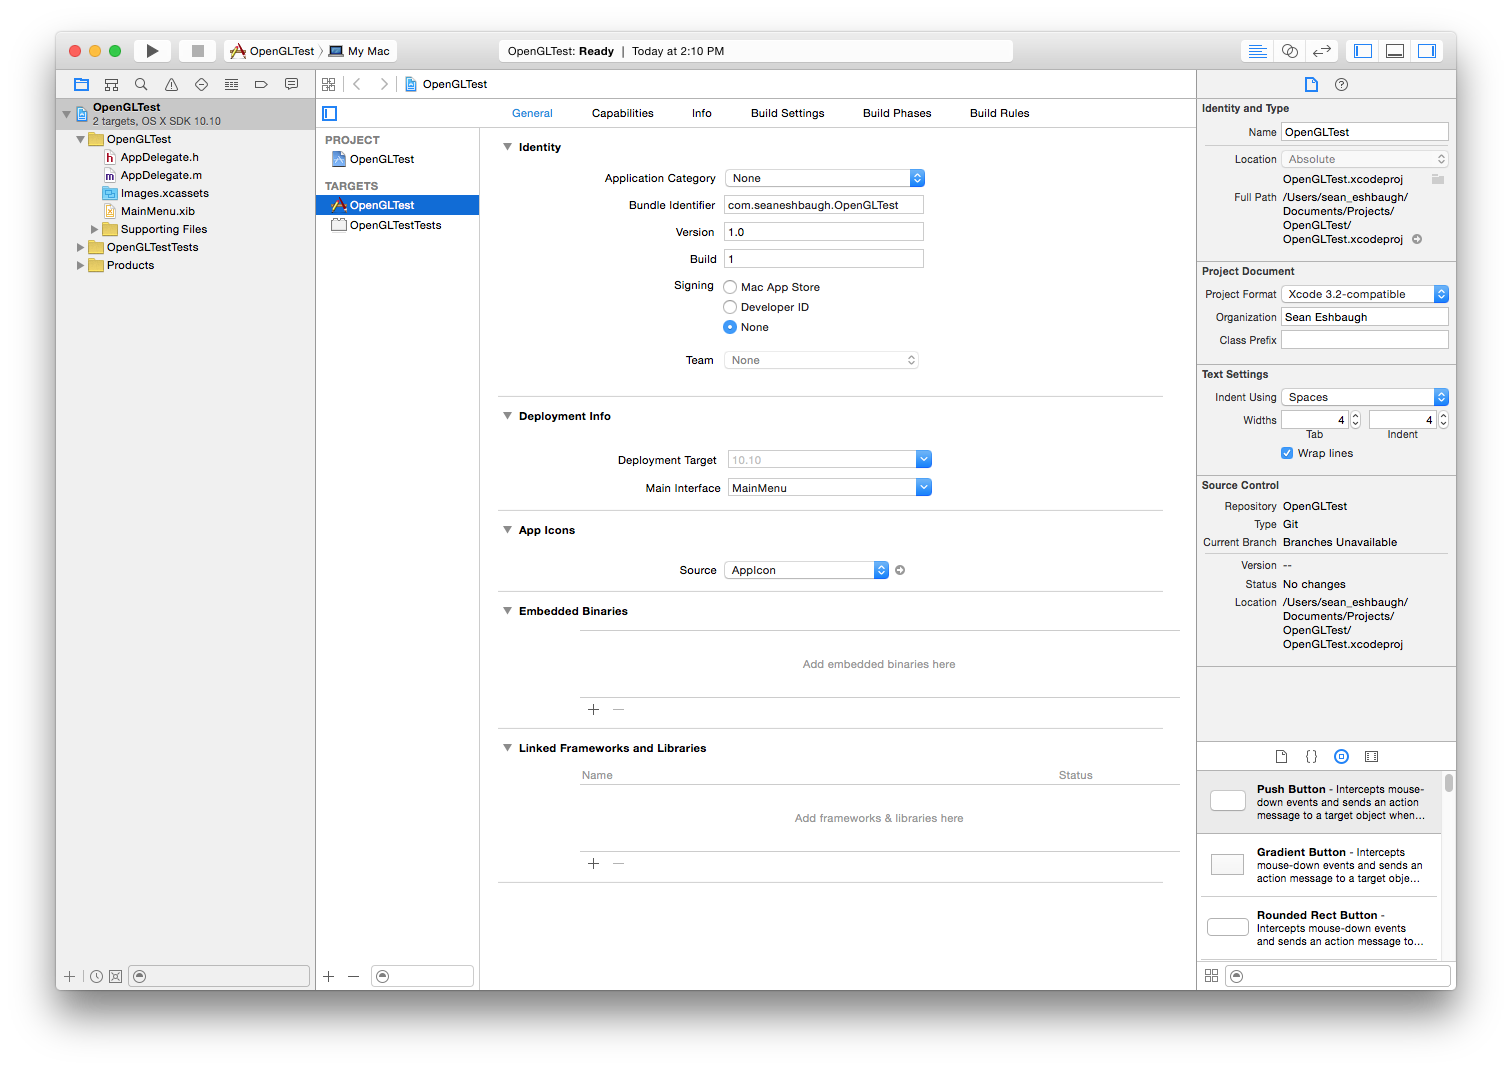
You should now have a brand new, but not quite empty project.
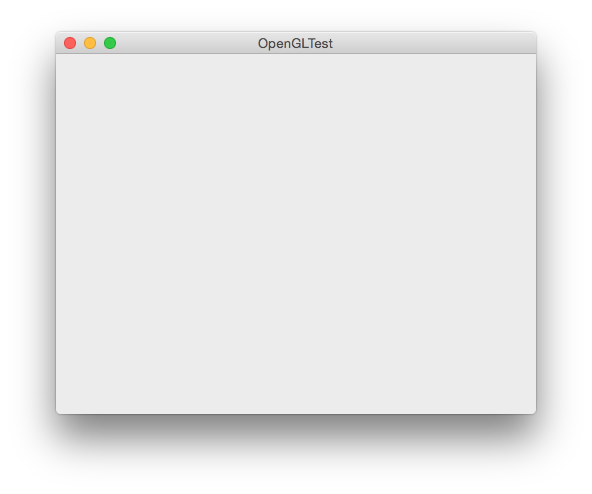
Build and run the project and you should be presented with an empty window.
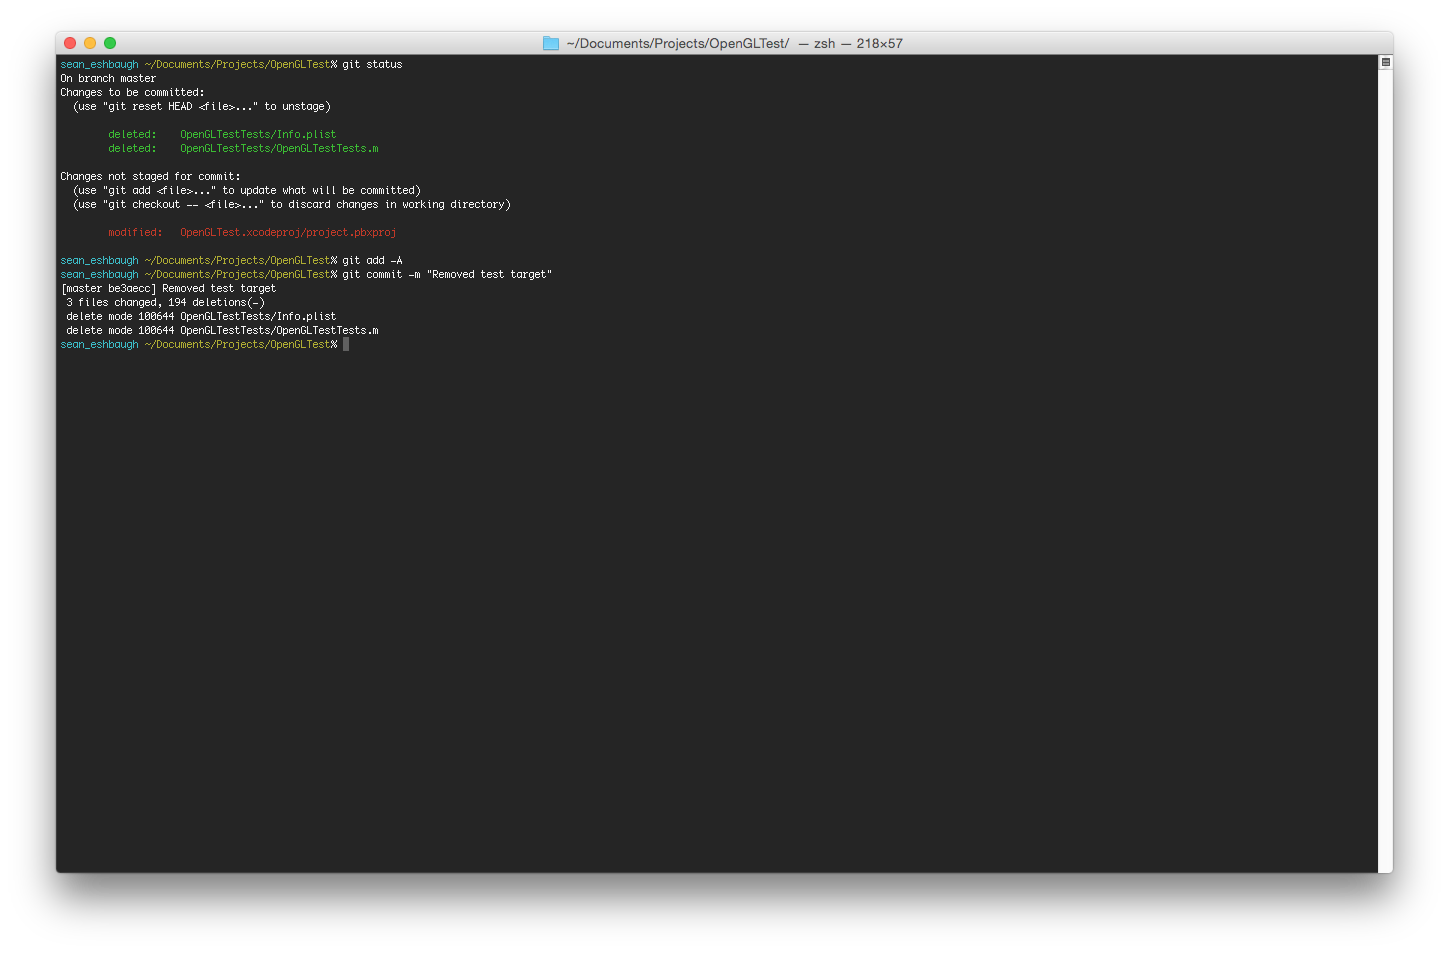
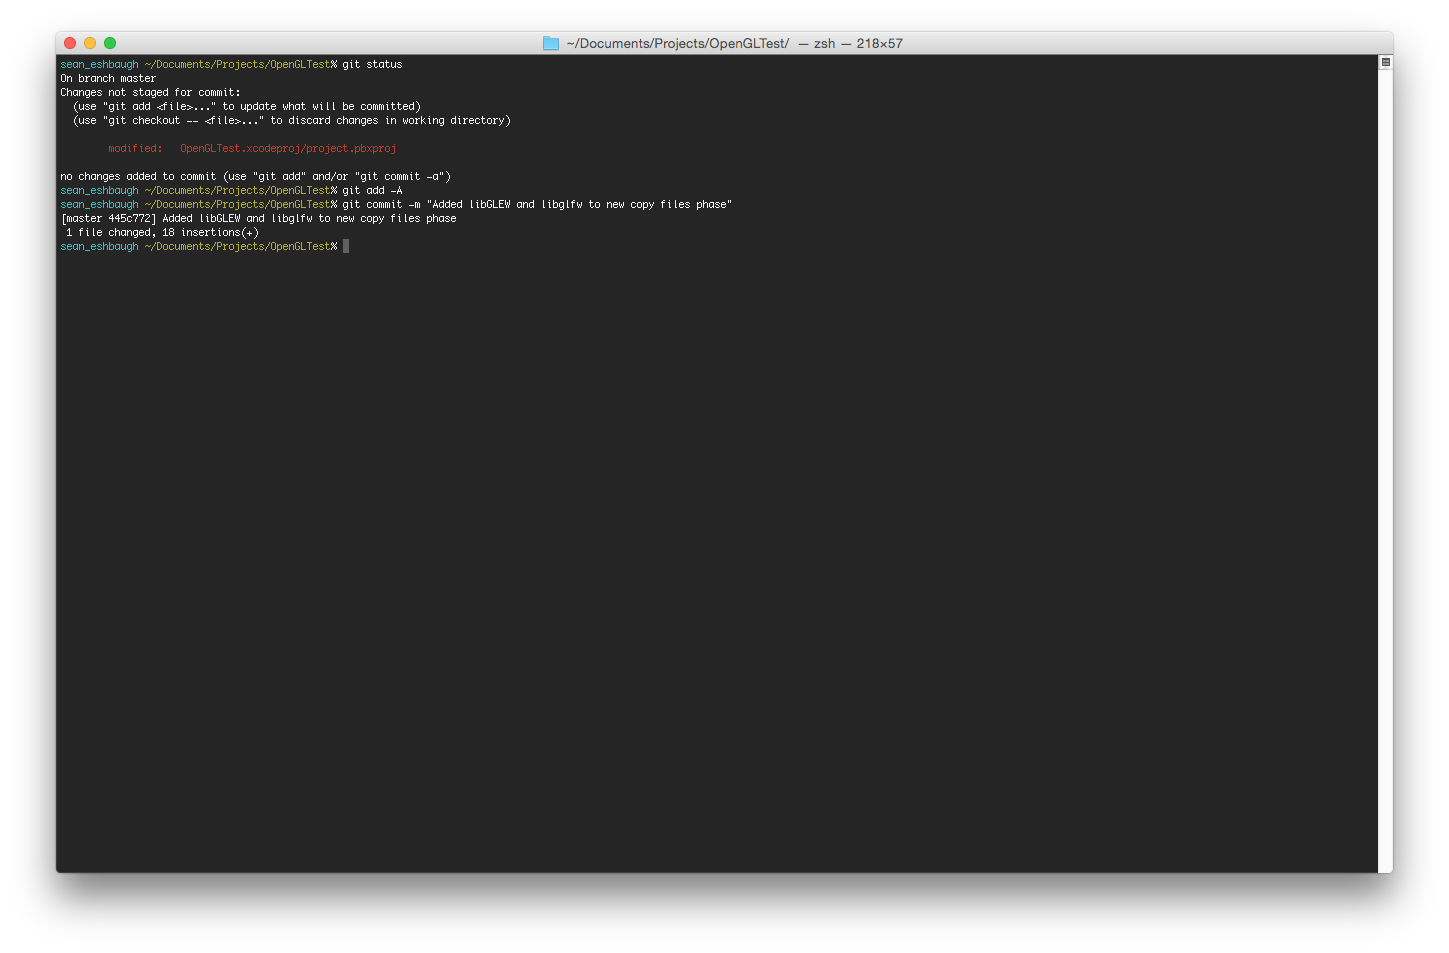
Close the window and open up a terminal and cd into the project directory. Do a git status now to confirm everything is as it should be.
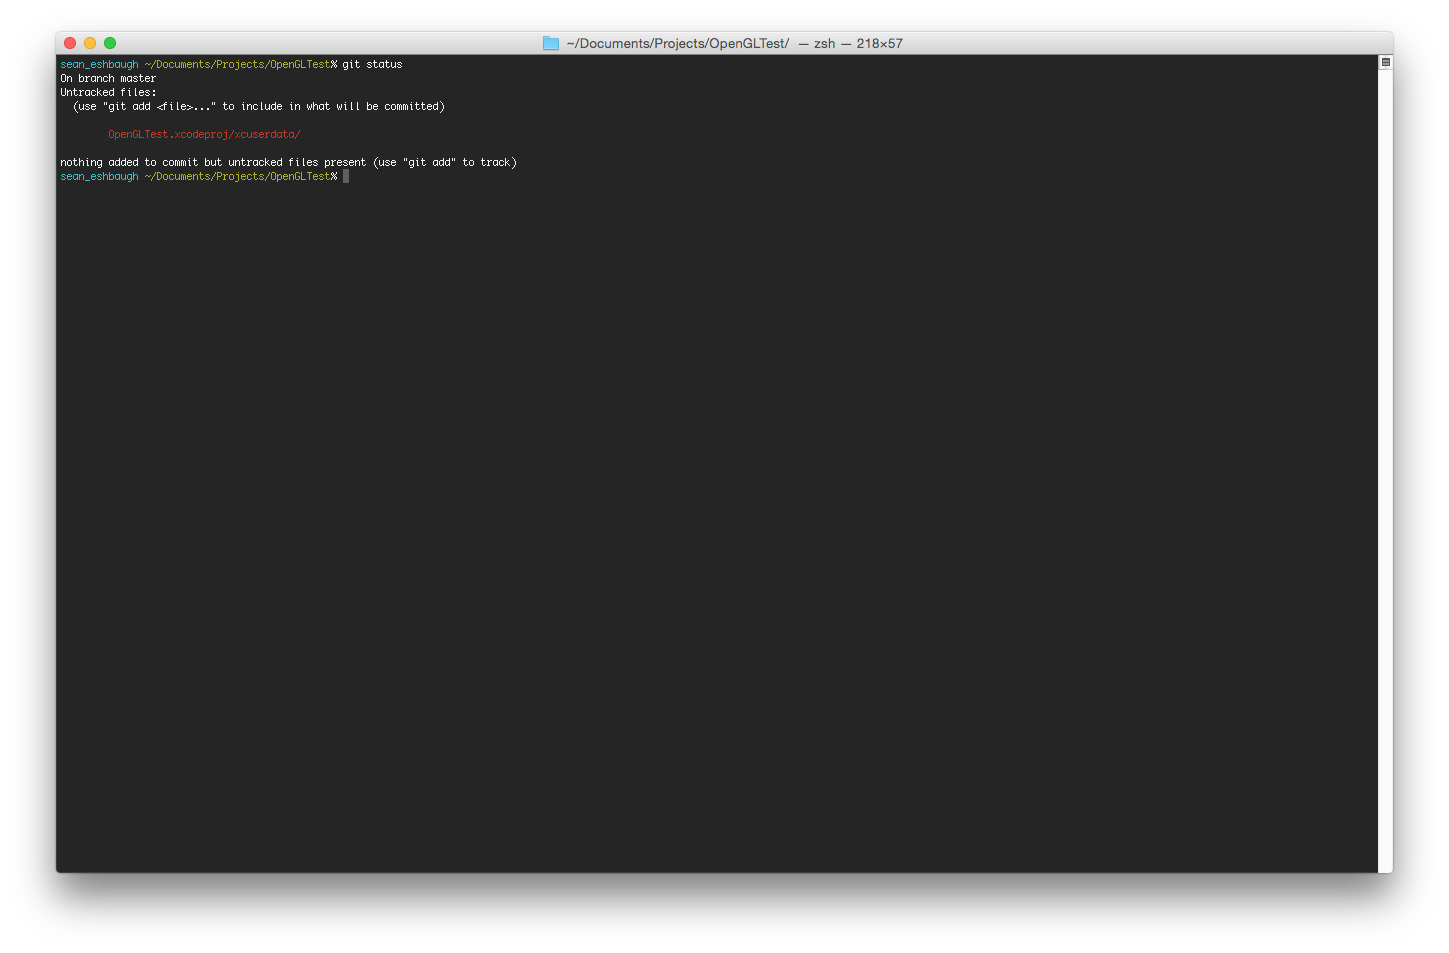
There should be a directory waiting to be added and commited, but you don't really want to include that with the project. Copy this for the contents of a .gitignore file:
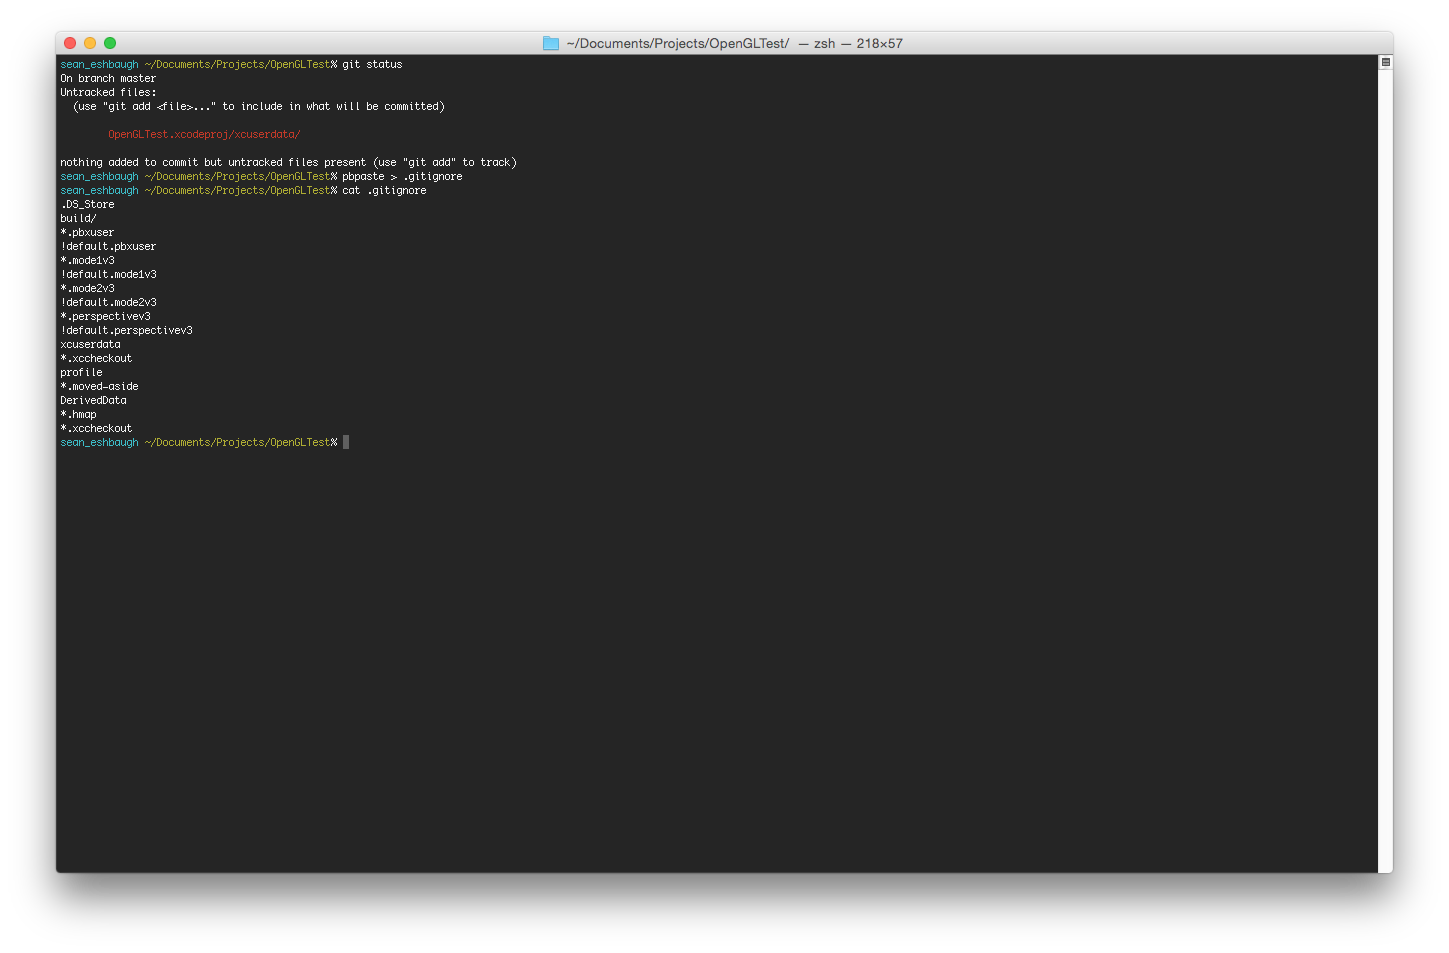
.DS_Store
build/
*.pbxuser
!default.pbxuser
*.mode1v3
!default.mode1v3
*.mode2v3
!default.mode2v3
*.perspectivev3
!default.perspectivev3
xcuserdata
*.xccheckout
profile
.moved-aside
DerivedData
*.hmap
*.xccheckout
and then use pbpaste and redirect it to .gitignore
After creating the .gitignore file now is a good time to commit your changes (check in early, check in often!).

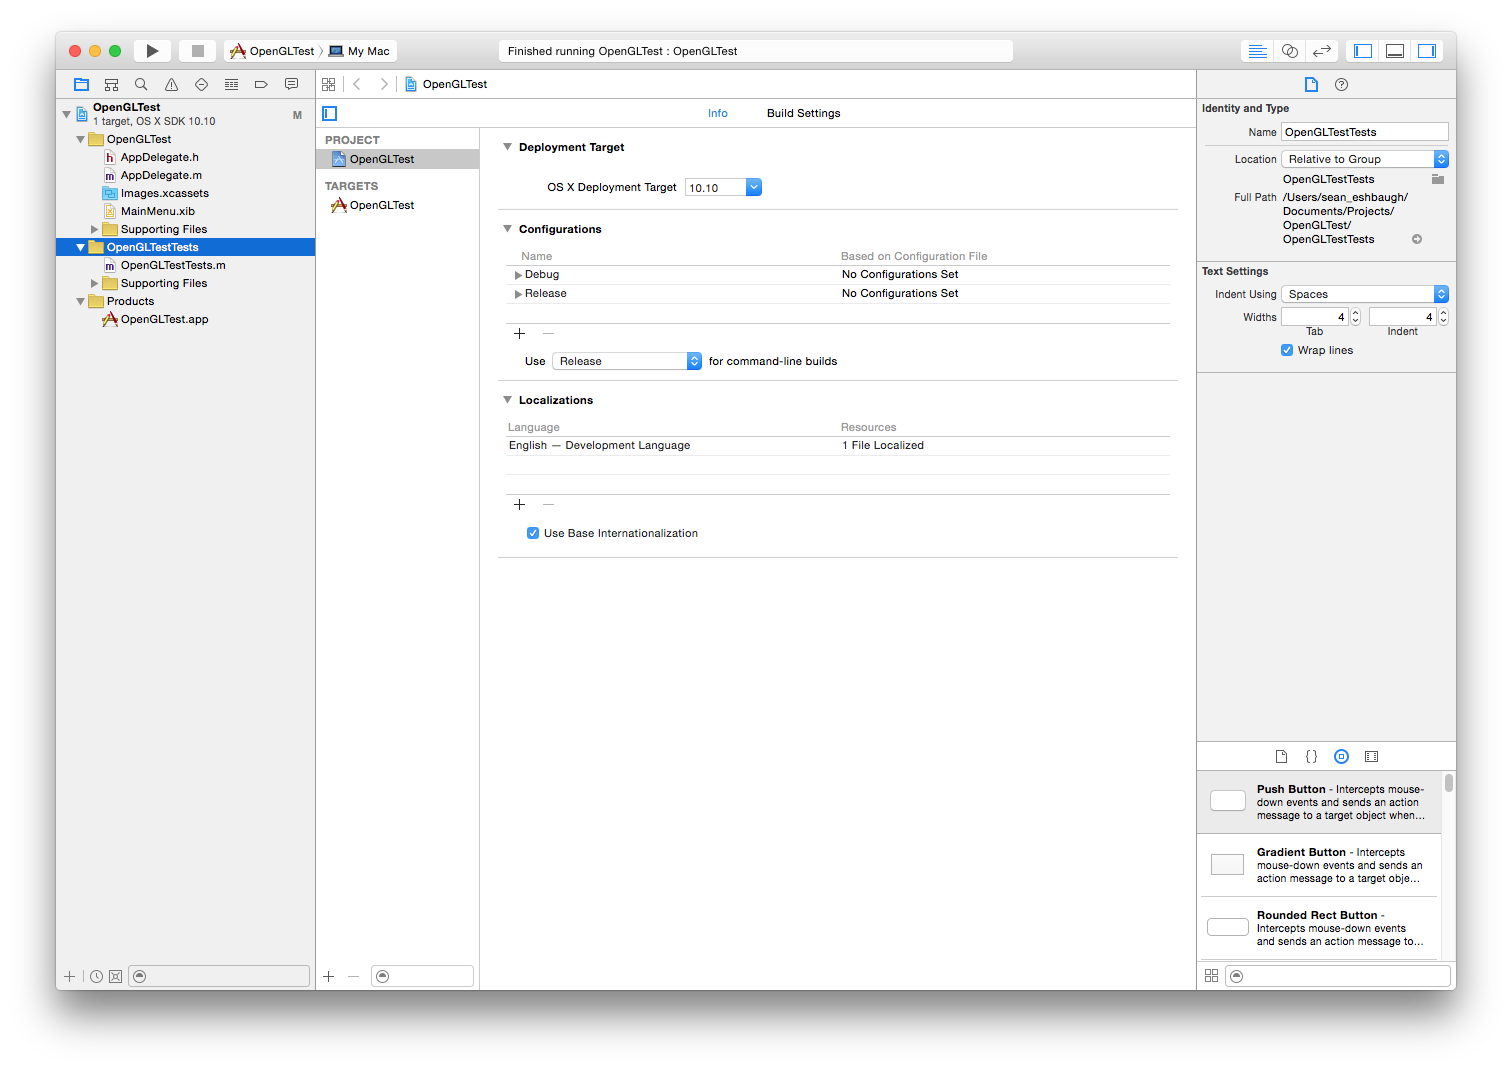
Back in Xcode go ahead and select the test product and delete it (unless you really want to keep it).
Next select the source code group for the tests and delete that too.
Go ahead and commit these changes now.
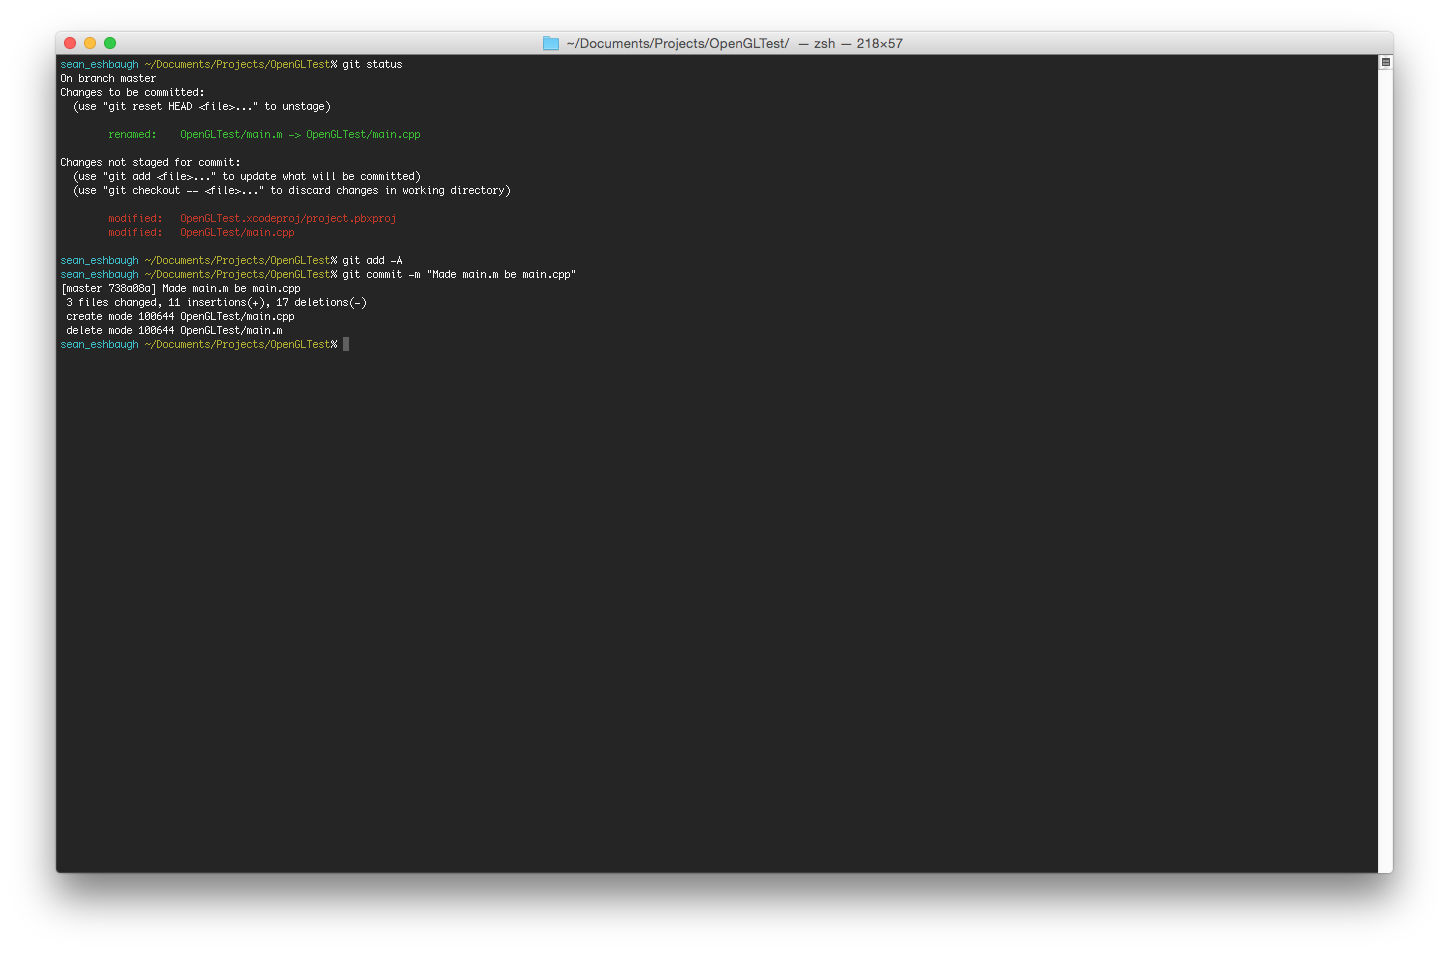
In Xcode find main.m...
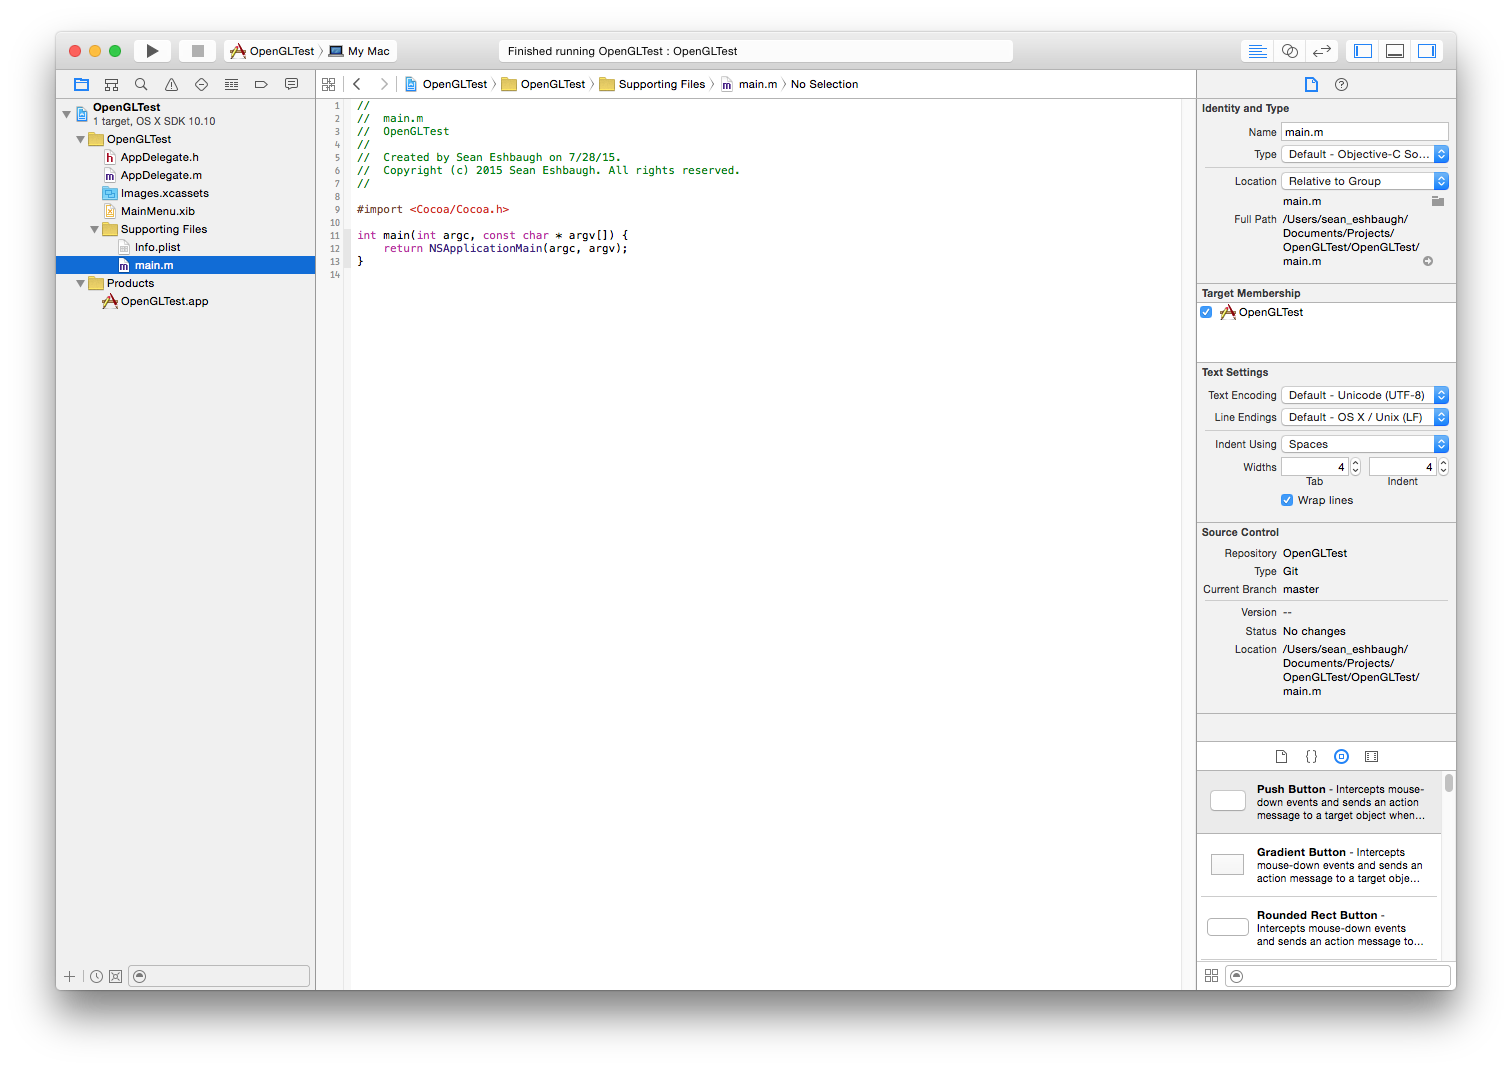
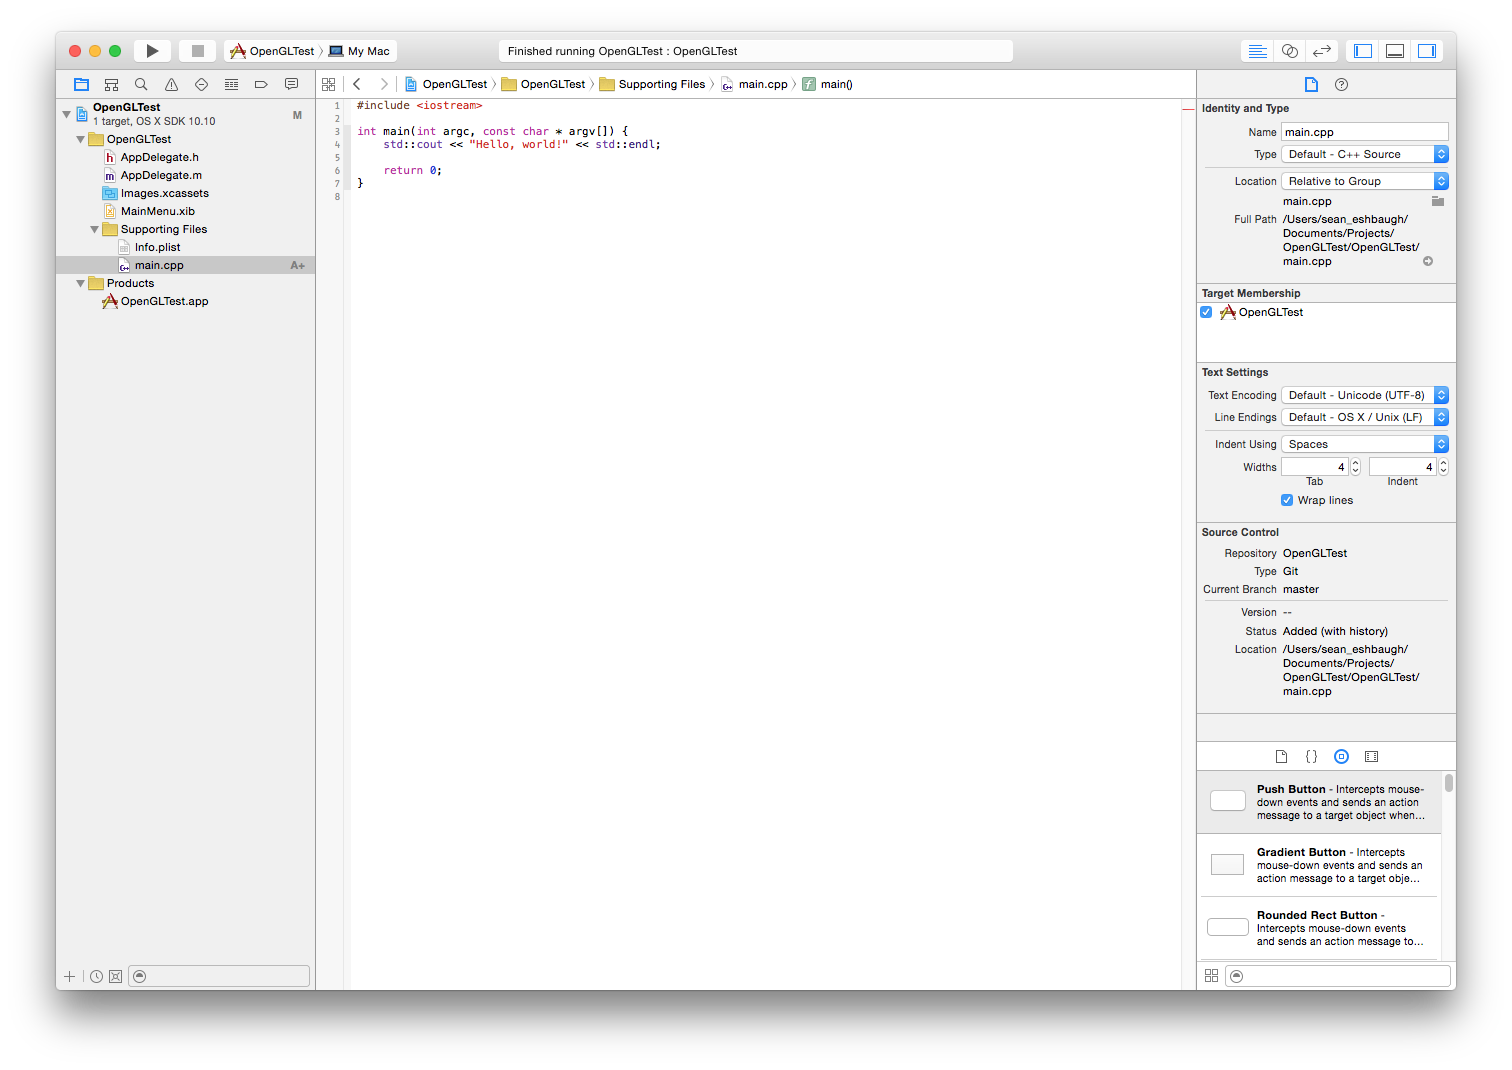
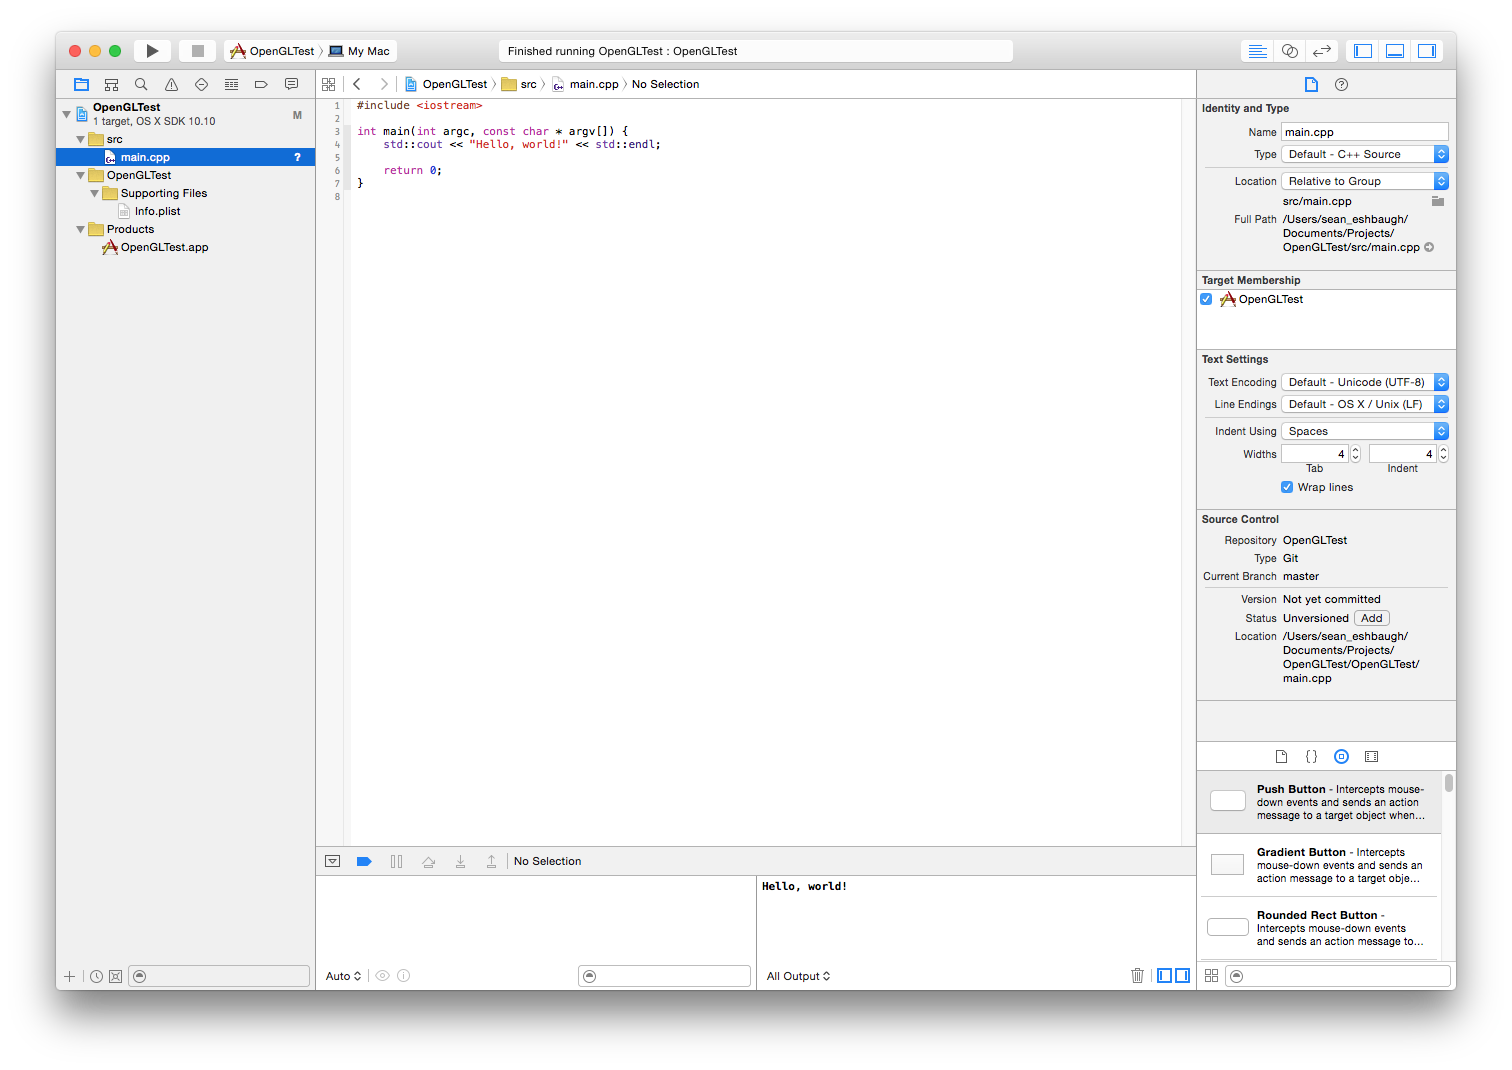
and rename it to main.cpp. This is why you don't care if Xcode only lets you select between Switft and Objective-C. You might also want to add in some sort of simple "Hello, world!" for the time being.
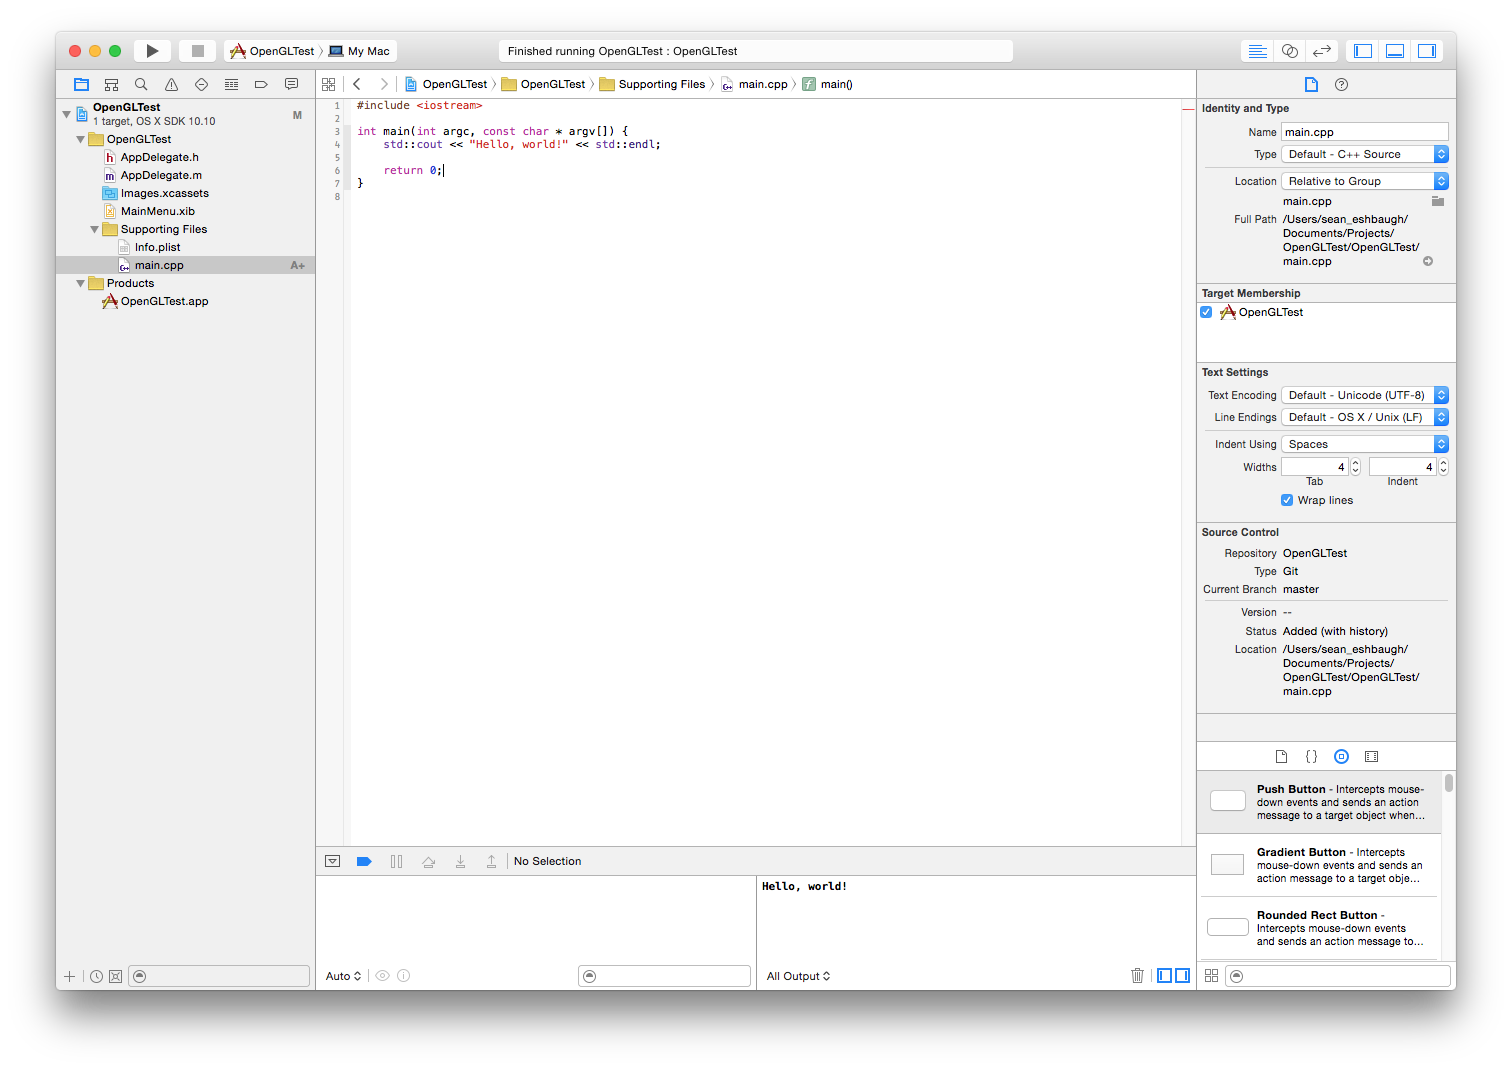
Build and run the project just to make sure everything is working. You should see your output below in the debug area.
Commit those changes.
You may be wondering now, "Why is this guy telling me when to commit? I'm a grown up, I can commit when I want to." And you're not wrong for thinking that. But during this process of figuring all of this out I found there were several points to which I reverted at least once. I suspect that if you're as clueless as I was/am you'll want to do the same. I hope that by explicitly calling out when those points are I'll save you some trouble later on.
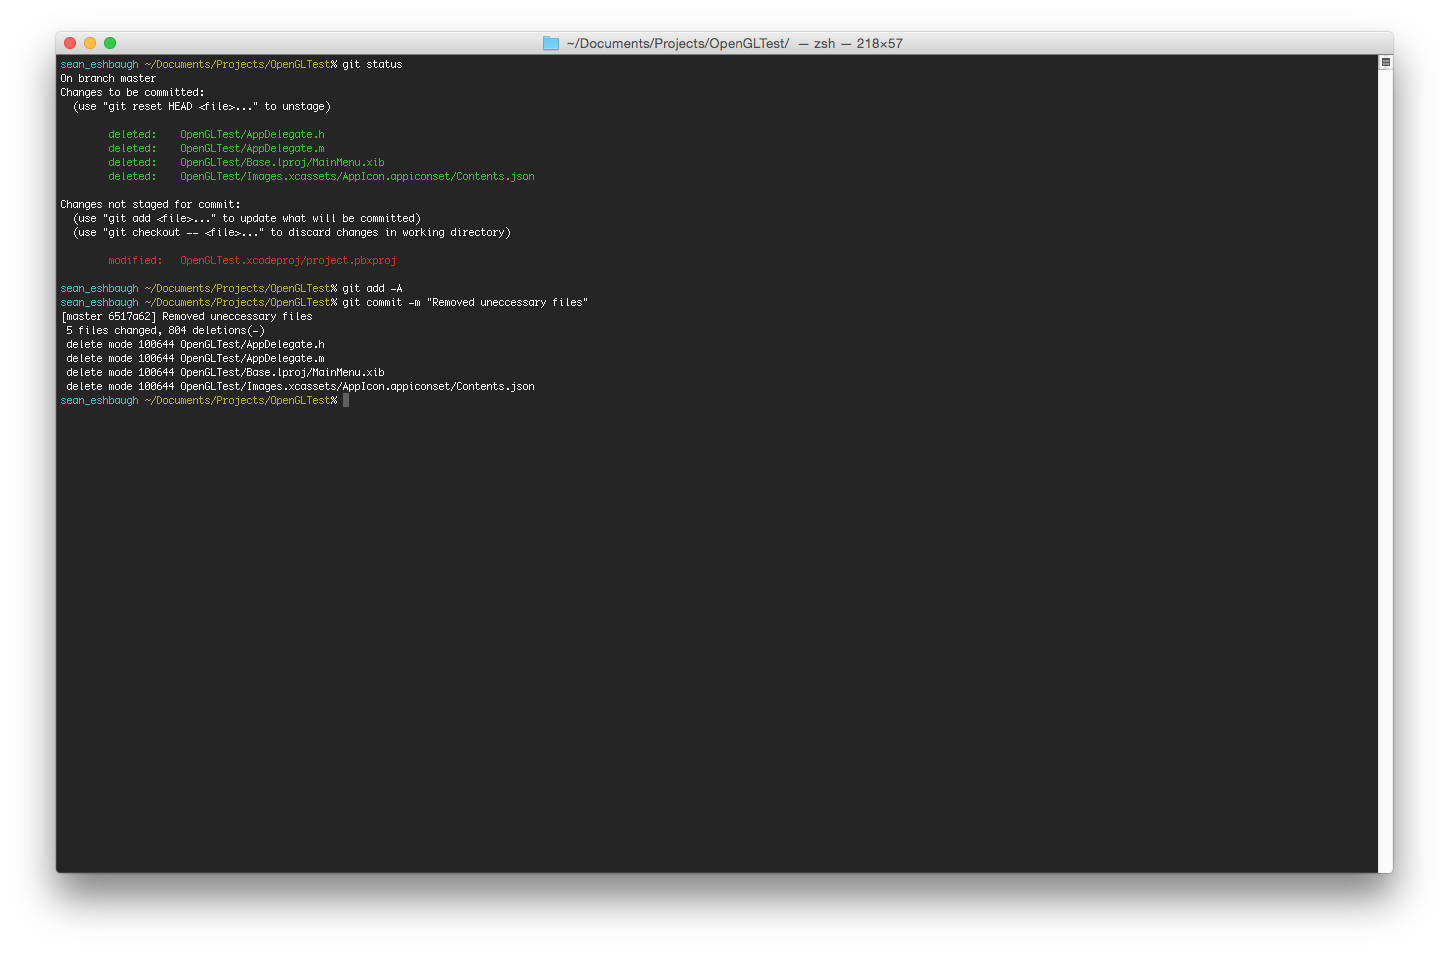
Now that you're not working with a normal Cocoa application anymore there's a few files you don't need. Specifically: AppDelegate.h, AppDelegate.m, Images.xcassets, and MainMenu.xib. Highlight them...
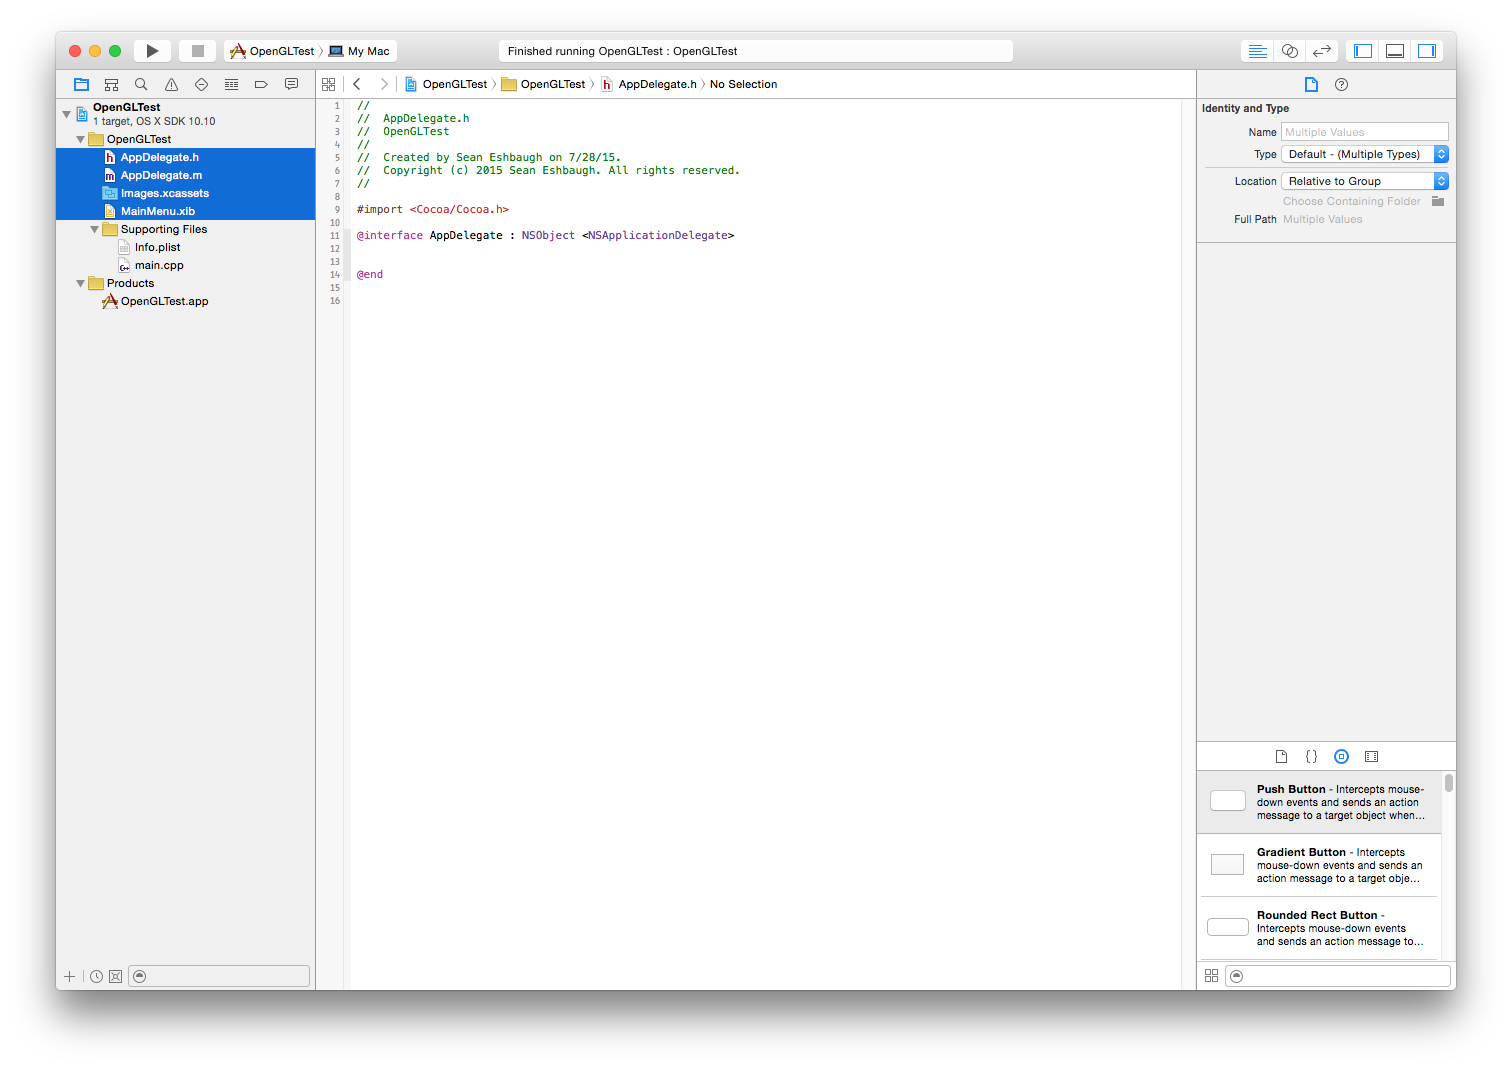
and delete them.

Commit the changes, and if you feel like it, build and run the project again just to make sure all is well.
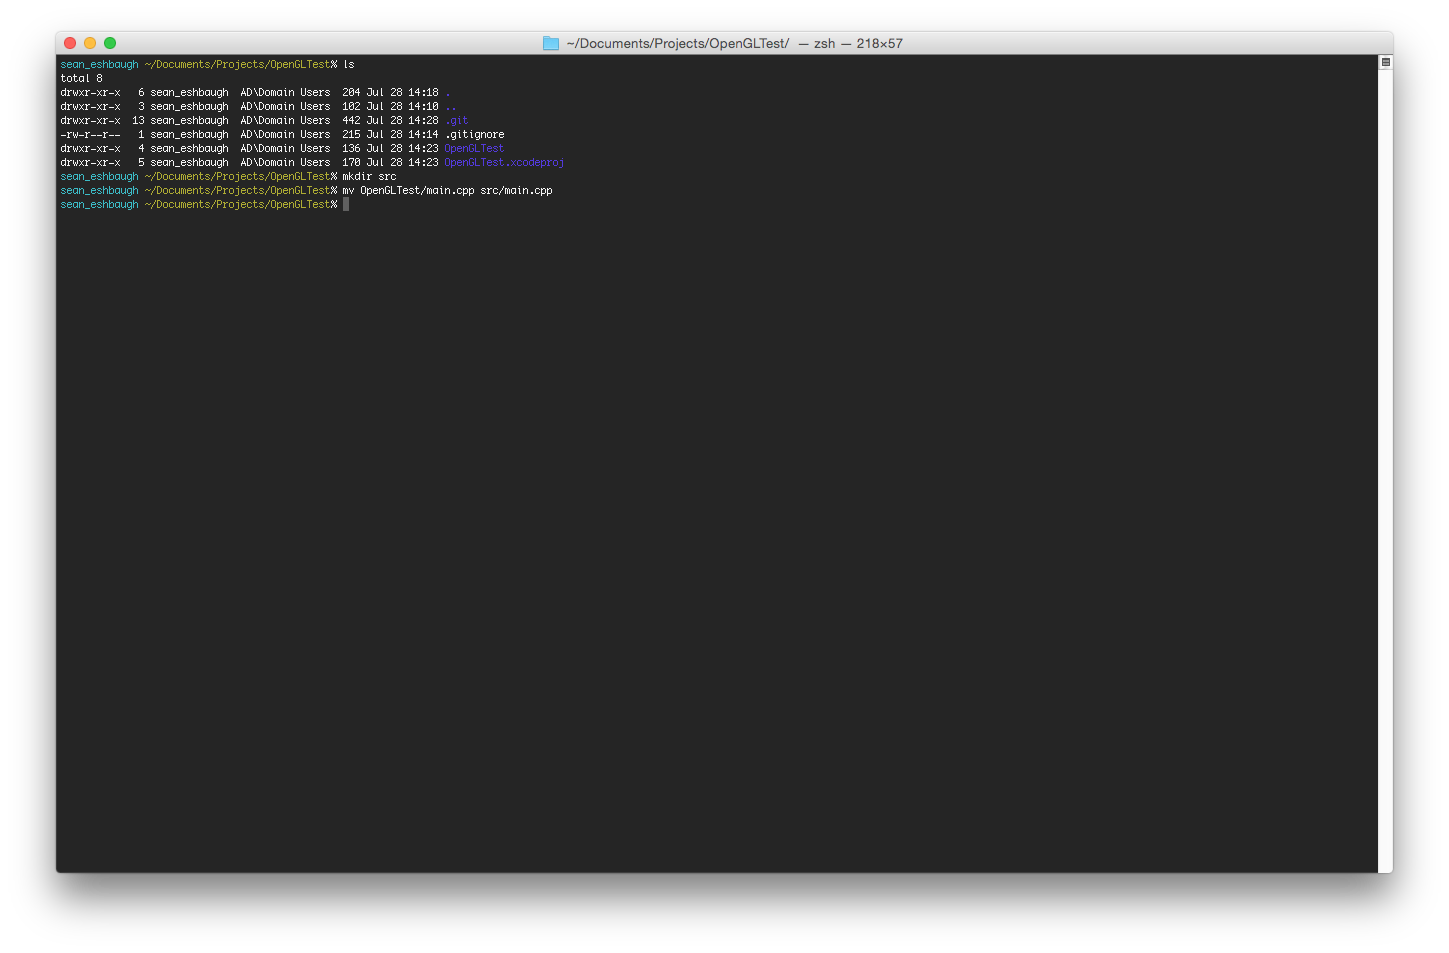
These next couple of steps aren't necessary in the slightest. In fact, for a small demo project they're pointless. But I'm going to assume that maybe someday this project will become larger, more complicated, and have many many source files. To make that eventuality less of a nightmare create a directory named src (or whatever you want really) and then move your main.cpp file into it.
Xcode will now be confused. Don't worry. You can fix it. Create a group under your project named "src" (or whatever you named the directory from before).

Move main.cpp into that group.

Highlight main.cpp and make sure that in the File Inspector it says "Relative to Group" under Location. Then click the little folder icon to browse for the file.
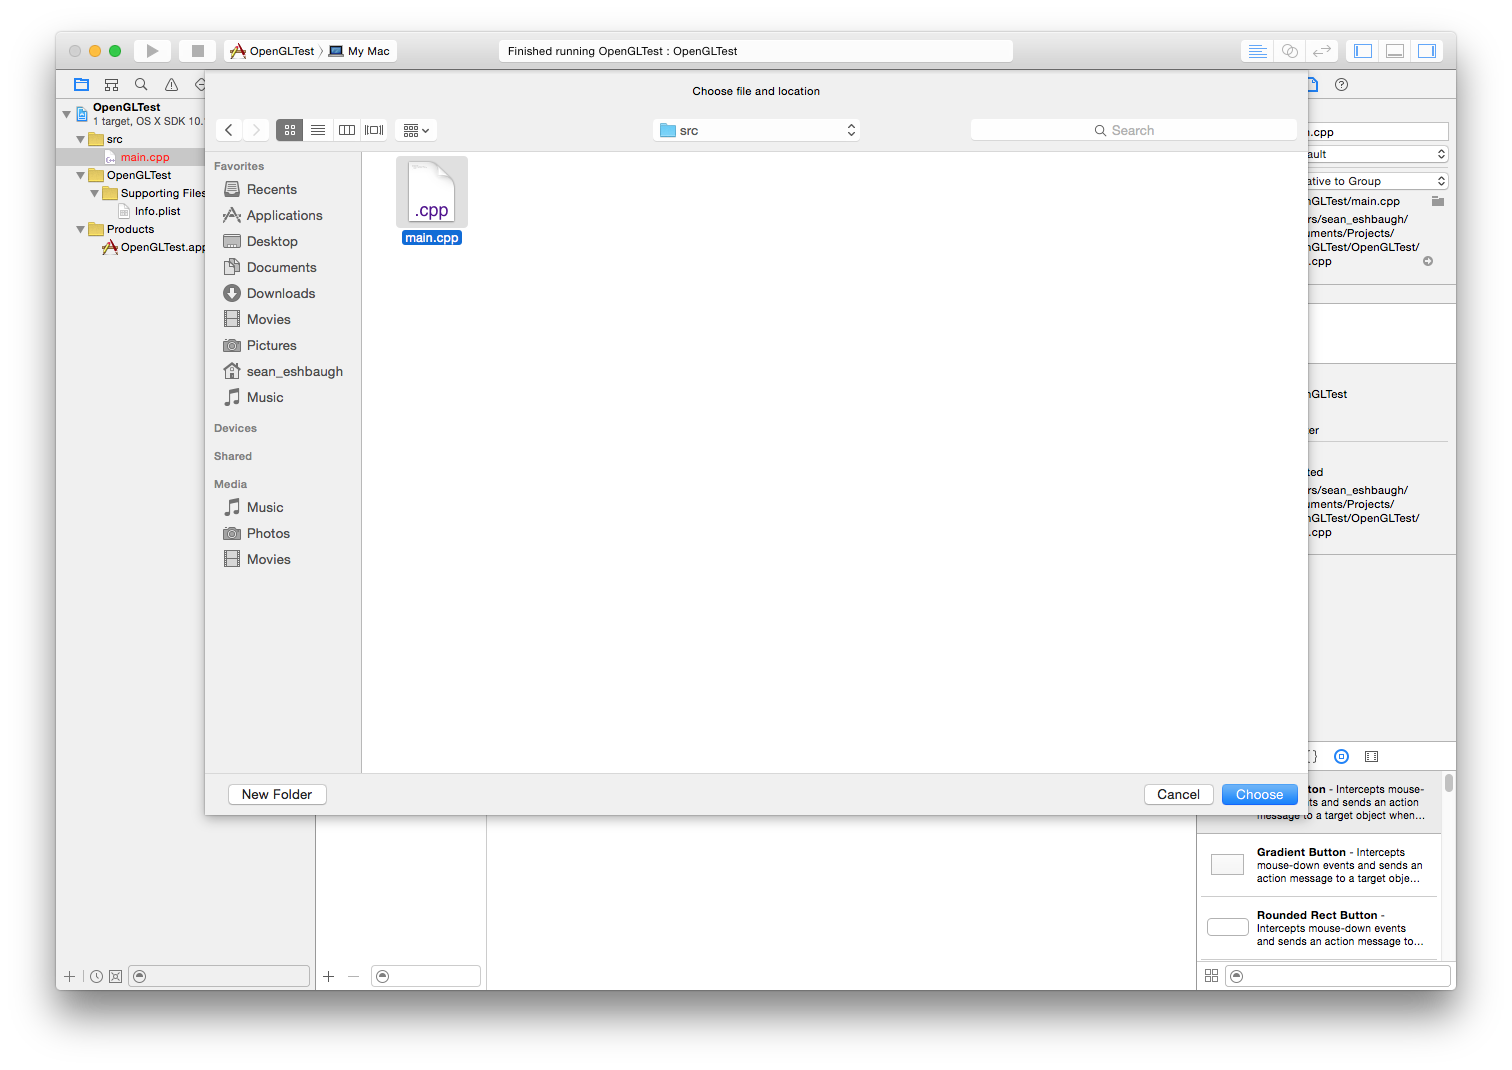
Select it and click "Choose". The file should no longer appear red and Xcode should now be unconfused.
Once again it's a great time to build and run the project to make sure nothing is broken and commit your changes.

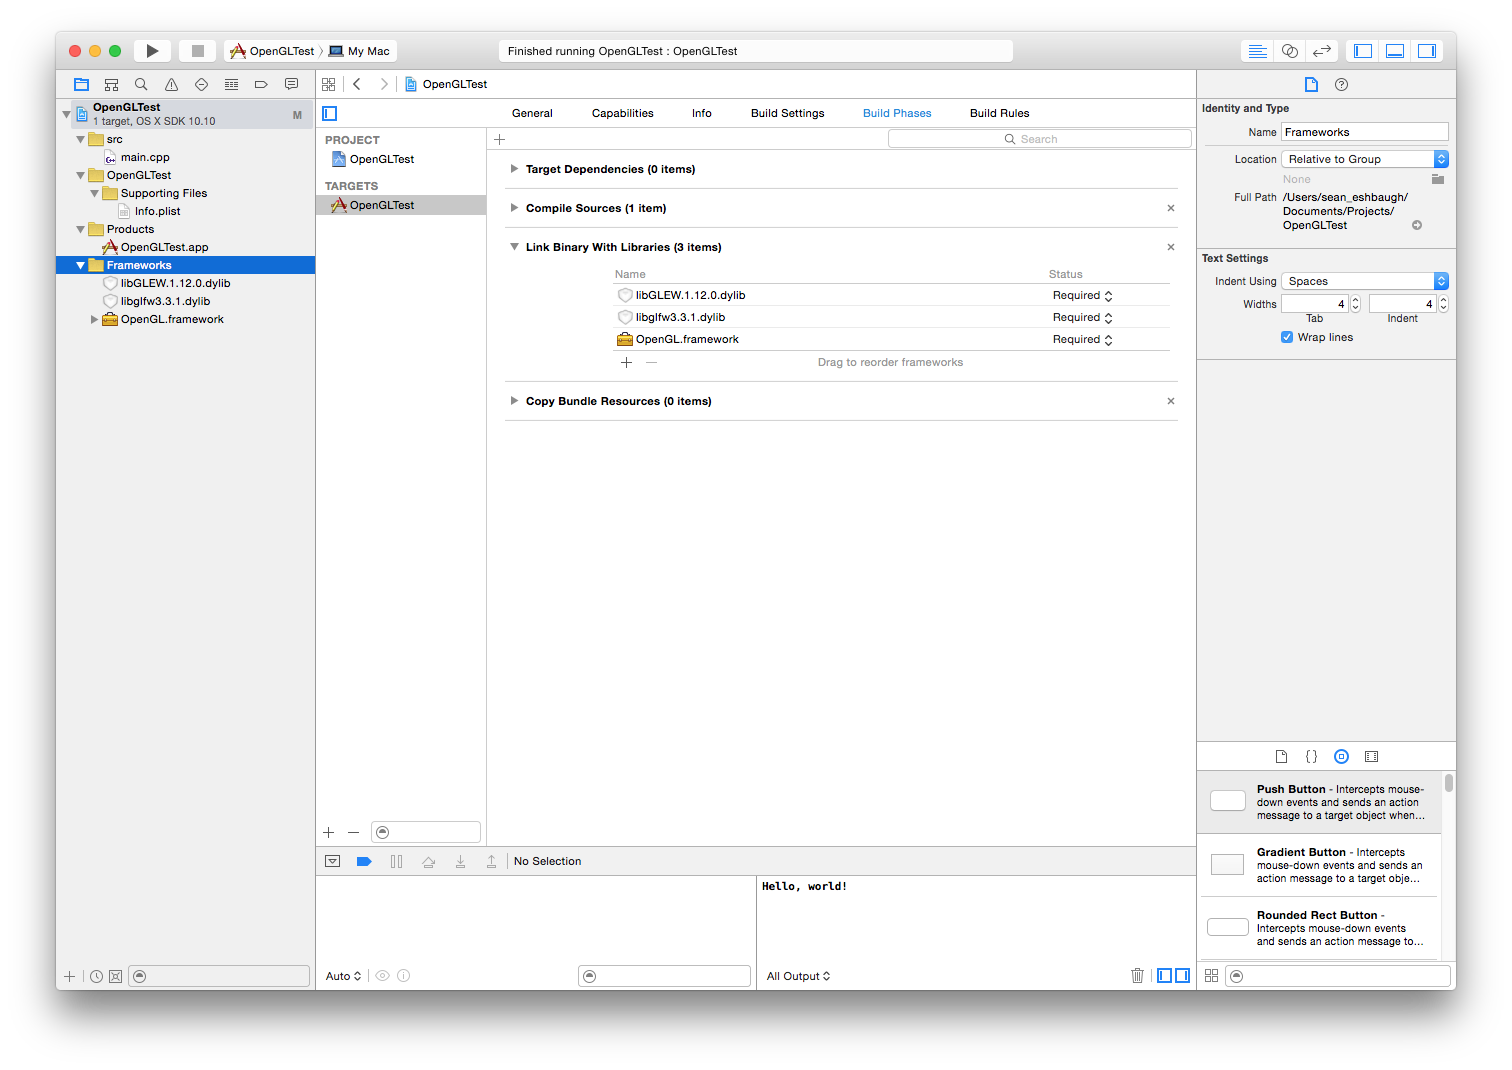
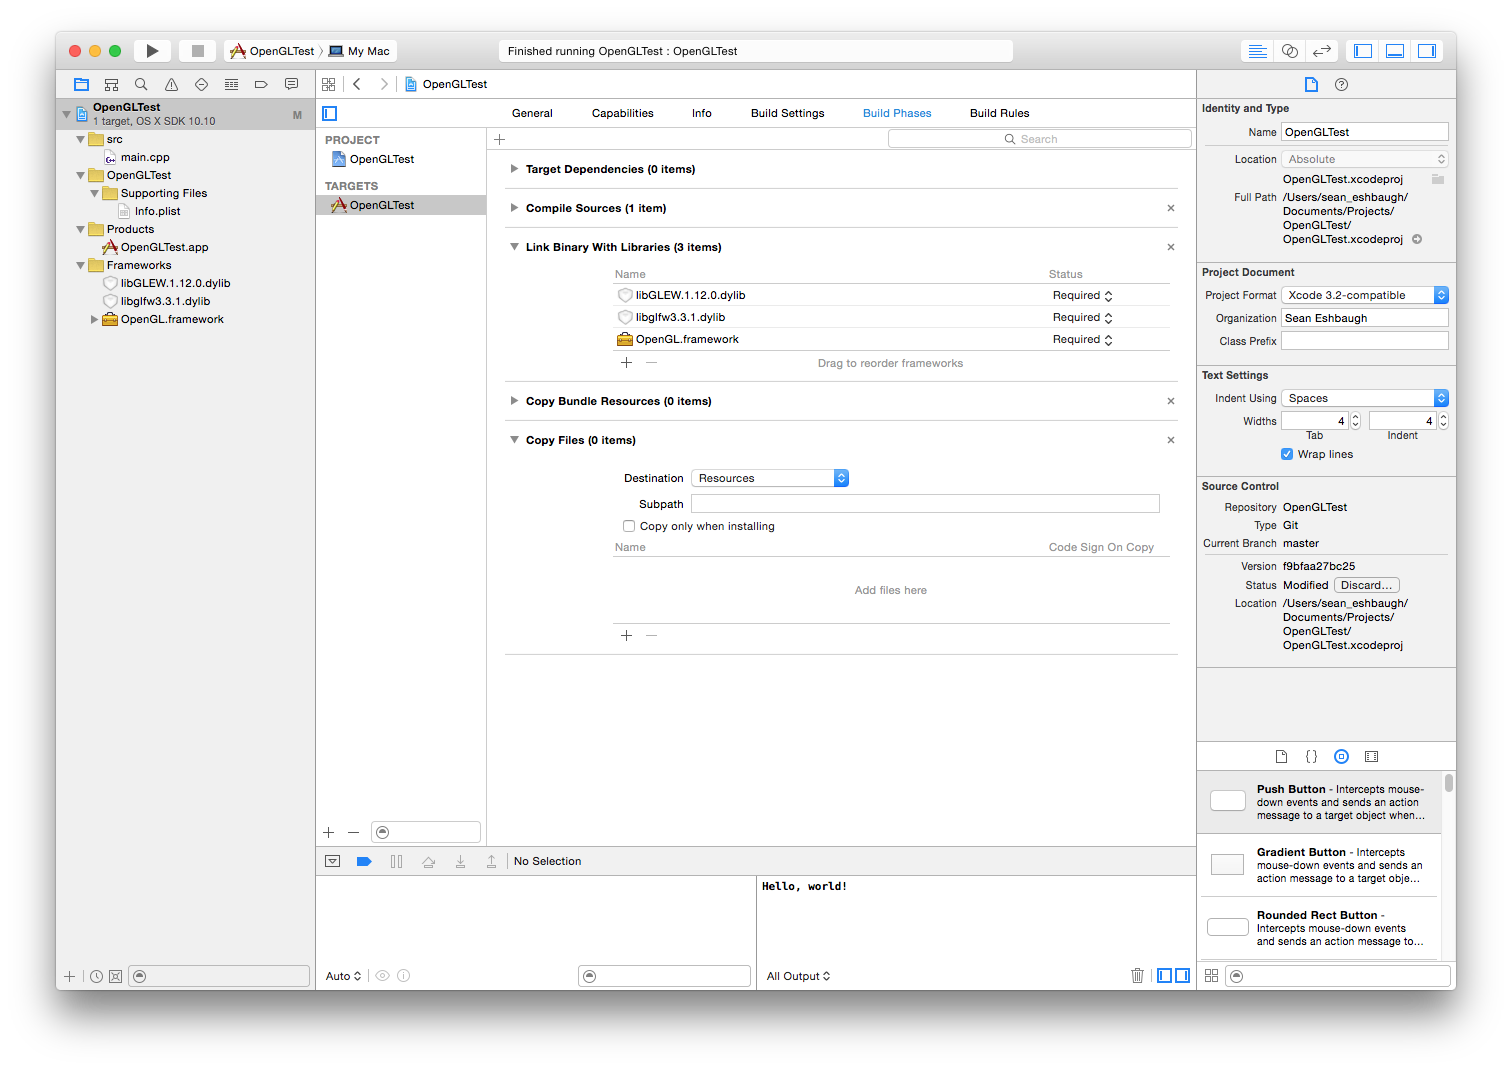
Finally it's time to start doing something actually related to OpenGL. Sort of. In Xcode select your project in the project navigator and then select the target and click the "Build Phases" tab.

Expand the "Link Binary With Libraries" section and then click the + button to begin selecting a framework to link against. Start typing "OpenGL.framework" to filter out the OpenGL framework.
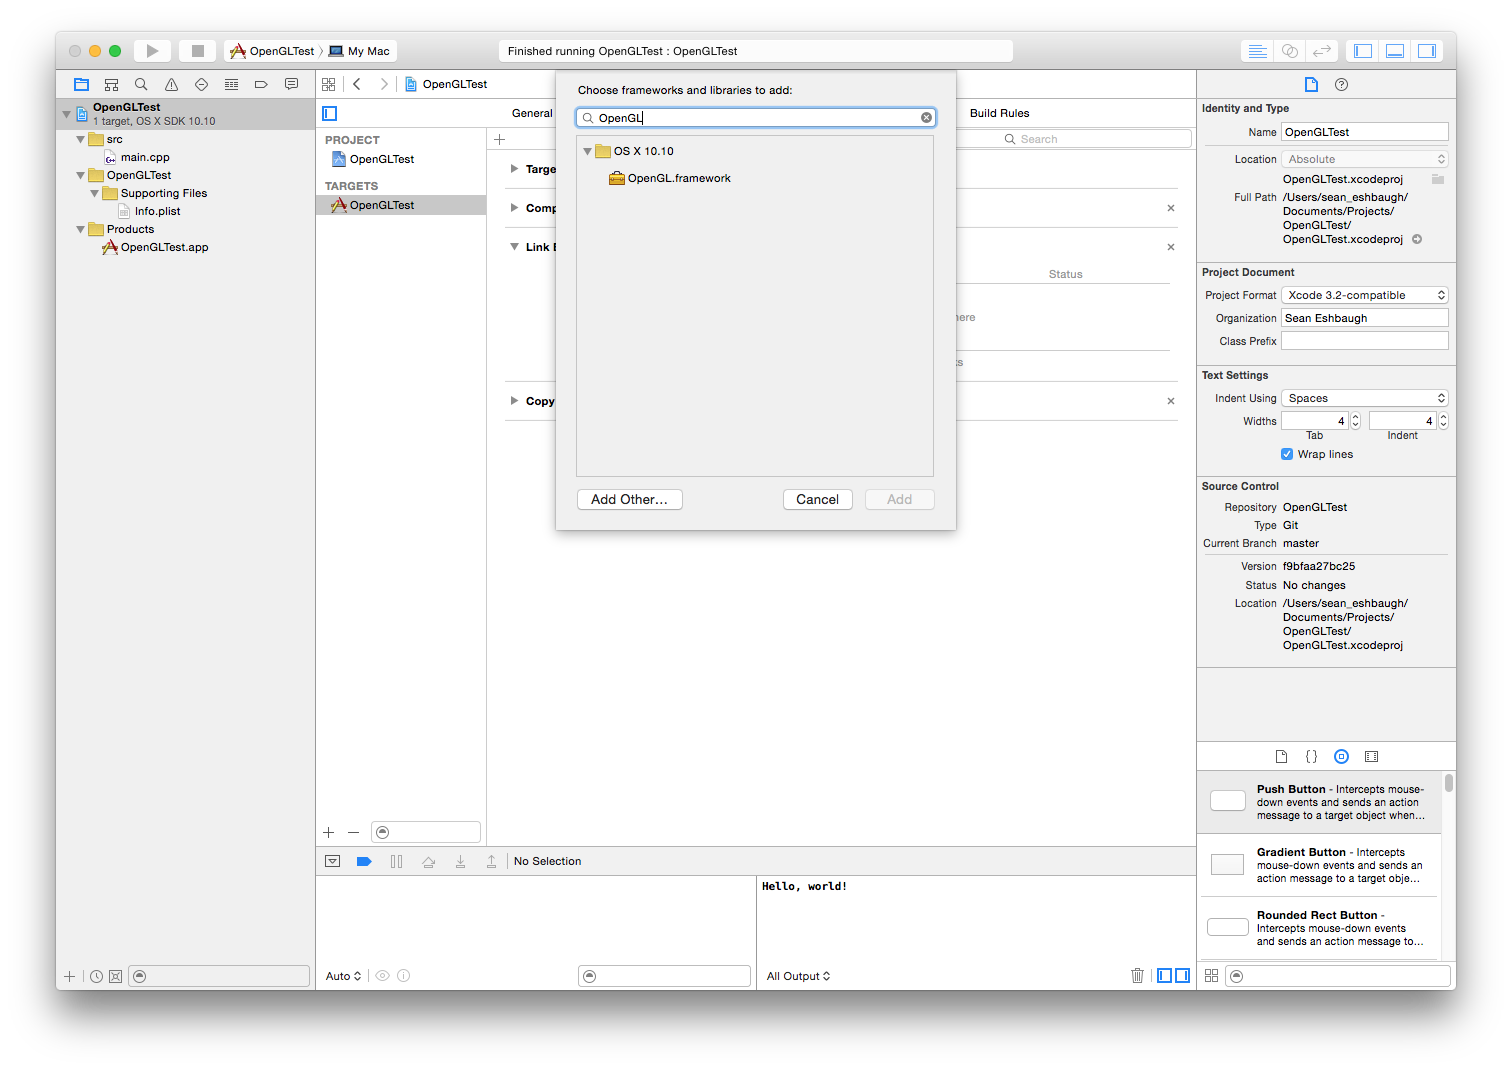
Select OpenGL.framework and click "Add"

Click the + button again to repeat the process. This time click "Add other..."

Navigate to the directory where Homebrew installed the GLFW dylib files. In my case it was /usr/local/Cellar/glfw3/3.1.1/lib. Yours might be different if you ended up with a more recent version of GLFW. Pro-tip: you can hit ⇧+⌘+g in the file browse modal to just type the directory you want to go to.

Select libglfw3.3.1.dylib and click "Open". It should go without saying that if your version of GLFW is different the name of the dylib will be different. From now on, for both GLEW and GLFW I'm going to assume you have the same version I do and that if you don't you know to find the appropriate files based on the version you have.
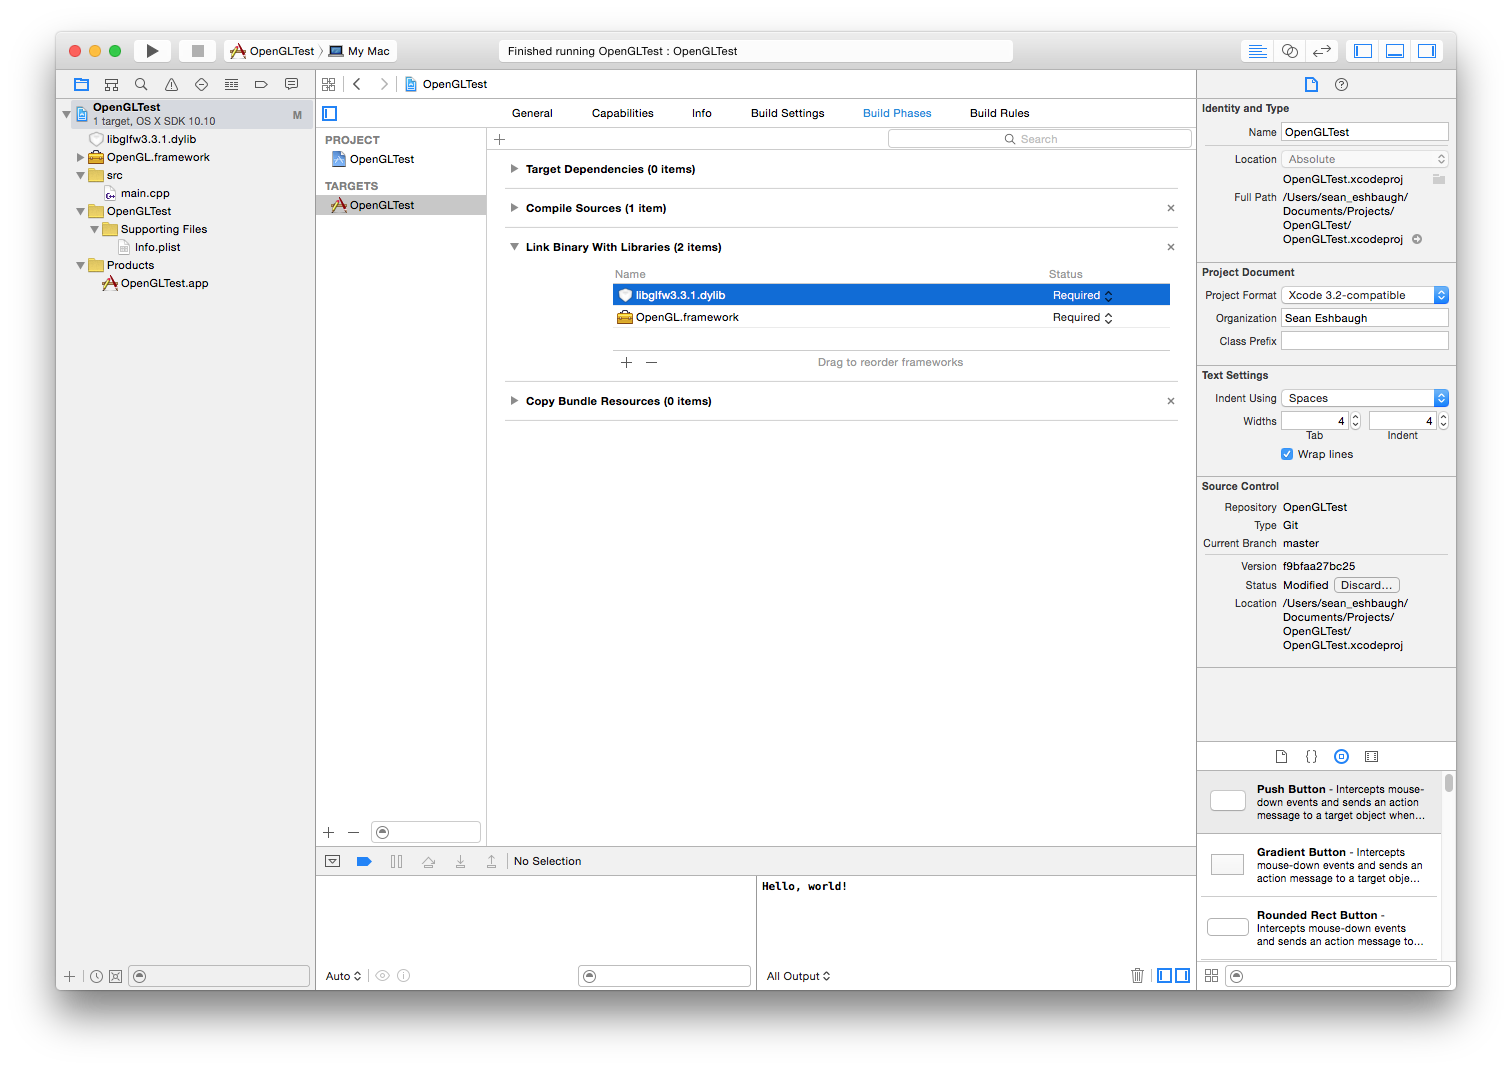
Click the + button one last time and click "Add other..." again. This time navigate to the directory where Homebrew installed the GLEW dylib files. Mine are in /usr/local/Cellar/glew/1.12.0/lib.
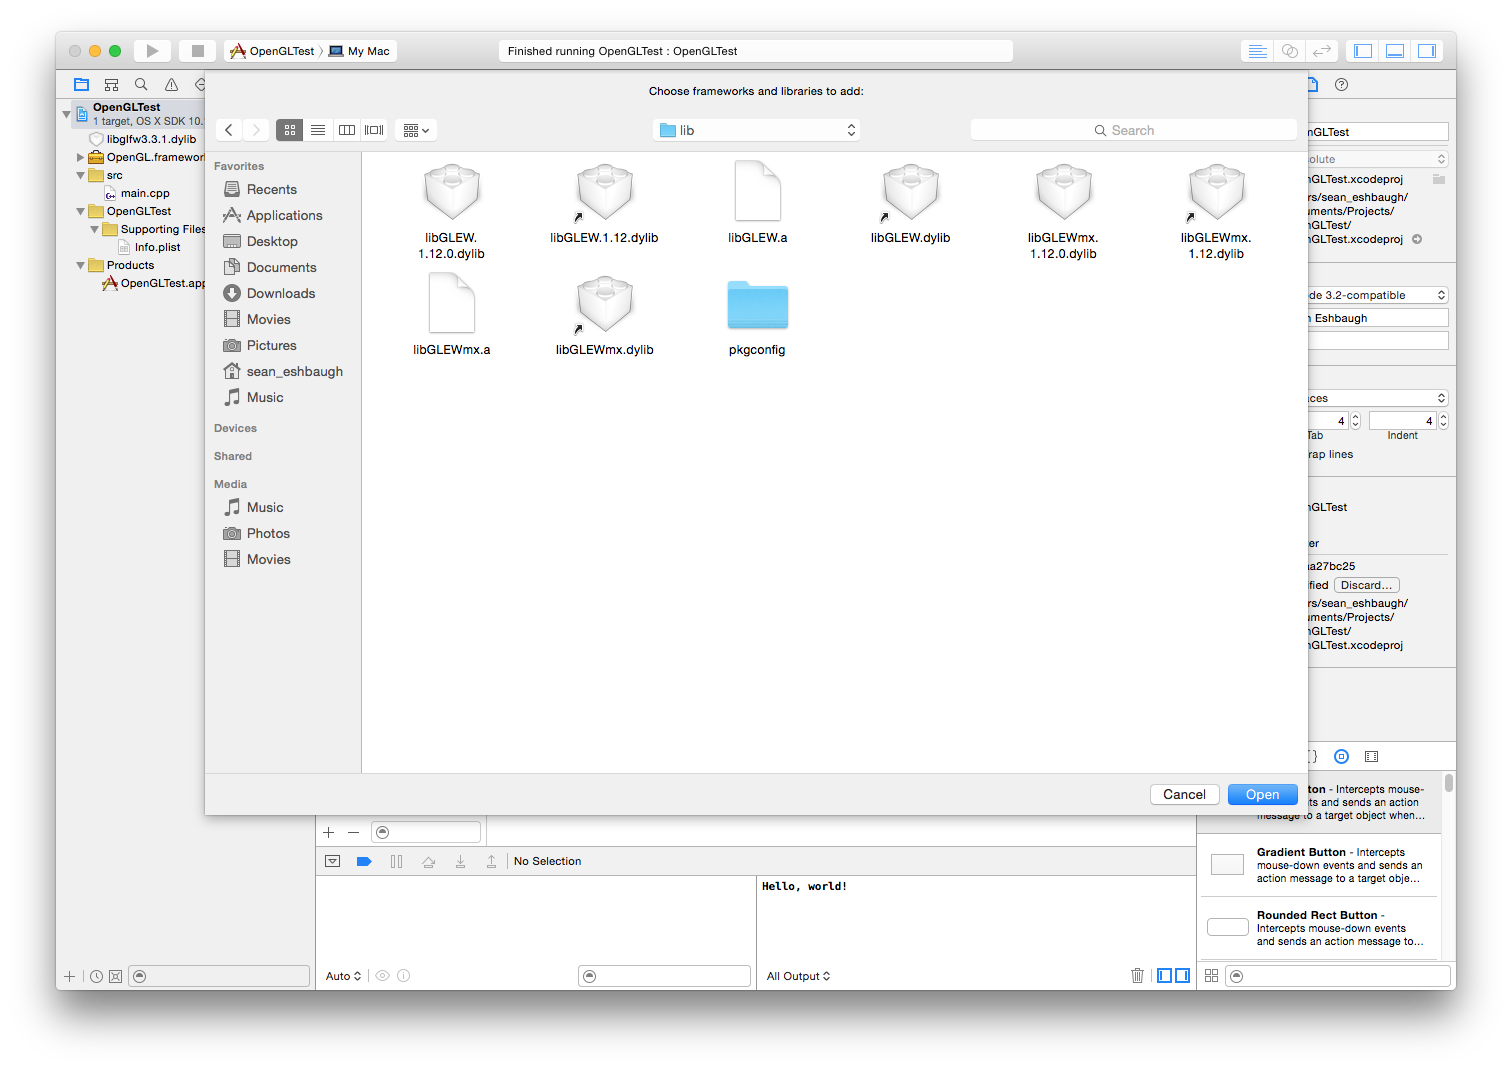
Select libGLEW.1.12.0.dylib and click "Open".

Create another group in your project named "Frameworks" and drag the three libraries you just added into it.
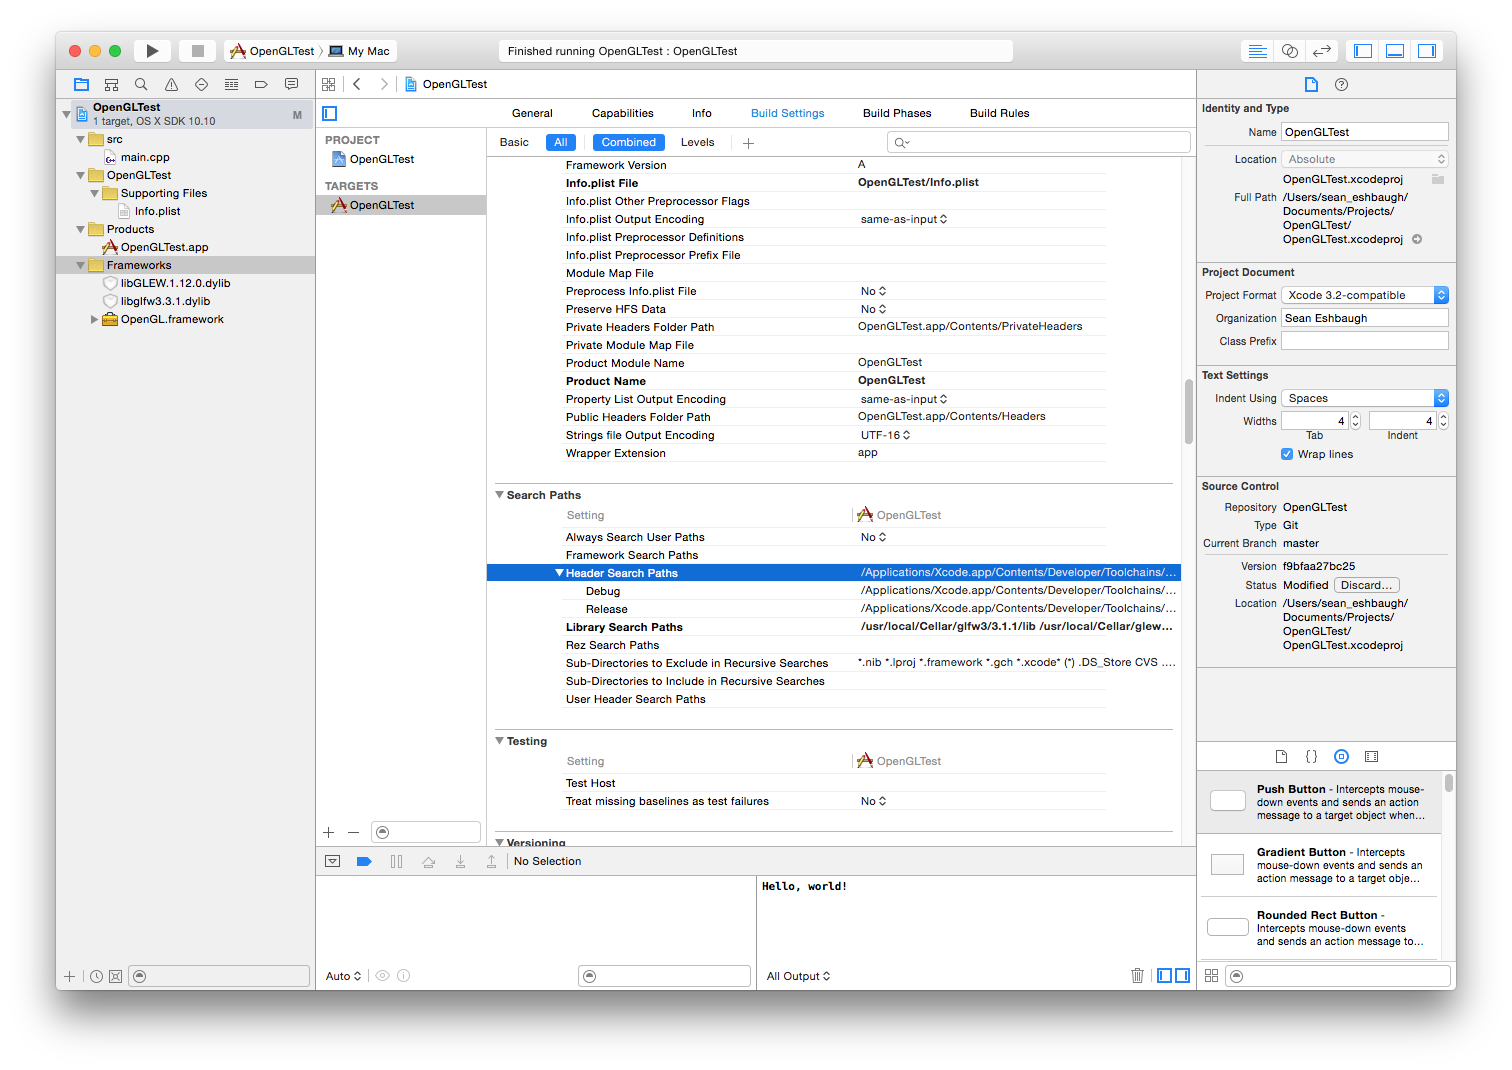
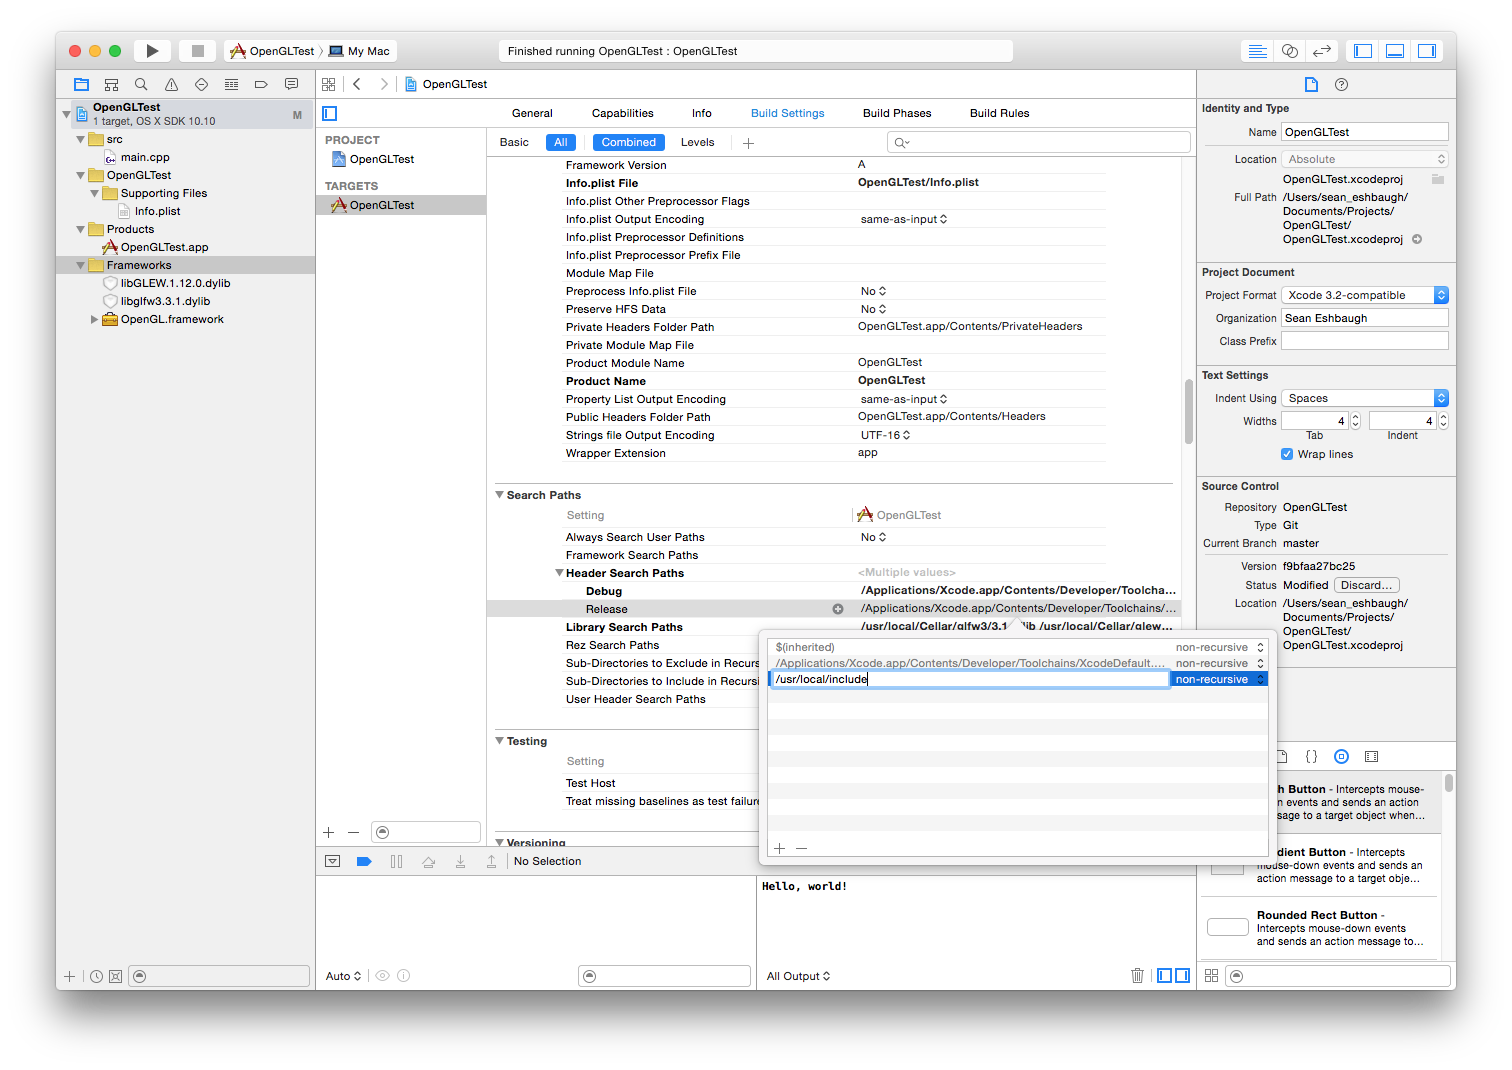
Select the "Build Settings" tab and then scroll down to the "Search Path" section. Expand the "Header Search Path" setting.
Double click the path next to "Debug" to reveal a pop up dialog that lets you add header search paths.

Click the + button to add a new path and enter /usr/local/include. By default the compiler will look inside /usr/include for header files since that's where system managed headers go. /usr/local/include is where user managed headers go. See this answer to a totally unrelated question for a bit of context. If you installed GLEW and GLFW from source yourself and set the prefix path to something else you would enter that path instead. Click outside the pop up to close it.

Double click the path next to "Release" to reveal the same pop up dialog.
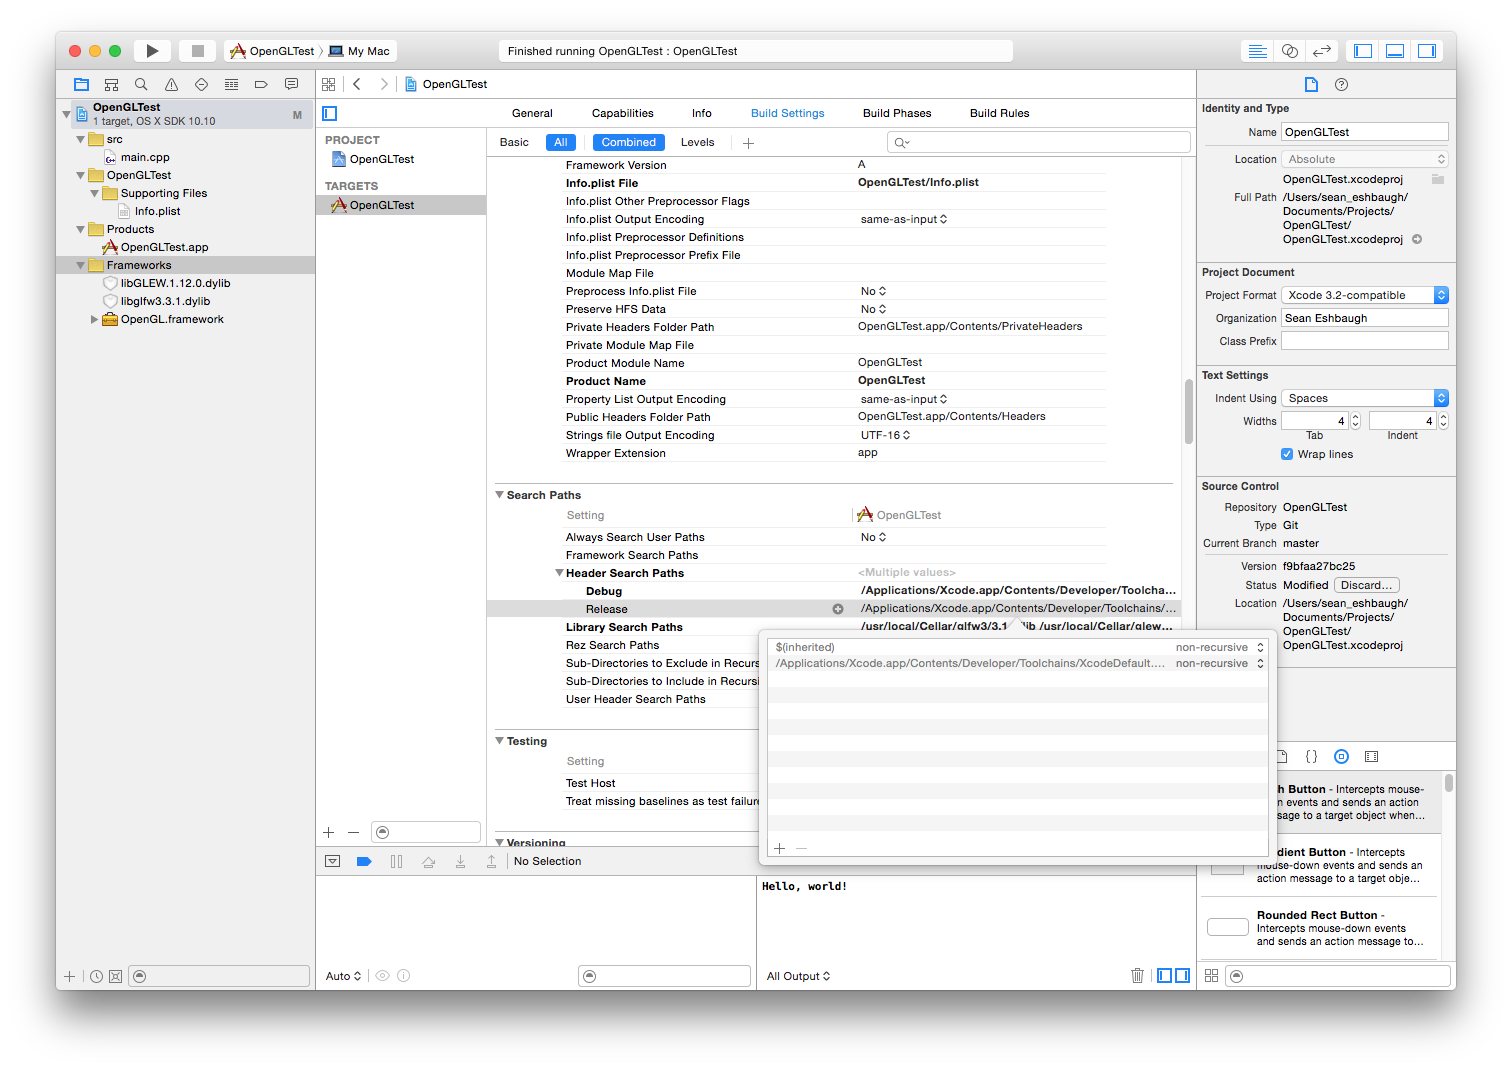
Click the + button again and enter the same path as before and close the pop up. I would strongly recommend attempting to build and run the project again.
And now is also a really good time to commit your changes.

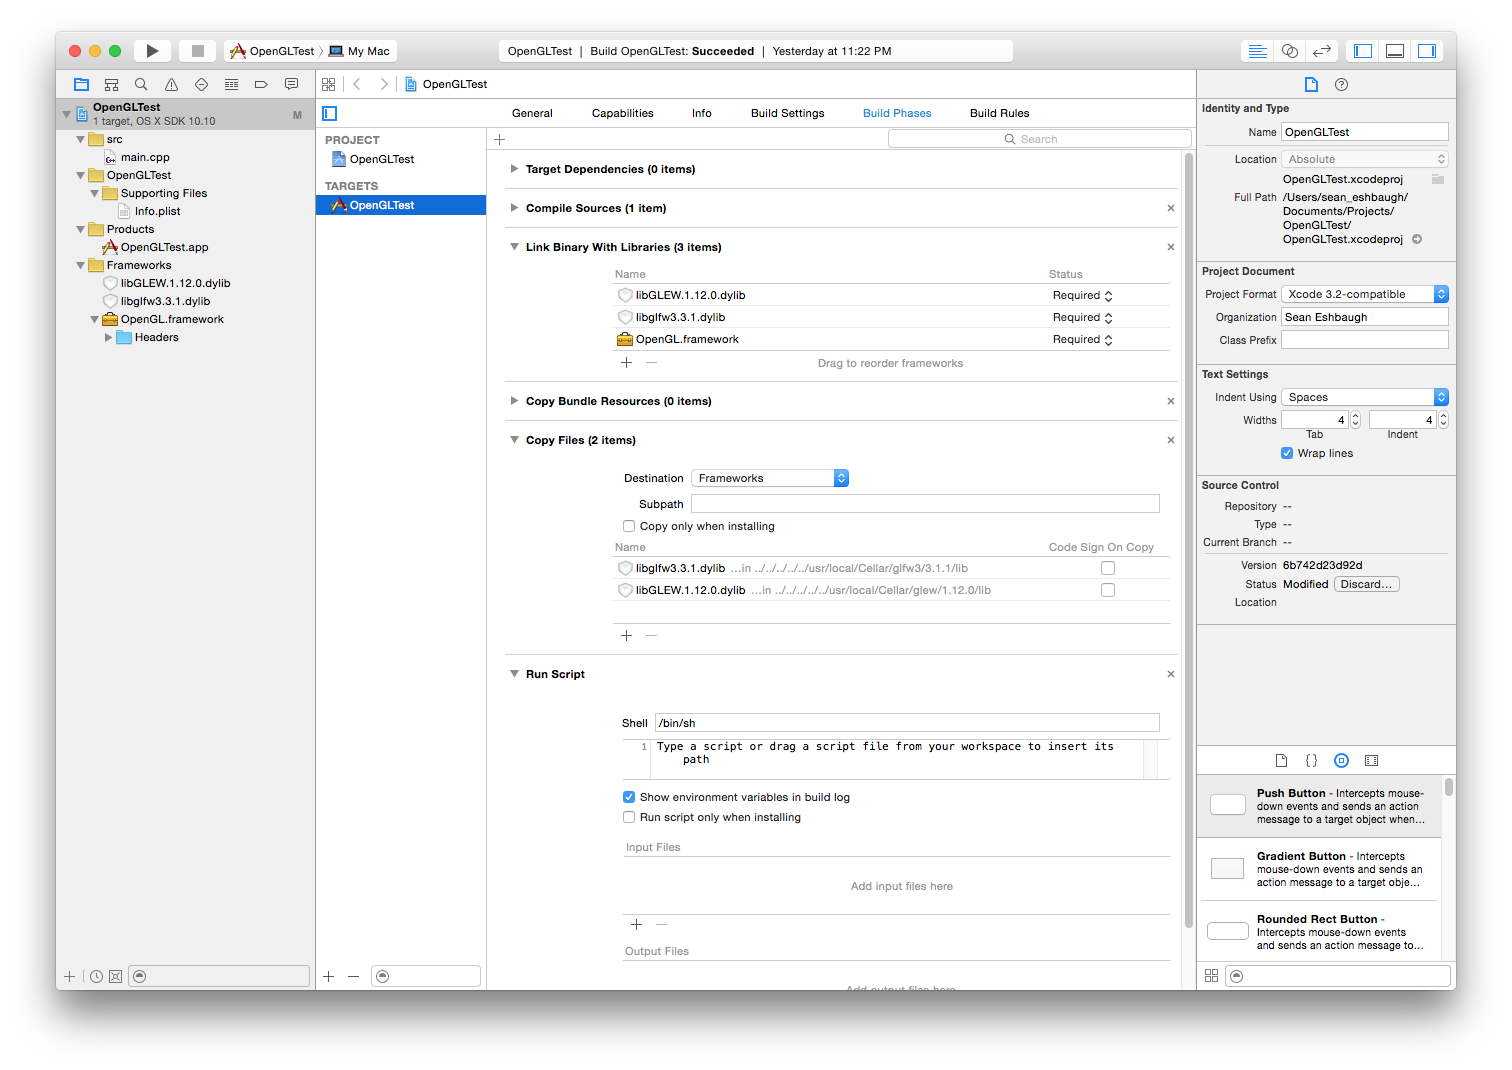
Click on the "Build Phases" tab again.

And click the + button in the upper left part of the view to to add a new build phase. Select "New Copy Files Phase".
In the "Destination" dropdown select "Frameworks".

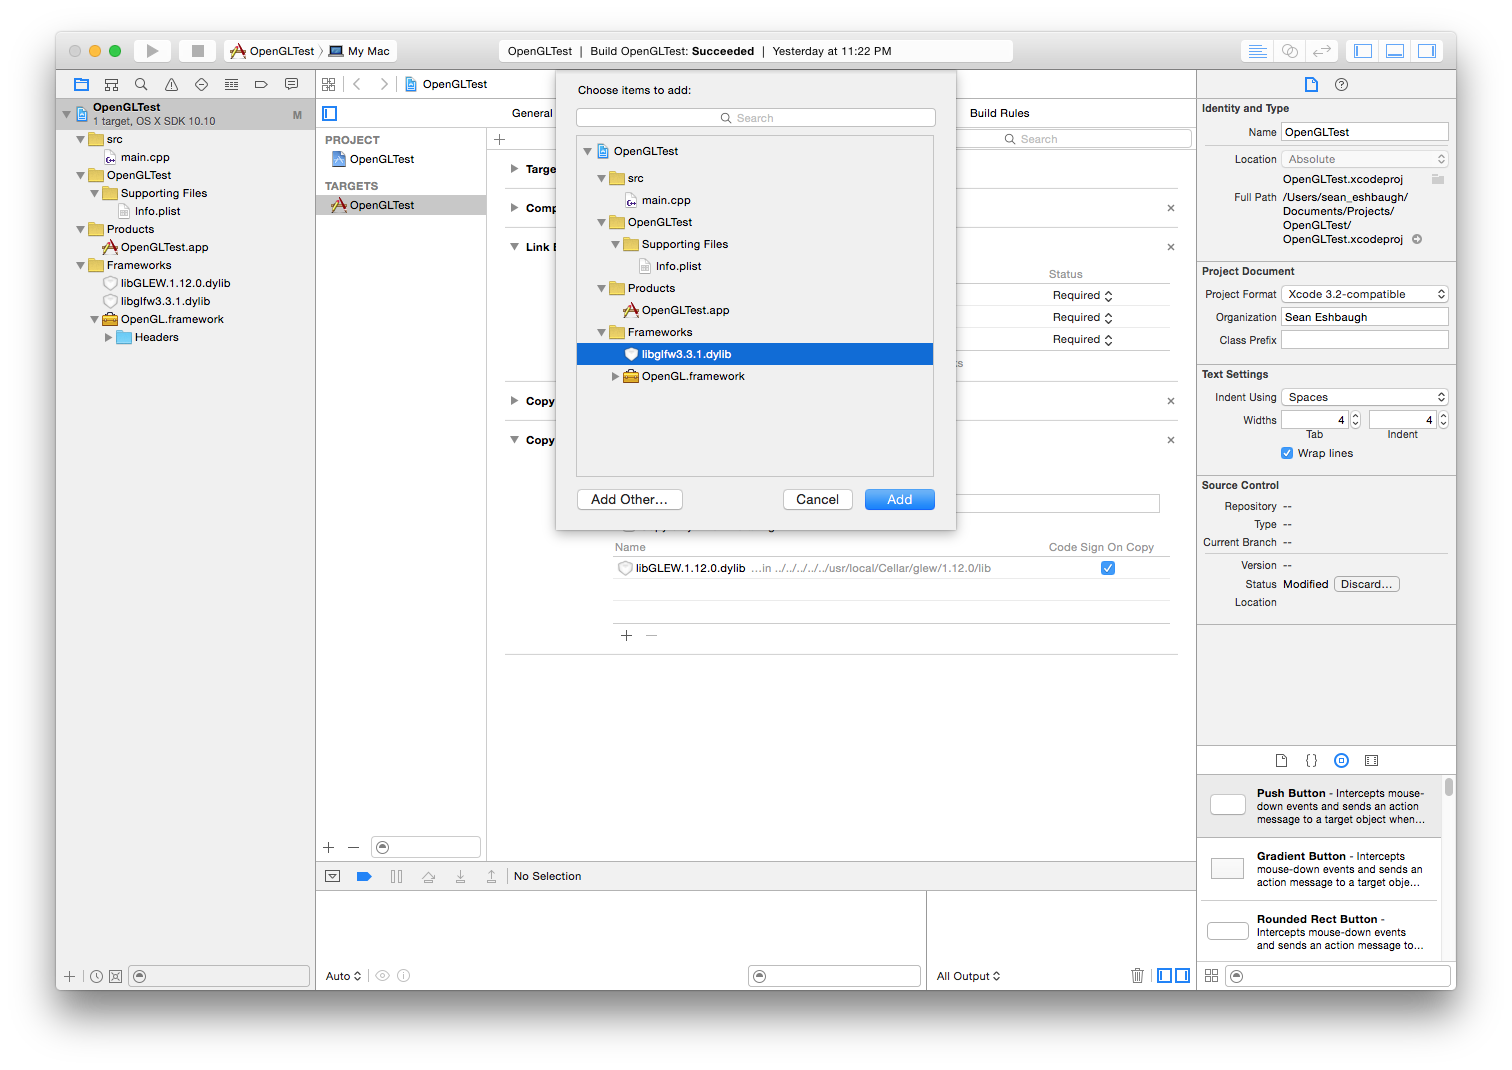
Click the + button and then select libGLEW.1.12.0.dylib from the list.

Click the + button again and this time select libglfw3.3.1.dylib
Now uncheck both boxes under "Code Sign On Copy". Normally you would want to keep these checked since all executable resources in the .app need to be signed. The problem is that the next step presented here will modify the dylib files and therefore make the code signing invalid. Instead they will have to be code signed after modification manually.

Once again it's time to commit!
Now it's time to start getting into the part of this process that made me feel like I should write about all of this: dynamically linked libraries and install names! Not what you were expecting right? I mean, this post is nominally about OpenGL (and using GLEW and GLFW on OS X) so why is it that this is what inspired me? Because if you actually want someone besides yourself to be able to run the final executable you're going to have to figure this part out.
When you installed GLEW and GLFW the binary files that were downloaded were built so that the install name for each dylib was /usr/local/lib/libGLEW.1.12.0.dylib and /usr/local/lib/libglfw3.3.dylib. You may have noticed that the actual place that Homebrew installed the libraries is a little different. The last thing Homebrew does is create a symlink in /usr/local/lib to the actual dylib. So what exactly is an install name? When the linker is run it looks at the install name in the library and uses that when creating the final executable. The result is that the executable will attempt to load the library at that path when it is run. Using otool it is possible to see all of the dynamically linked libraries that an executable file will load.

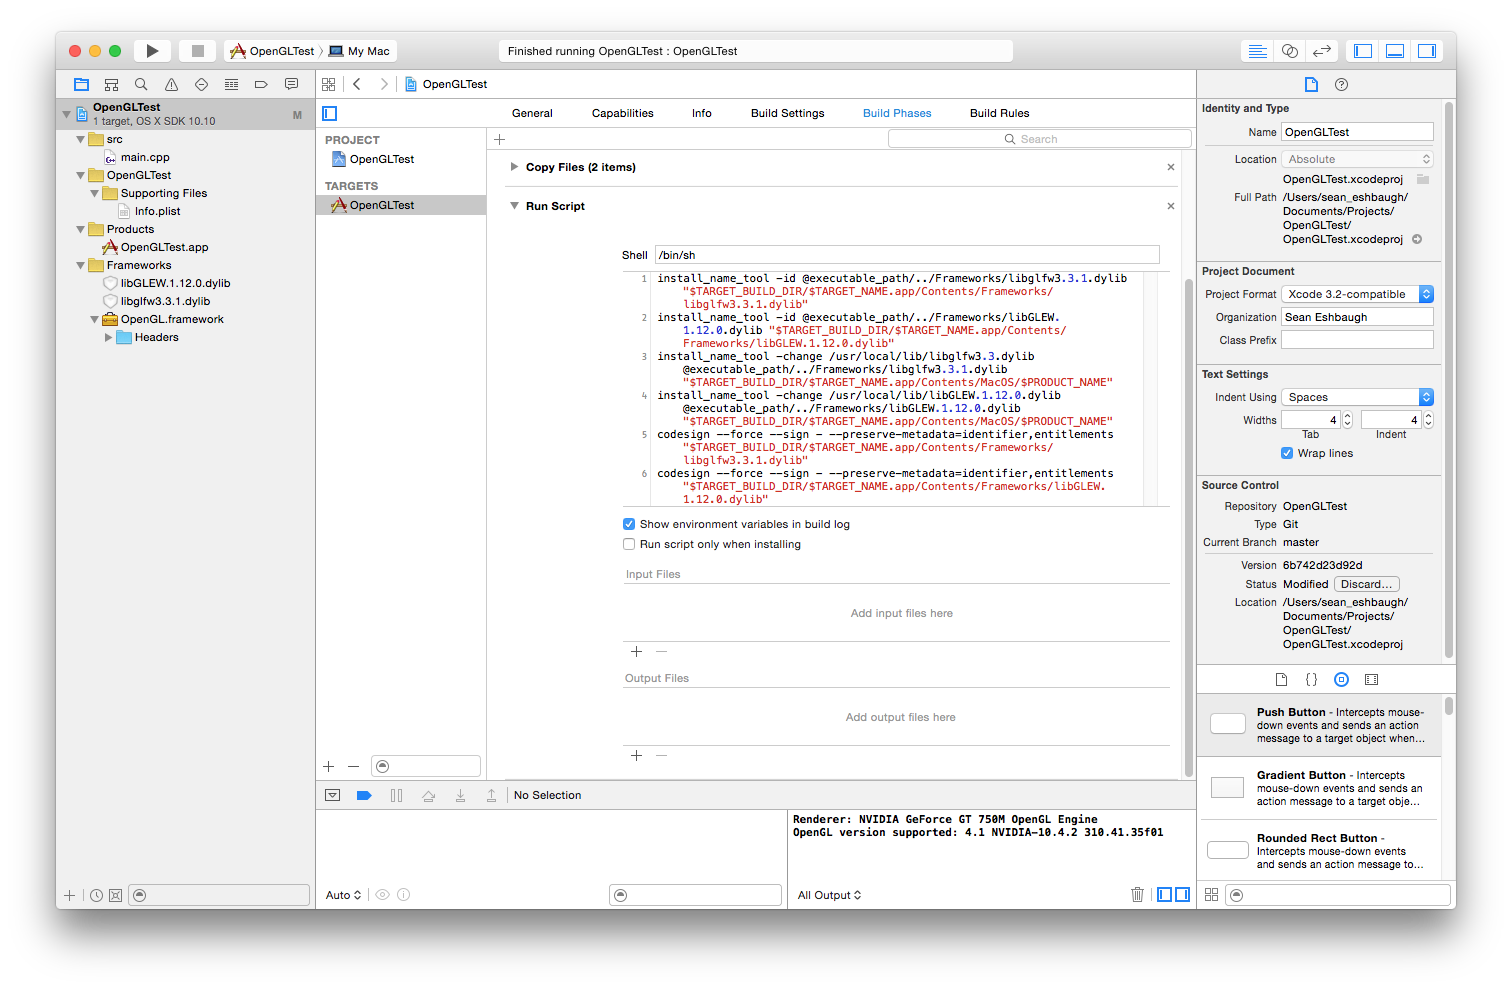
You can see the install name of each of the .dylib files on the first line of the output of otool -L. Now that the GLEW and GLFW dylib files are being copied into the .app it's time to add a "Run Script" phase to the project's build phases to fix the install path of the dylibs. In the project navigator select the project, click "Build Phases", and then click the + button in the top left corner and select "New Run Script Phase"
In the text area for the script enter the following:
install_name_tool -id @executable_path/../Frameworks/libglfw3.3.1.dylib "$TARGET_BUILD_DIR/$TARGET_NAME.app/Contents/Frameworks/libglfw3.3.1.dylib"
install_name_tool -id @executable_path/../Frameworks/libGLEW.1.12.0.dylib "$TARGET_BUILD_DIR/$TARGET_NAME.app/Contents/Frameworks/libGLEW.1.12.0.dylib"
install_name_tool -change /usr/local/lib/libglfw3.3.dylib @executable_path/../Frameworks/libglfw3.3.1.dylib "$TARGET_BUILD_DIR/$TARGET_NAME.app/Contents/MacOS/$PRODUCT_NAME"
install_name_tool -change /usr/local/lib/libGLEW.1.12.0.dylib @executable_path/../Frameworks/libGLEW.1.12.0.dylib "$TARGET_BUILD_DIR/$TARGET_NAME.app/Contents/MacOS/$PRODUCT_NAME"
codesign --force --sign - --preserve-metadata=identifier,entitlements "$TARGET_BUILD_DIR/$TARGET_NAME.app/Contents/Frameworks/libglfw3.3.1.dylib"
codesign --force --sign - --preserve-metadata=identifier,entitlements "$TARGET_BUILD_DIR/$TARGET_NAME.app/Contents/Frameworks/libGLEW.1.12.0.dylib"
The first thing this script does is use install_name_tool -id to change the install name of the GLEW and GLFW dylibs. The first argument, @executable_path/../Frameworks/libglfw3.3.1.dylib, is the new install name for the library. @executable_path means it should be relative to the location of the executable file. The second argument is the location of the dylib file being modified. The $TARGET_BUILD_DIR and $TARGET_NAME in the path to the dylibs ensure that the correct absolute path is used during the build phase since the exact location of the output will depend on your project's name and whether or not your building for debug or release.
After changing the install name of dylib the next step is to use install_name_tool -change to change the old install name (seen before using otool -L) to the new one.
Finally the dylib is signed with codesign. The arguments for this are taken from what Xcode would use if you had left the "Code Sign On Copy" boxes checked. This last step ensures that the codesigning actually works. The previous two steps modify the dylib files that are copied into the .app and if you just let them be code signed like normal the program will crash when attempting to load the dylibs.
Now that all of the build phases are in place it's time to input the actual code that does something fun and useful (for a generous definition of useful) with OpenGL. Put the following in main.cpp:
#include <GL/glew.h>
#include <GLFW/glfw3.h>
#include <iostream>

static void keyCallback(GLFWwindow* window, int key, int scancode, int action, int mods) {
    if (key == GLFW_KEY_ESCAPE && action == GLFW_PRESS) {
        glfwSetWindowShouldClose(window, GL_TRUE);
    }
}

int main(int argc, const char* argv[]) {
    if (!glfwInit()) {
        return 1;
    }

    int monitorCount;

    GLFWmonitor** monitors = glfwGetMonitors(&monitorCount);

    GLFWmonitor* largestMonitor = monitors[0];

    const GLFWvidmode* largestVidmode = glfwGetVideoMode(largestMonitor);

    for (int i = 1; i < monitorCount; i += 1) {
        const GLFWvidmode* vidmode = glfwGetVideoMode(monitors[i]);

        if (vidmode->width * vidmode->height > largestVidmode->width * largestVidmode->height) {
            largestVidmode = vidmode;

            largestMonitor = monitors[i];
        }
    }

    glfwWindowHint(GLFW_CONTEXT_VERSION_MAJOR, 4);

    glfwWindowHint(GLFW_CONTEXT_VERSION_MINOR, 1);

    glfwWindowHint(GLFW_OPENGL_FORWARD_COMPAT, GL_TRUE);

    glfwWindowHint(GLFW_OPENGL_PROFILE, GLFW_OPENGL_CORE_PROFILE);

    GLFWwindow* window = glfwCreateWindow(largestVidmode->width, largestVidmode->height, "OpenGLTest", largestMonitor, nullptr);

    if (window == nullptr) {
        std::cerr << "Failed to create GLFW window." << std::endl;

        glfwTerminate();

        return 1;
    }

    glfwMakeContextCurrent(window);

    glewExperimental = GL_TRUE;

    glewInit();

    const GLubyte* openGLRenderer = glGetString(GL_RENDERER);

    const GLubyte* openGLVersion = glGetString(GL_VERSION);

    std::cout << "Renderer: " << openGLRenderer << std::endl;

    std::cout << "OpenGL version supported: " << openGLVersion << std::endl;

    glEnable(GL_DEPTH_TEST);

    glDepthFunc(GL_LESS);

    float points[] = {
        0.0f, 0.5f, 0.0f,
        0.5f, -0.5f, 0.0f,
        -0.5f, -0.5f, 0.0f
    };

    GLuint triangleVBO = 0;

    glGenBuffers(1, &triangleVBO);

    glBindBuffer(GL_ARRAY_BUFFER, triangleVBO);

    glBufferData(GL_ARRAY_BUFFER, 9 * sizeof(float), points, GL_STATIC_DRAW);

    GLuint triangleVAO = 0;

    glGenVertexArrays(1, &triangleVAO);

    glBindVertexArray(triangleVAO);

    glEnableVertexAttribArray(0);

    glBindBuffer(GL_ARRAY_BUFFER, triangleVBO);

    glVertexAttribPointer(0, 3, GL_FLOAT, GL_FALSE, 0, nullptr);

    const char* vertexShaderSource =
    "#version 400\n"
    "in vec3 vp;"
    "void main() {"
    "  gl_Position = vec4 (vp, 1.0);"
    "}"

    const char* fragmentShaderSource =
    "#version 400\n"
    "out vec4 frag_colour;"
    "void main() {"
    "  frag_colour = vec4(1.0, 1.0, 1.0, 1.0);"
    "}";

    GLuint vertexShader = glCreateShader(GL_VERTEX_SHADER);

    glShaderSource(vertexShader, 1, &vertexShaderSource, nullptr);

    glCompileShader(vertexShader);

    GLuint fragmentShader = glCreateShader(GL_FRAGMENT_SHADER);

    glShaderSource(fragmentShader, 1, &fragmentShaderSource, nullptr);

    glCompileShader(fragmentShader);

    GLuint shaderProgram = glCreateProgram();

    glAttachShader(shaderProgram, fragmentShader);

    glAttachShader(shaderProgram, vertexShader);

    glLinkProgram(shaderProgram);

    glfwSetKeyCallback(window, keyCallback);

    while (!glfwWindowShouldClose(window)) {
        glClear(GL_COLOR_BUFFER_BIT | GL_DEPTH_BUFFER_BIT);

        glUseProgram(shaderProgram);

        glBindVertexArray(triangleVAO);

        glDrawArrays(GL_TRIANGLES, 0, 3);

        glfwSwapBuffers(window);

        glfwPollEvents();
    }

    glfwTerminate();

    return 0;
}
I'm not going to go into extreme detail on the code in this post. The primary reason is that it's largely not mine. I present the code only as a good fairly minimal OpenGL program. Here are the places from which the above code was stolen:
- "Modern OpenGL 01 - Getting Started in Xcode, Visual C++, and Linux" by Tom Dalling
- "Hello Window" by Joey de Vries
- "Hello Triangle" by Joey de Vries
- "Hello Triangle" by Anton Gerdelan
The only thing I've really added is the use of glfwGetMonitors and glfwGetVideoMode to find the largest available monitor so that it can be used for full screen rendering. I also made it so the calls to glfwWindowHint request OpenGL 4.1.
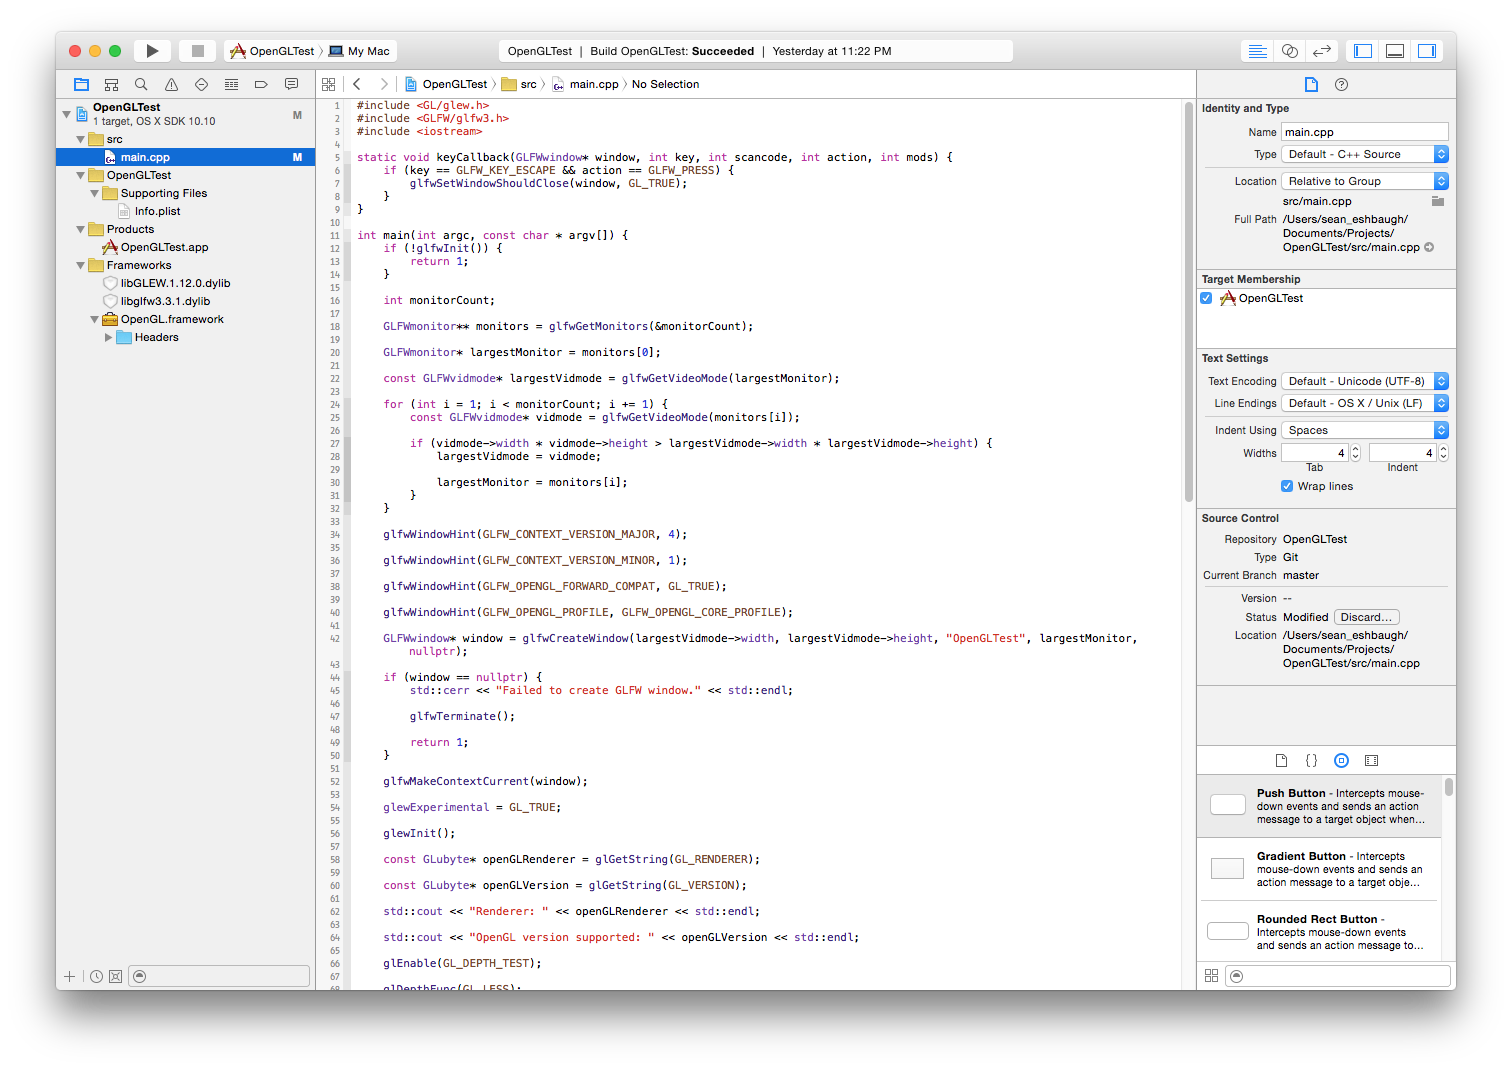
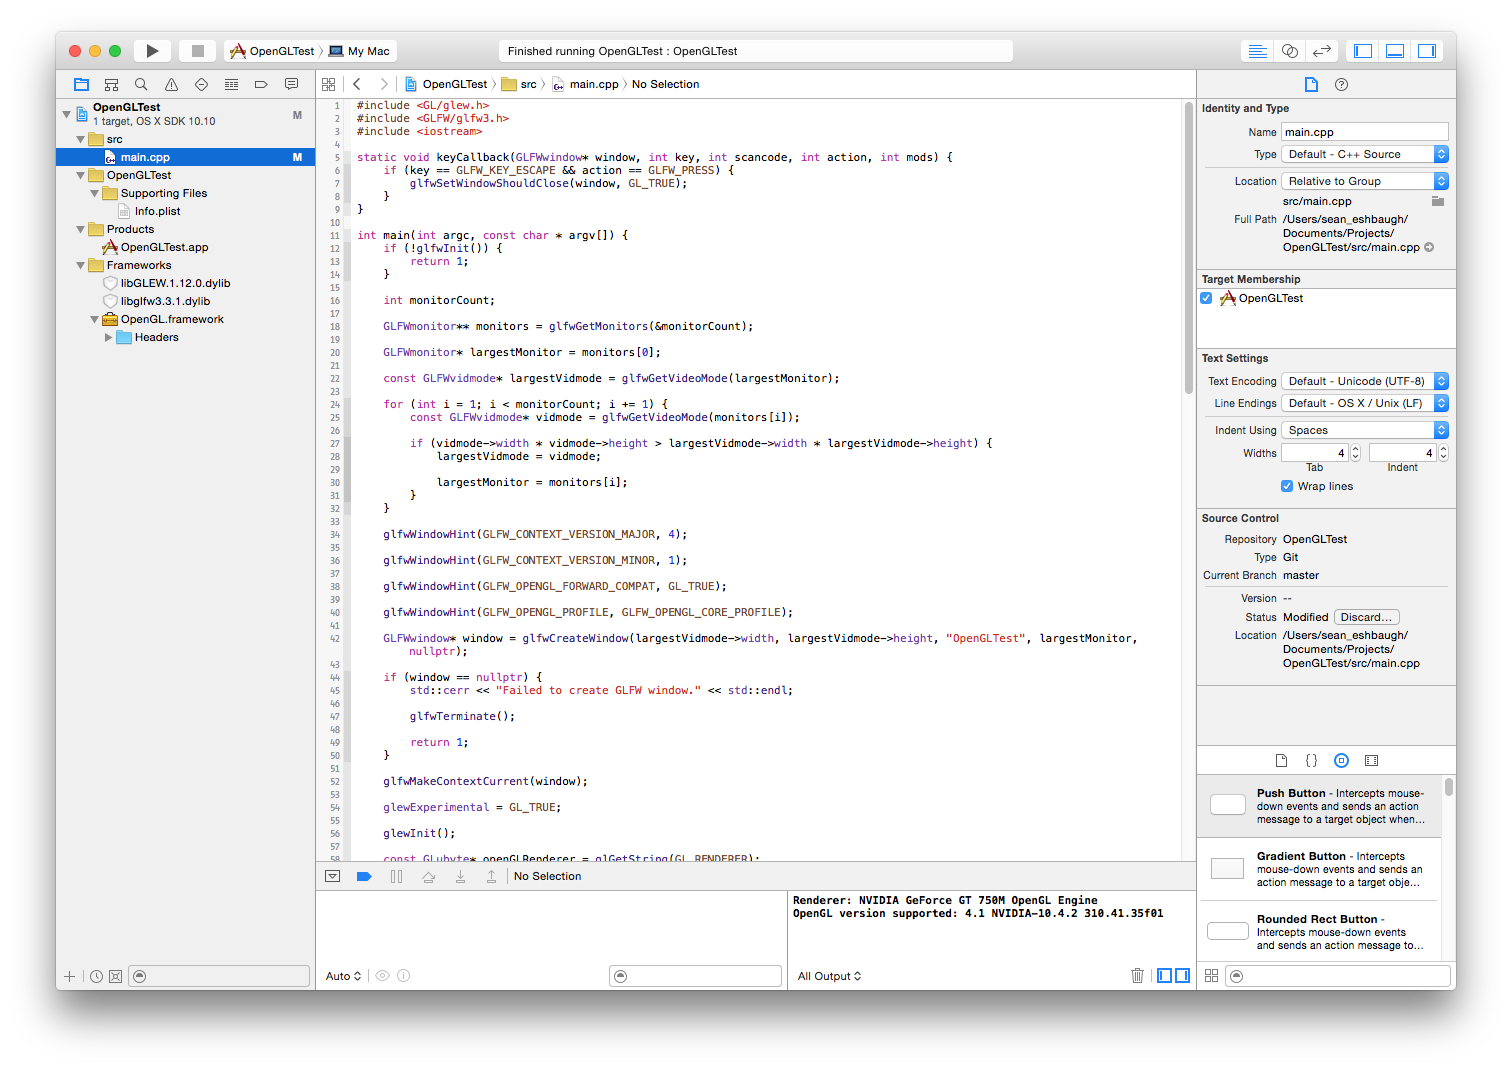
Build and run the project and you should see a white triangle in the middle of a black screen on your largest monitor. Press "escape" to exit the program. You should see the debug output from the program in the debug console in Xcode.
Now it's time for the final step: exporting the app. Click Product > Archive to bring up the archive dialog.
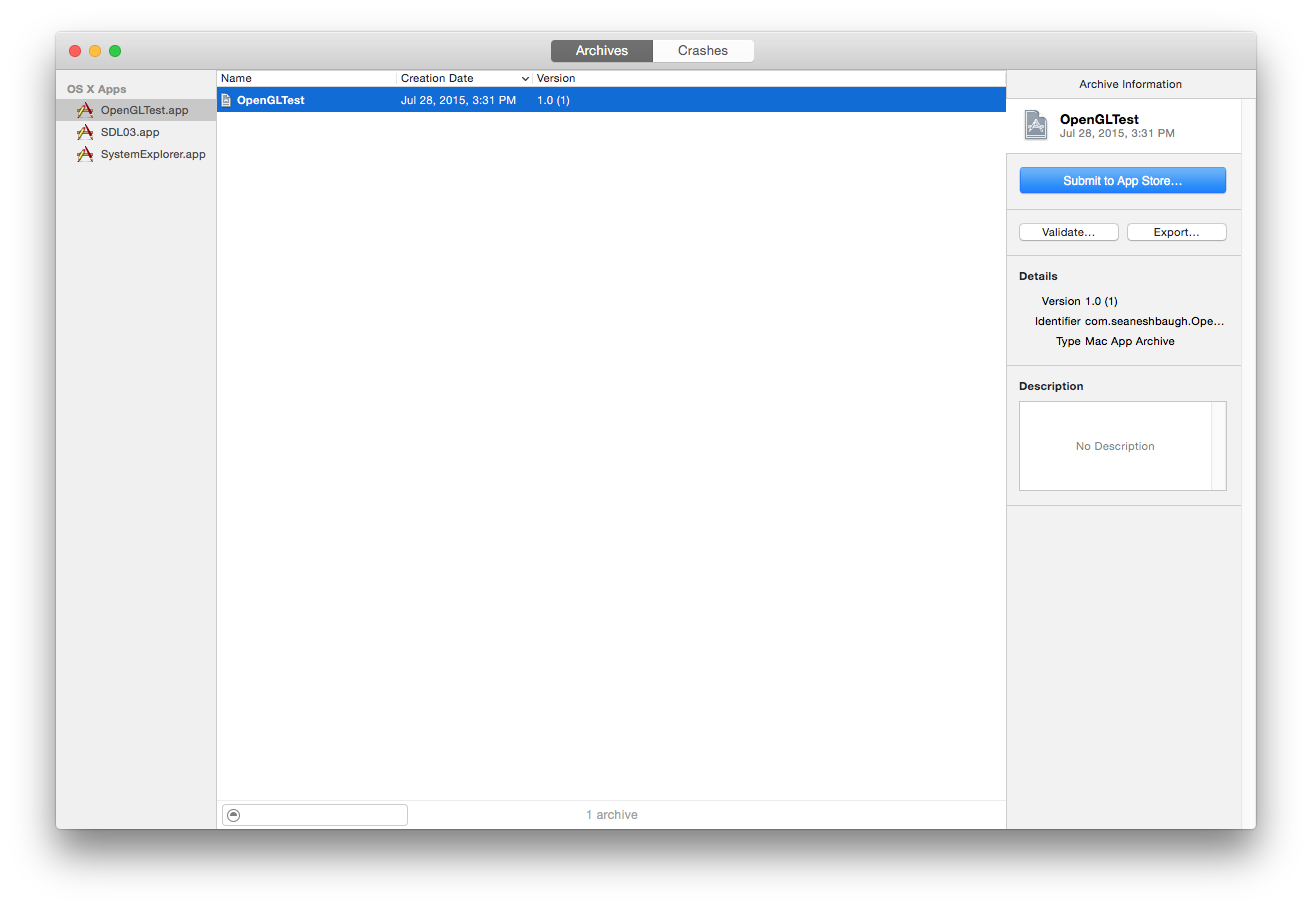
Select the archive and then click "Export".

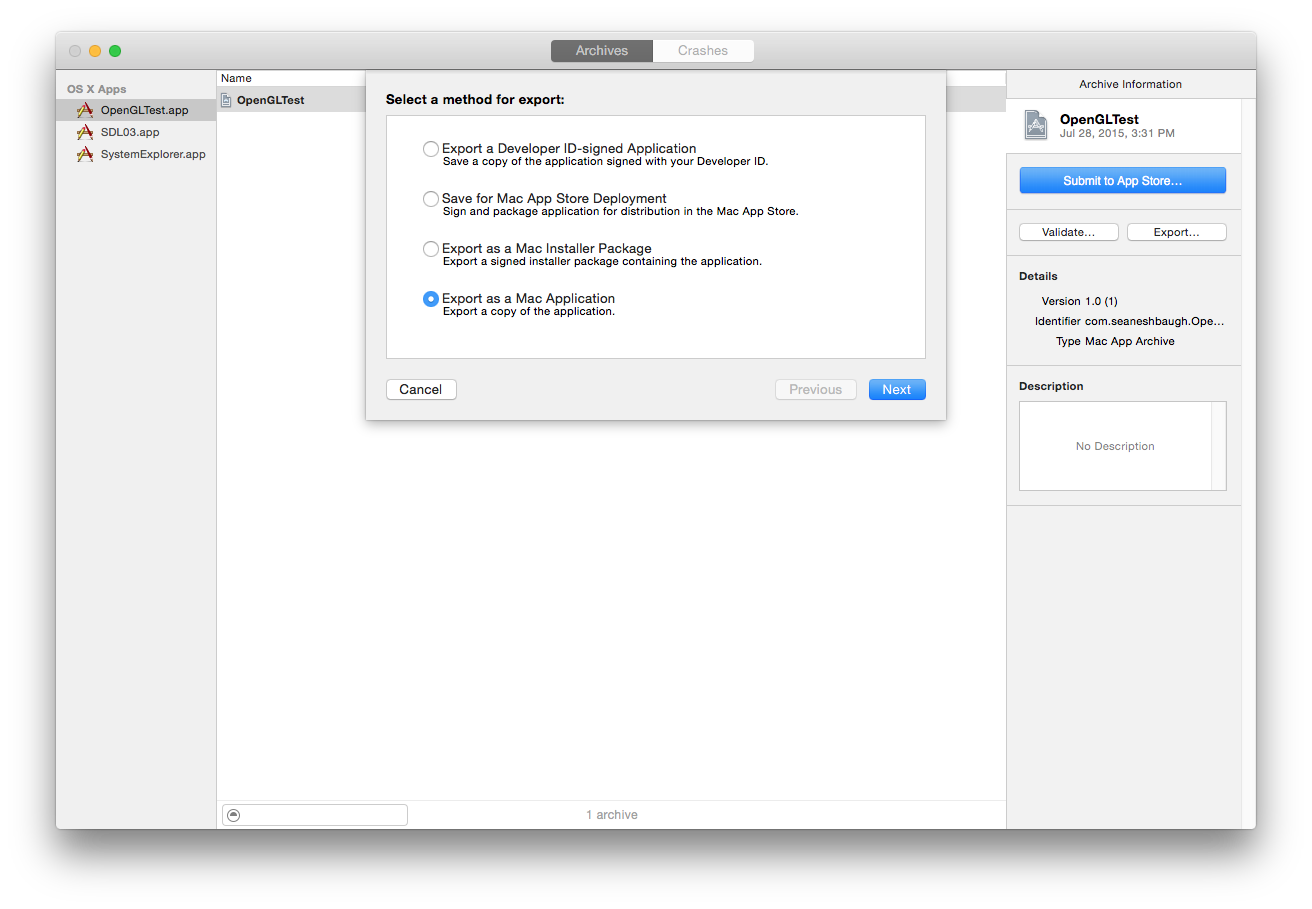
Select the "Export as a Mac Application" option and then click "Next".
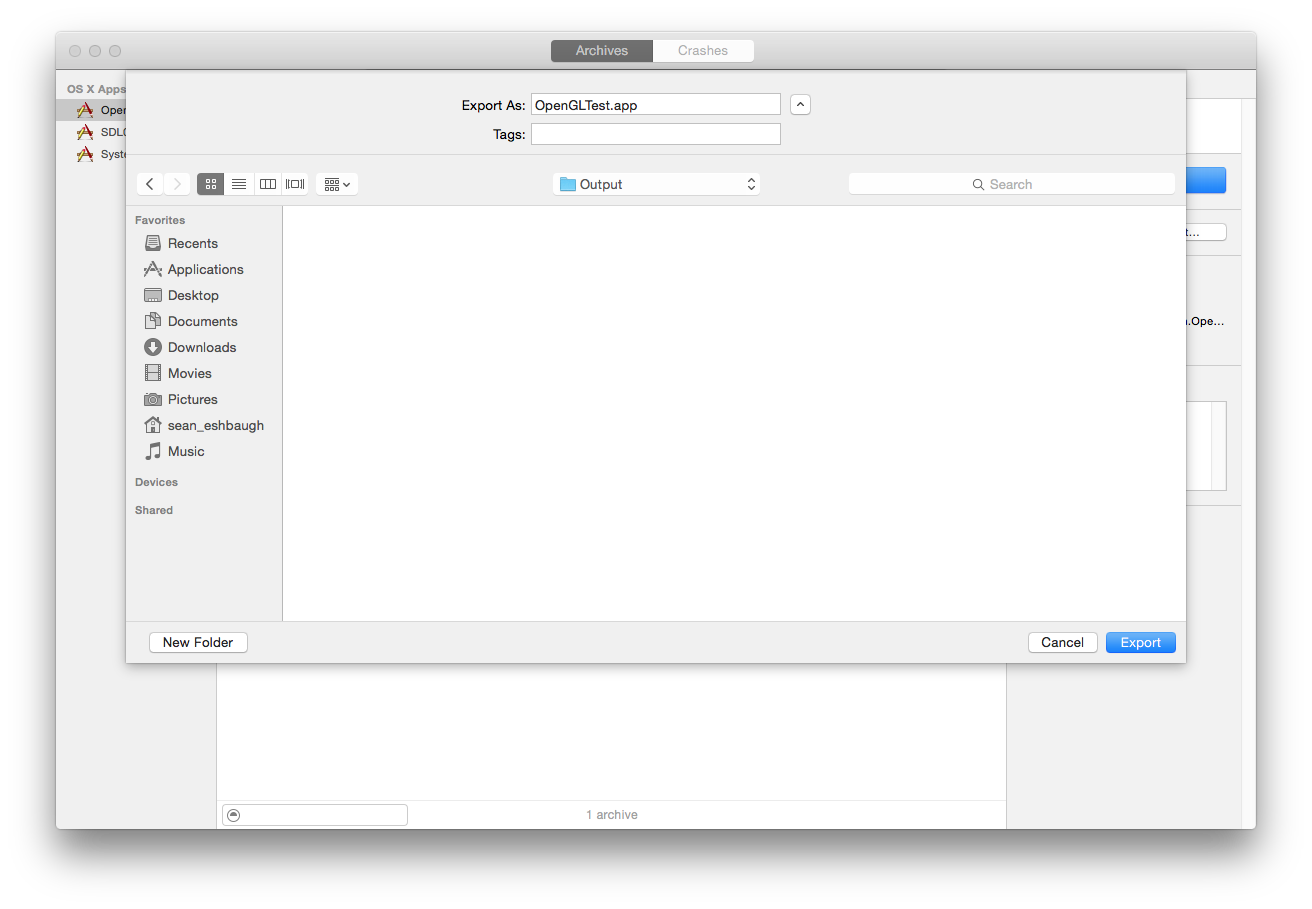
Select a location (anywhere will do) and then click "Export".
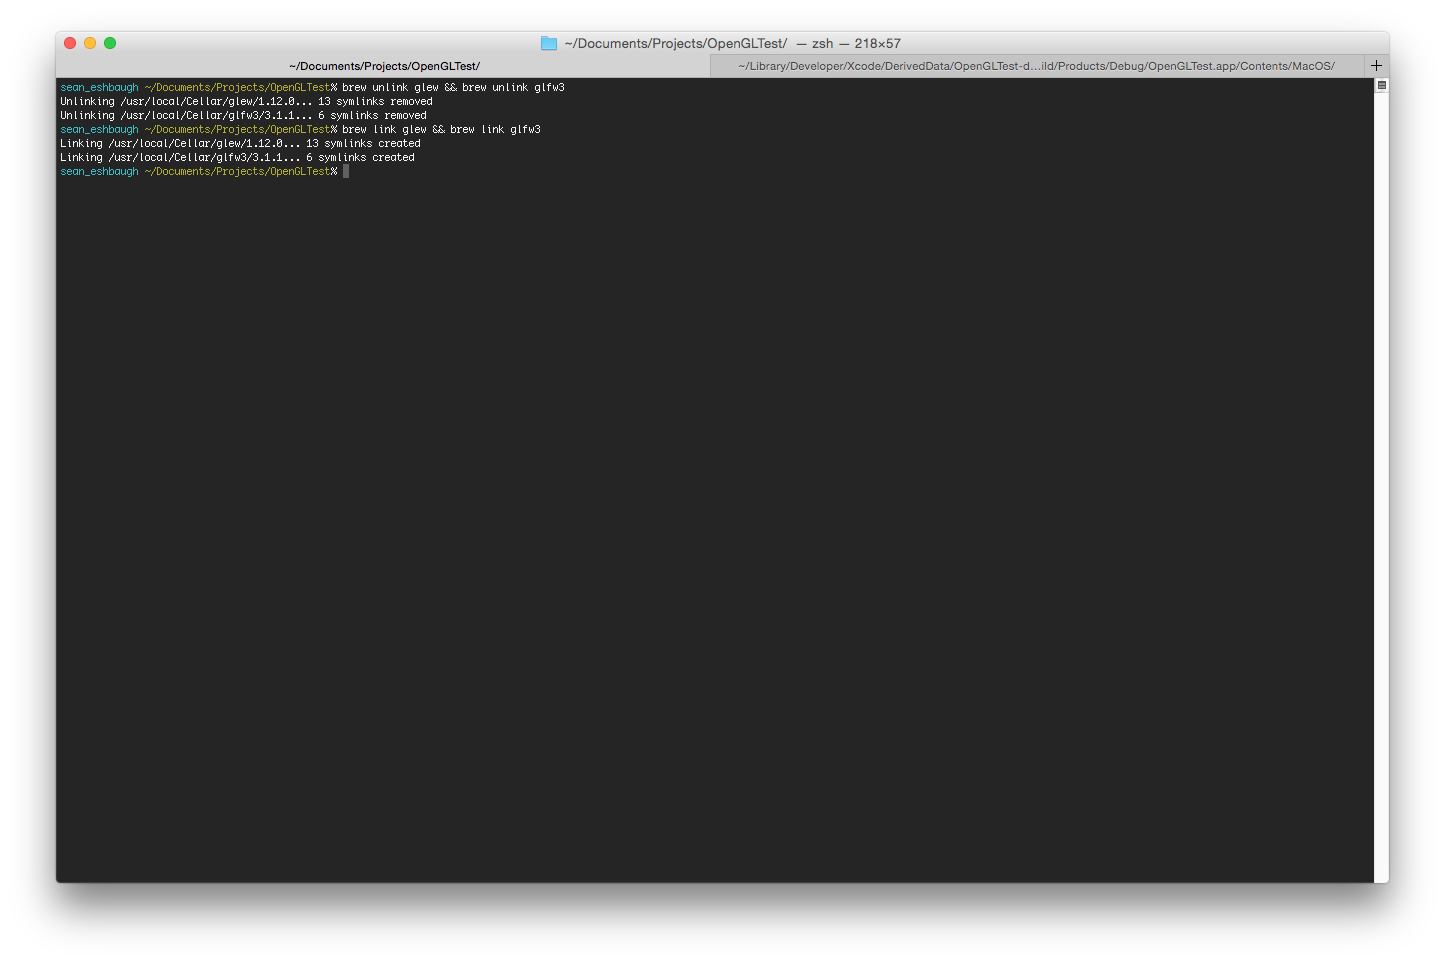
Open the app and make sure it works. There's one last thing you should probably do first though; unlink GLEW and GLFW just to make sure the copied and modified dylibs are being loaded correctly. brew unlink glew && brew unlink glfw3 should take care of this for you.

Open the app again. If the exported app still works this means the exeuctable is referencing its own local copies of the GLEW and GLFW dylibs and not the ones installed on your system. Re-link GLEW and GLFW now.
And there you have it, a working .app that has all of the stuff you need in it to get started on something useful using OpenGL.
Here are some additional resources worth looking at. Most of them focus on OpenGL specific things rather than dealing with the tools you use.