I originally wrote this some time ago for a message board. It finally occurred to me the other day to post it here where it can actually be found. When I wrote this I was working on Windows 7. The general steps should be applicable to older versions of Windows as well as Windows 8.
The rest of this is very long...
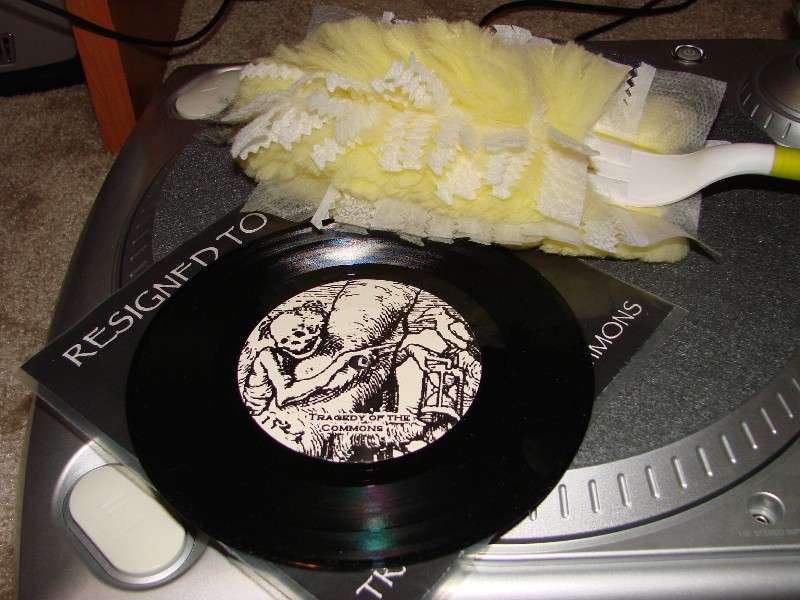
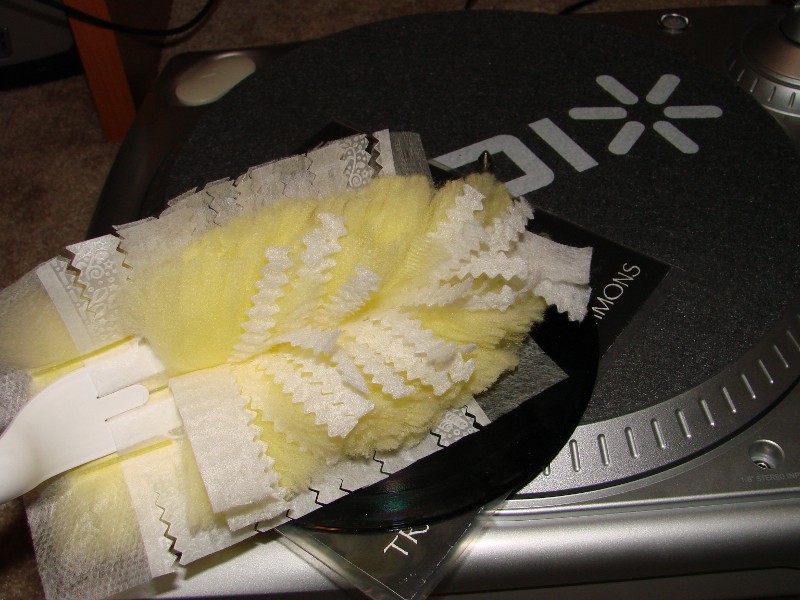
Before you get started you will need an RCA female to 3.5mm stereo male Y adapter like the one shown below.
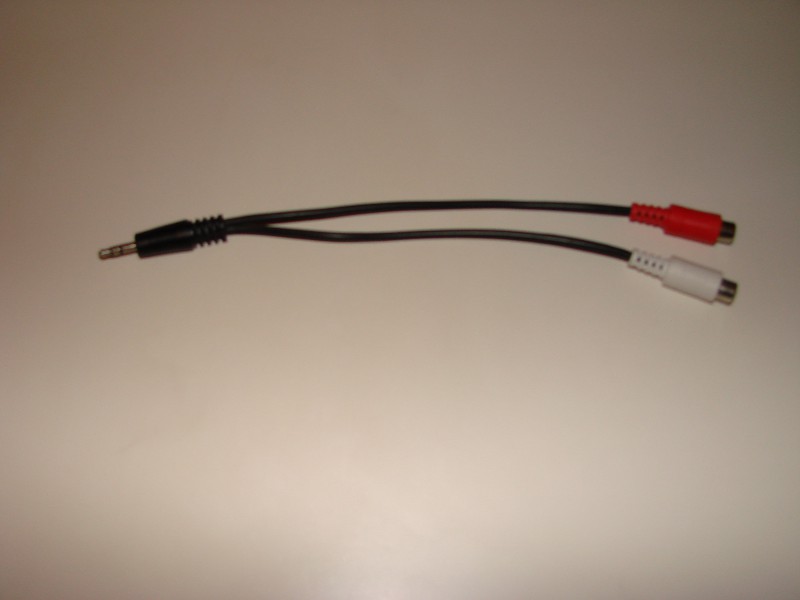
You can buy one online from Amazon or from Walmart or Target.
You also might want to get some Swiffer dusters. I use them to gently clean my records before ripping to ensure dust doesn't interfere with the process. Make sure you use a clean one that hasn't been used for any actual dusting. I've been told this can cause the record to become statically charged and cause popping during playback. I've never personally experienced this, but if you want you can use your prefered method for cleaning your records.
The first thing you're going to need to do is install Adobe Audition. A lot of people will tell you to use Audacity since it's free. It does an okay enough job recording, but when it comes to actually cleaning up the audio it is utter shit. It's noise reduction algorithms are vastly inferior. In fact, in my experience you can hardly even say they work properly. Note: I originally wrote this almost two years ago. Things may have changed in regards to Audacity's noise reduction quality since then. Audition is still a fine choice though. You can find a free trial of Audition here.
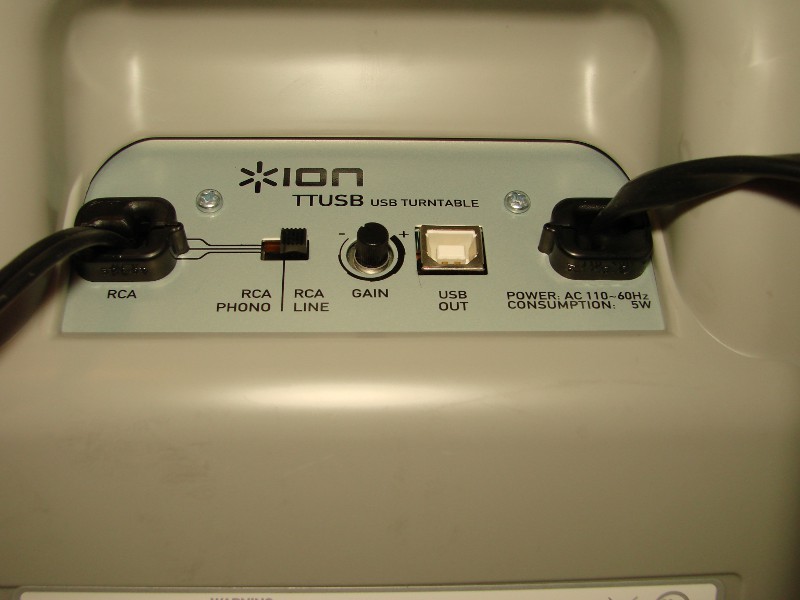
Even if your record player has a USB output we're going to be using the RCA output. The reason for this is that we want the actual analogue signal to come in to the soundcard/montherboard and let it do the conversion to a digital signal. Odds are it will do a better job than the record player itself would. It'll also give us more control over everything.
If your record player has a switch between phono and line levels switch it to line unless you want to bother with a pre-amp. If it has no switch then just assume it only does the phono voltage level. This will mean you need a pre-amp or your signal will be very weak.
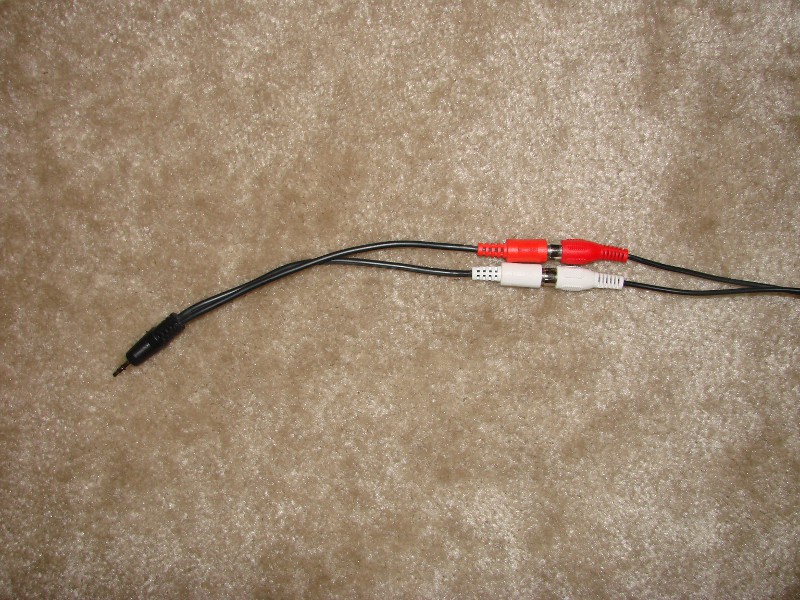
Connect your RCA output cable to the 3.5mm stereo Y adapter.
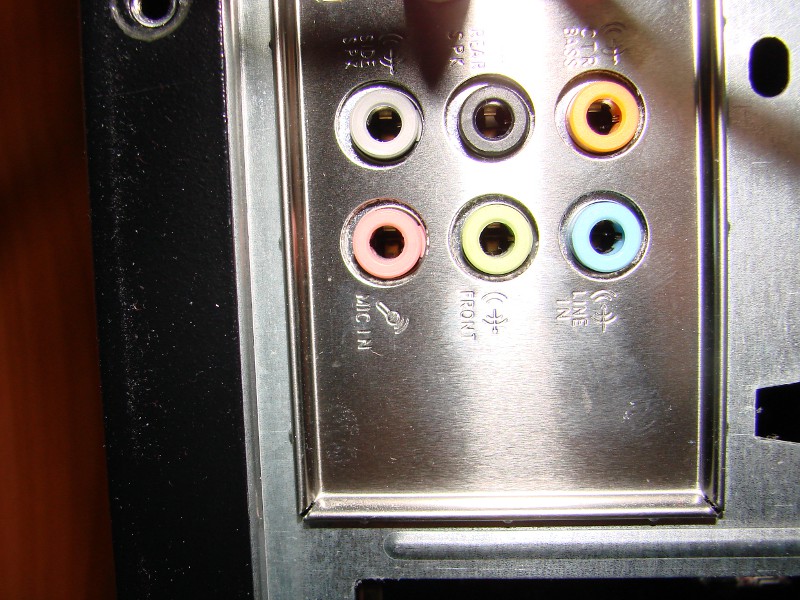
Find your audio input on the back of your computer. If you've got a laptop it's probably on the side. Plug the Y adapter into the line in input.
Now in your system task tray (the area down by the clock) right click the little speaker icon and then click "recording devices".

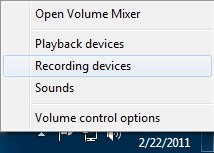
You should see your line in device. If it isn't the default device right click it and click "Set as Default Device".
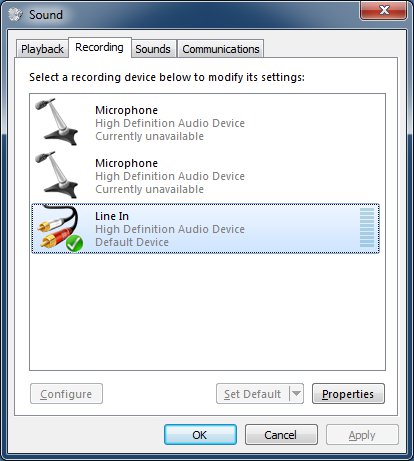
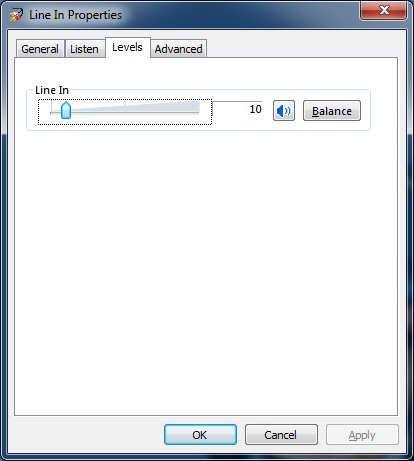
Then right click it again and click "Properties". Go to the "Levels" tab and bring the input level down to around 10. We will start off there. You may have to adjust this for each record. On Windows 7 I've noticed the line in level gets reset to 8 every time I reboot. I'm not sure if that's just my setup or if that's just how it works. Remember to check for that though.
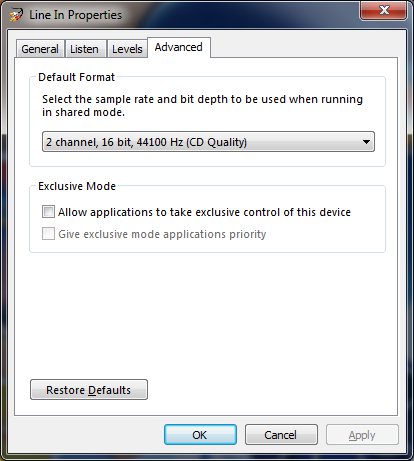
Go to the "Advanced" tab and make sure the default format is set to "2 channel, 16 bit, 44100 Hz (CD Quality)". Click "OK" to save the changes.
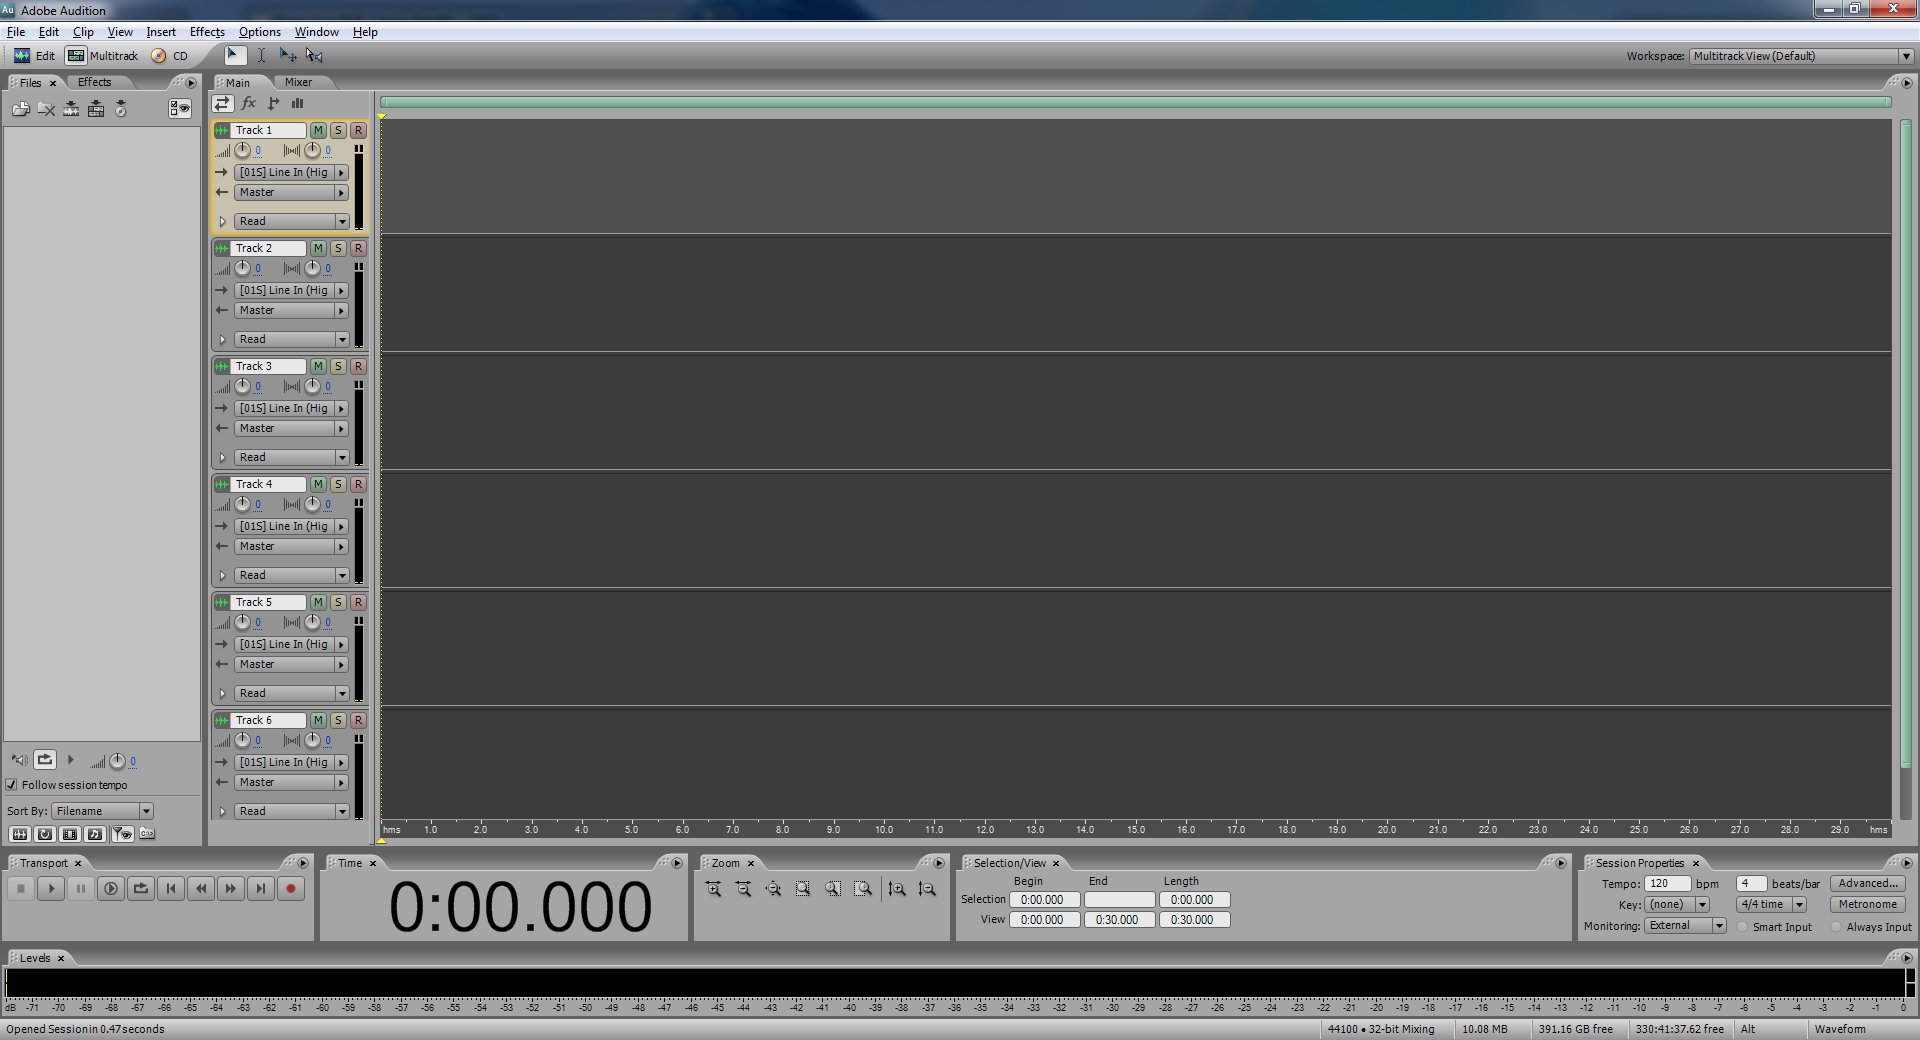
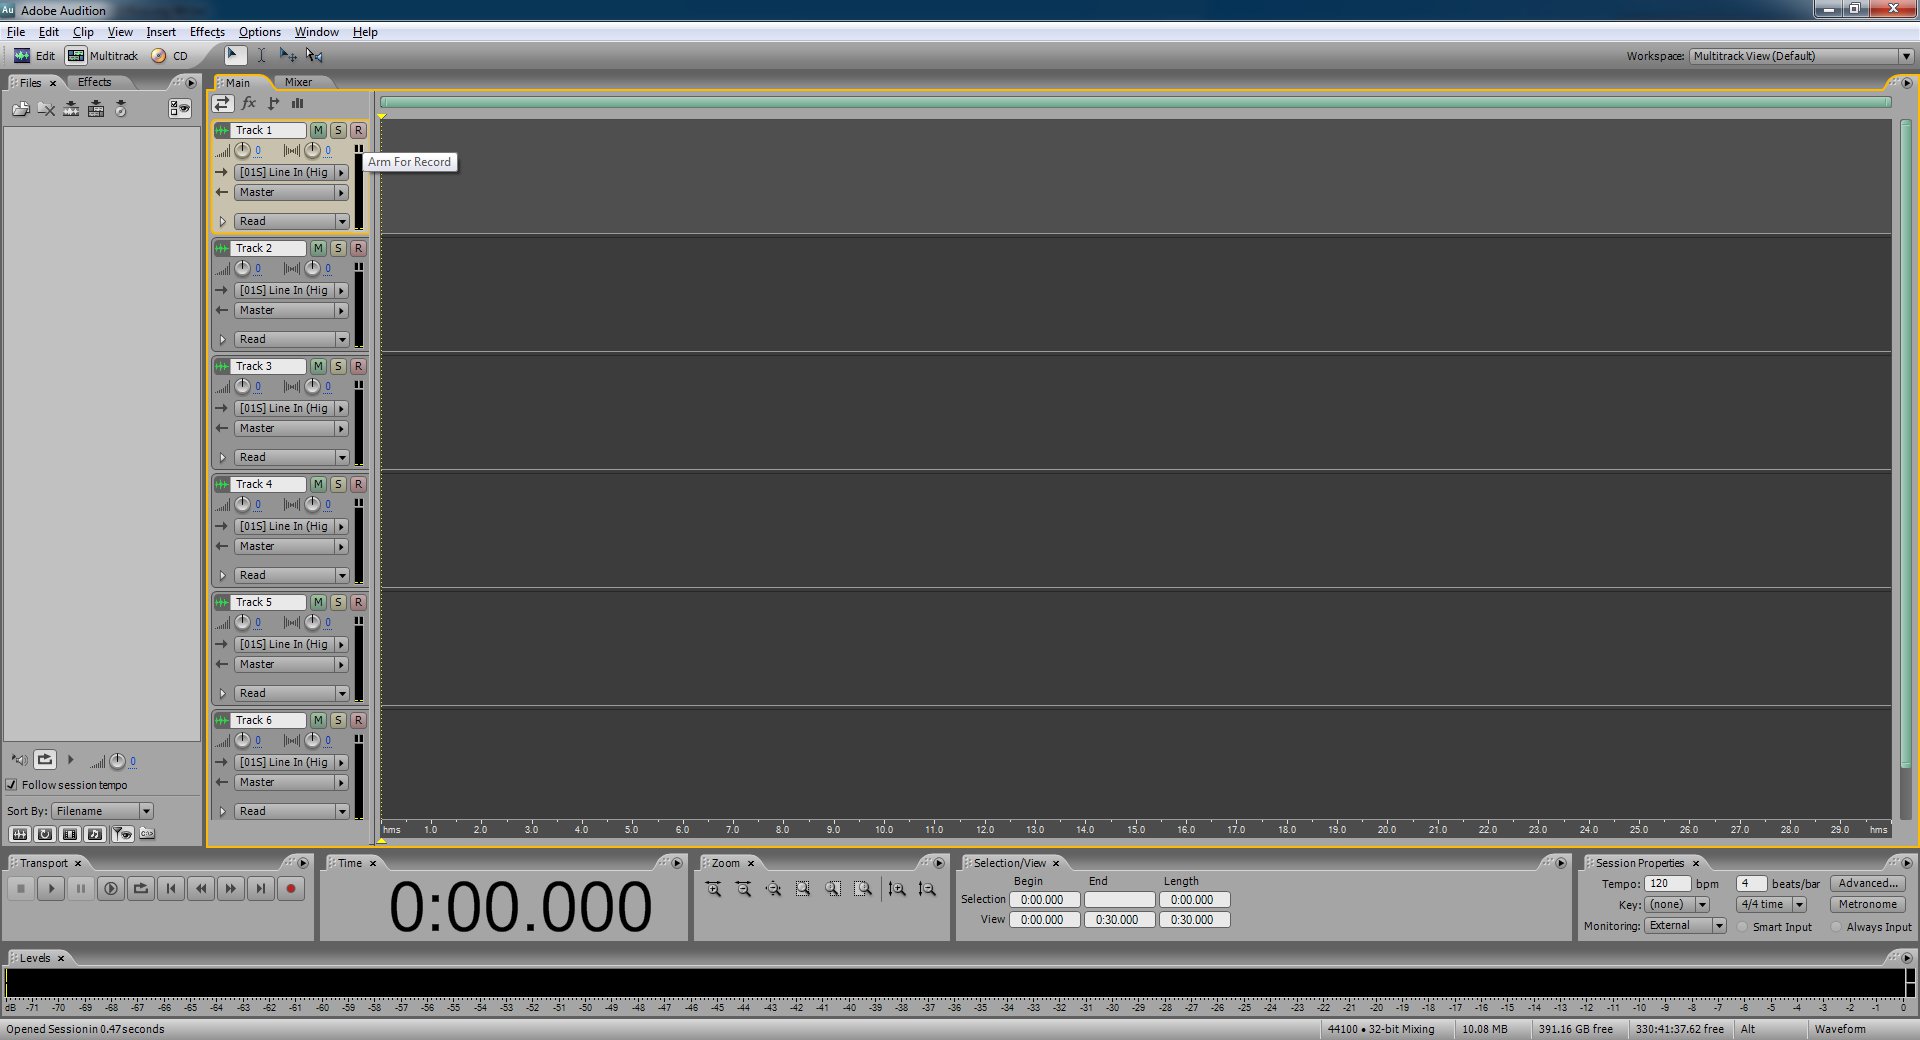
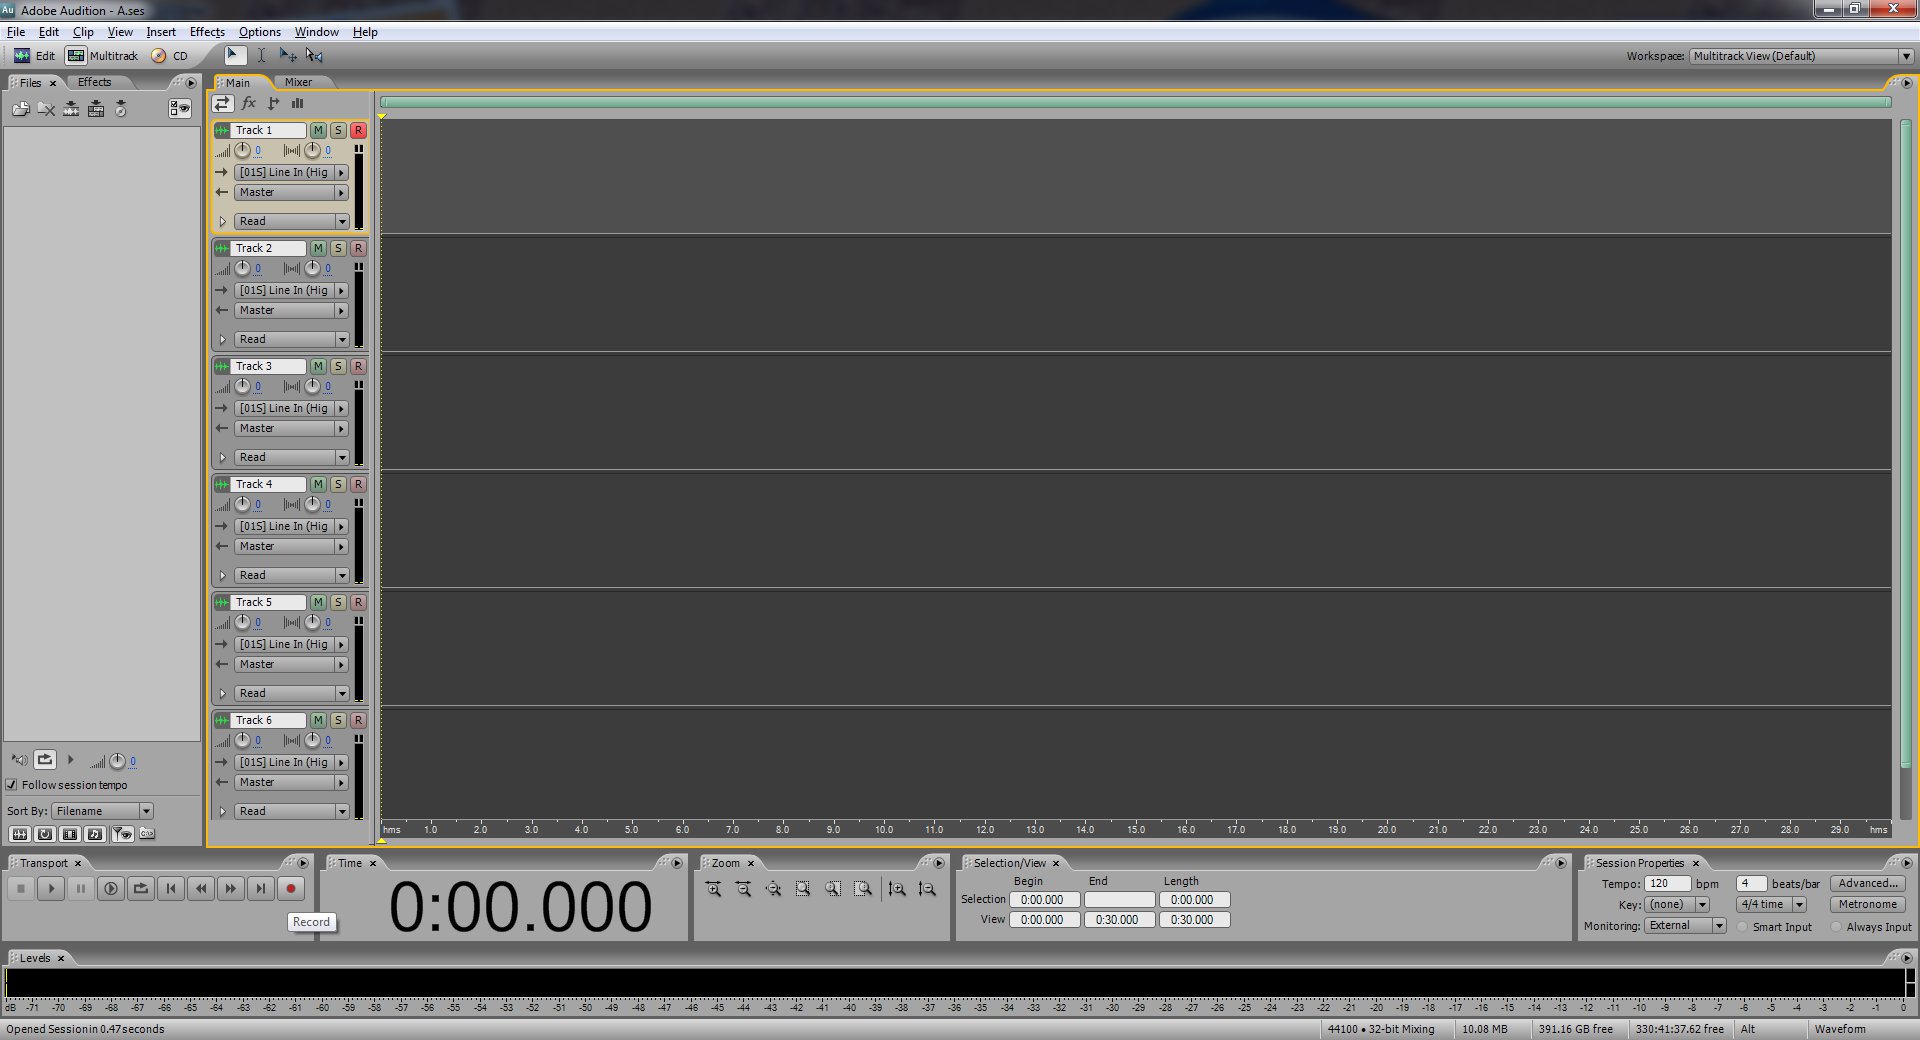
We're going to take a minute to set up Audition now. So open it up. You should see something like this.
Go to Edit -> Preferences -> Multitrack (6th tab).
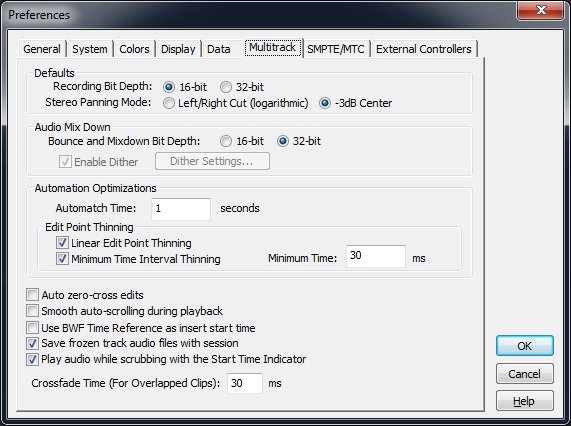
Set your recording bit depth to 16-bit. This is because the LAME mp3 encoder will only accept 16-bit wav files. 32-bit is pretty much useless anyways for what we're doing. Click OK to save the changes.
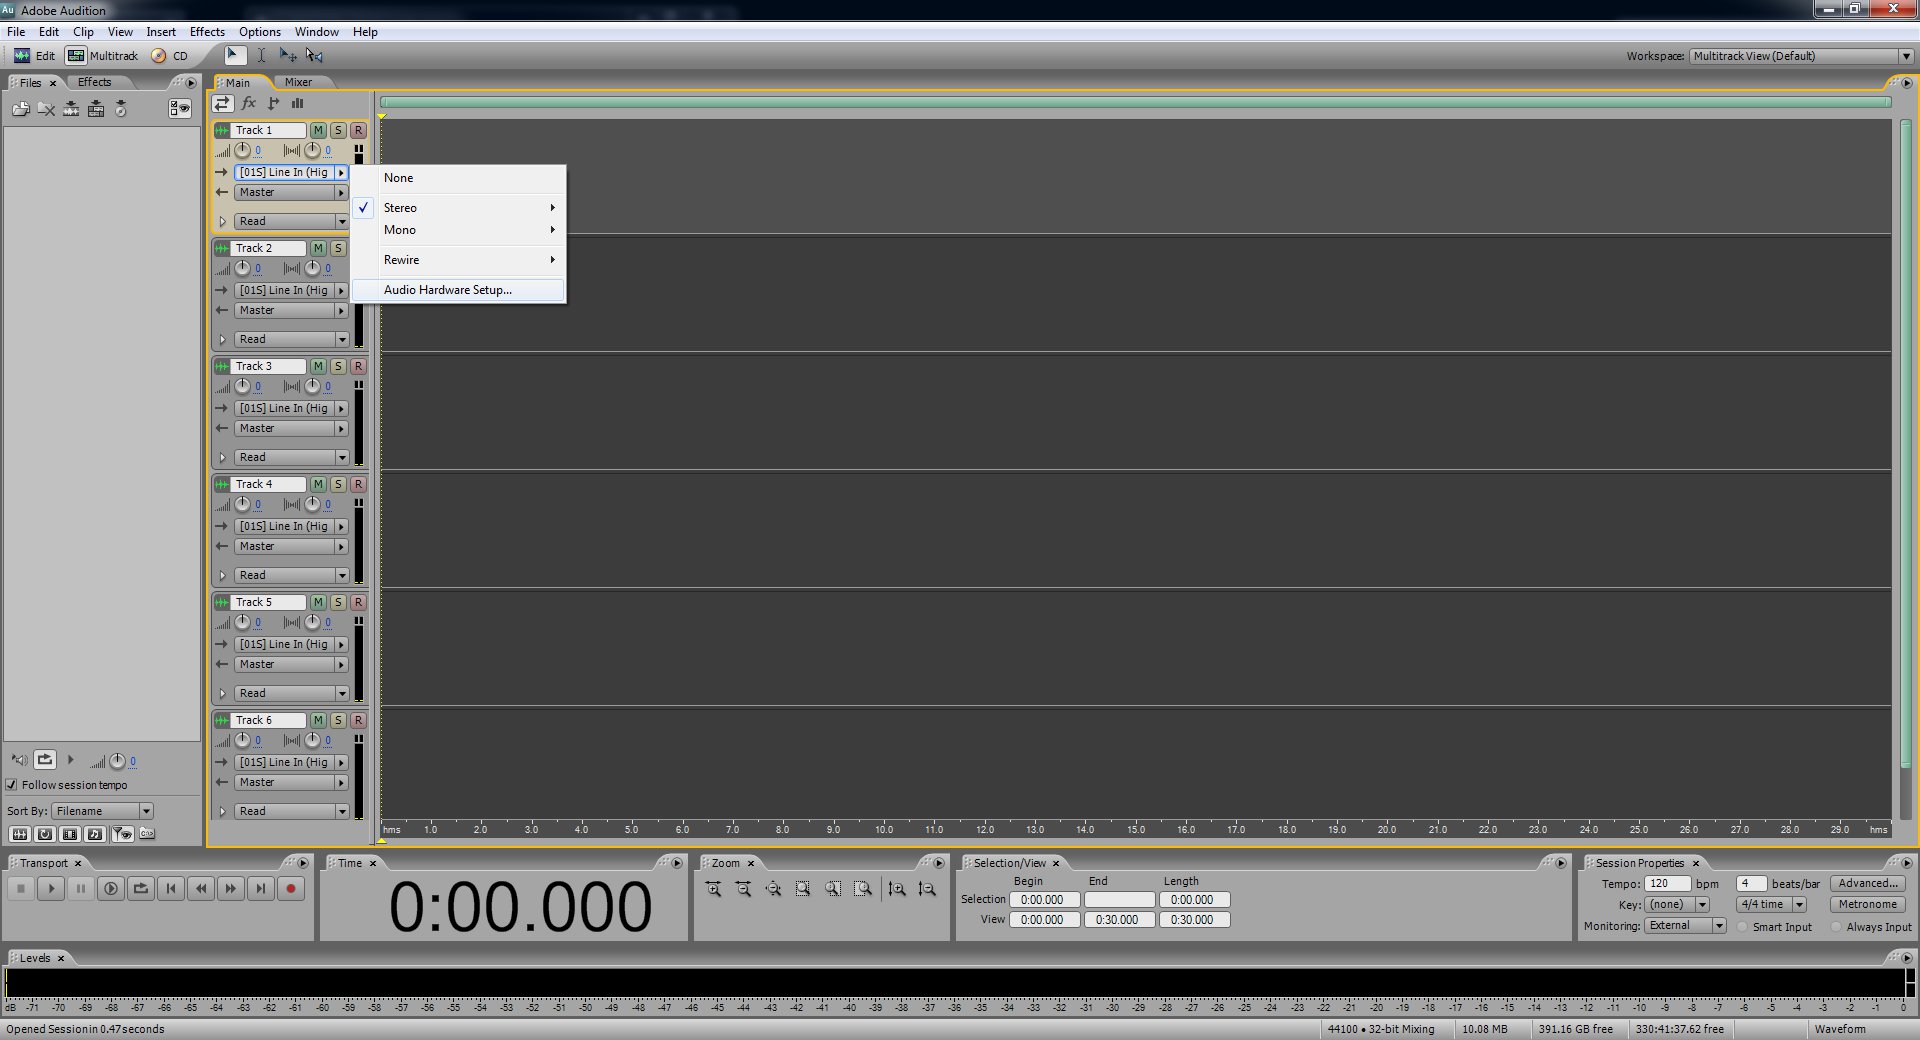
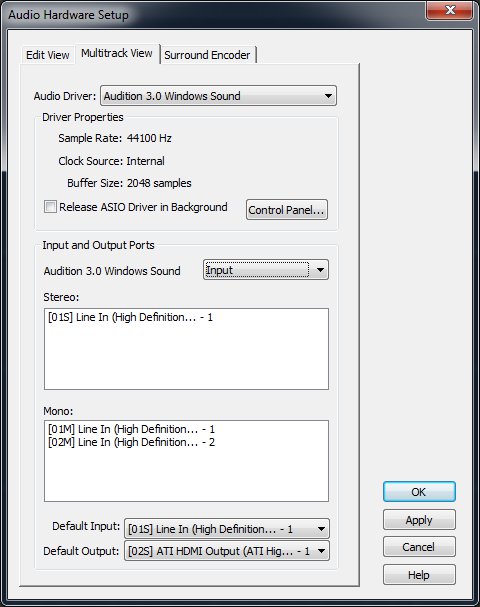
In the Multitrack view on track one where it has an arrow pointing to the right click the button (what it says may be different for you) and click "Audio Hardware Setup...".
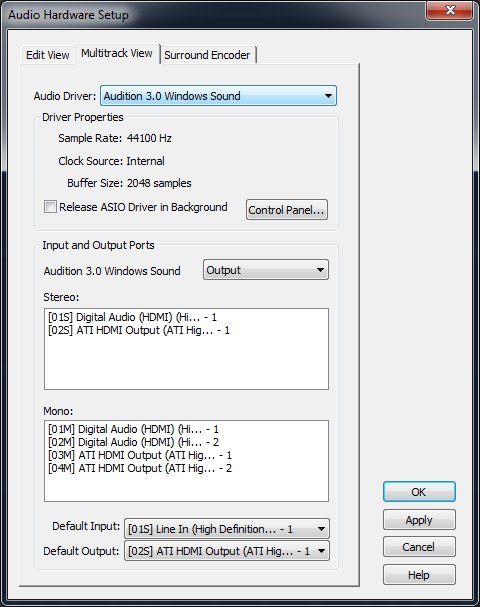
This should open up a the hardware setup dialog that defaults to the multitrack tab. Make sure down at the bottom where it says default input it says line in. It may say other stuff next to "line in" depending on your hardware setup. Click "OK" to save any changes might make.
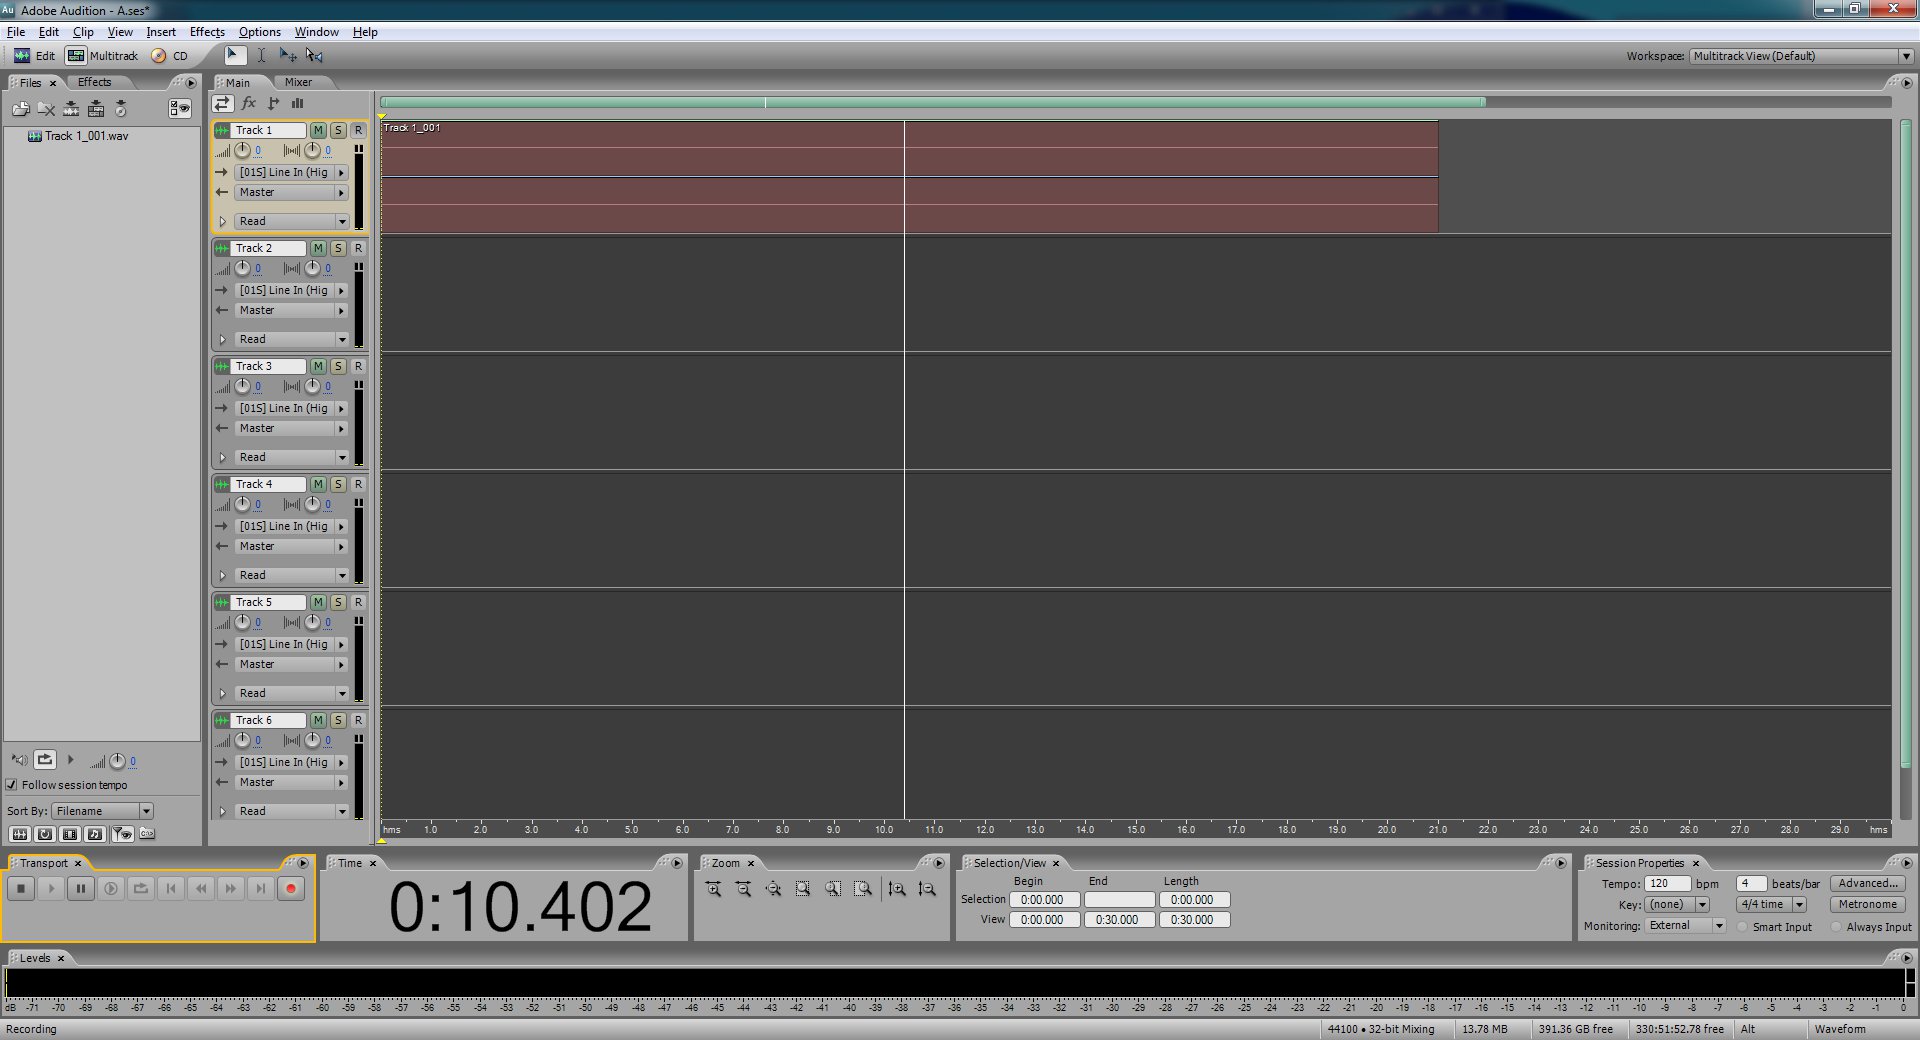
On track one click the "arm for record" button (the "R" button).
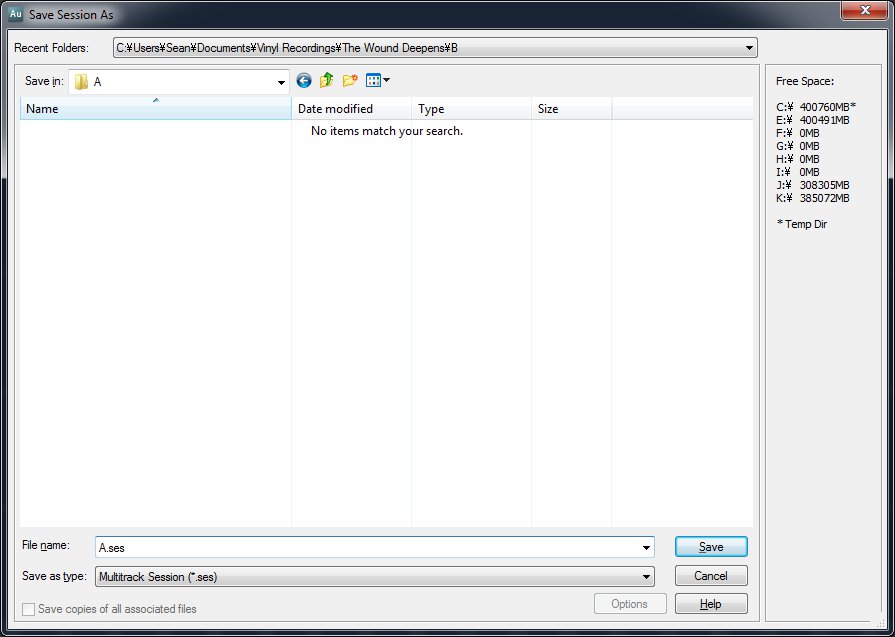
This will bring up the save session dialog. Save it wherever you want. I suggest you keep your sessions organized and named properly for your own sanity.
Make sure the input is set to stereo, not mono (unless you're recording an old mono record). You can switch this with the input button next to the right pointing arrow.
Now take out your record and give it the once over with the Swiffer. I like to do this because it gets any dust or hair off the record without scratching it. You don't have to do this if you're not comfortable with it, but it'll make it so there's less noise to clean up.
Put the needle on the record.
Click the record button down in the bottom left of Audition. It is very important that when you're recording you don't bump the record player or even the table or ground near it. I usually just carefully walk away and keep my distance while it's recording.
Let Audition record about ten or so seconds of silence with the needle just sitting there. You'll see why in a minute.
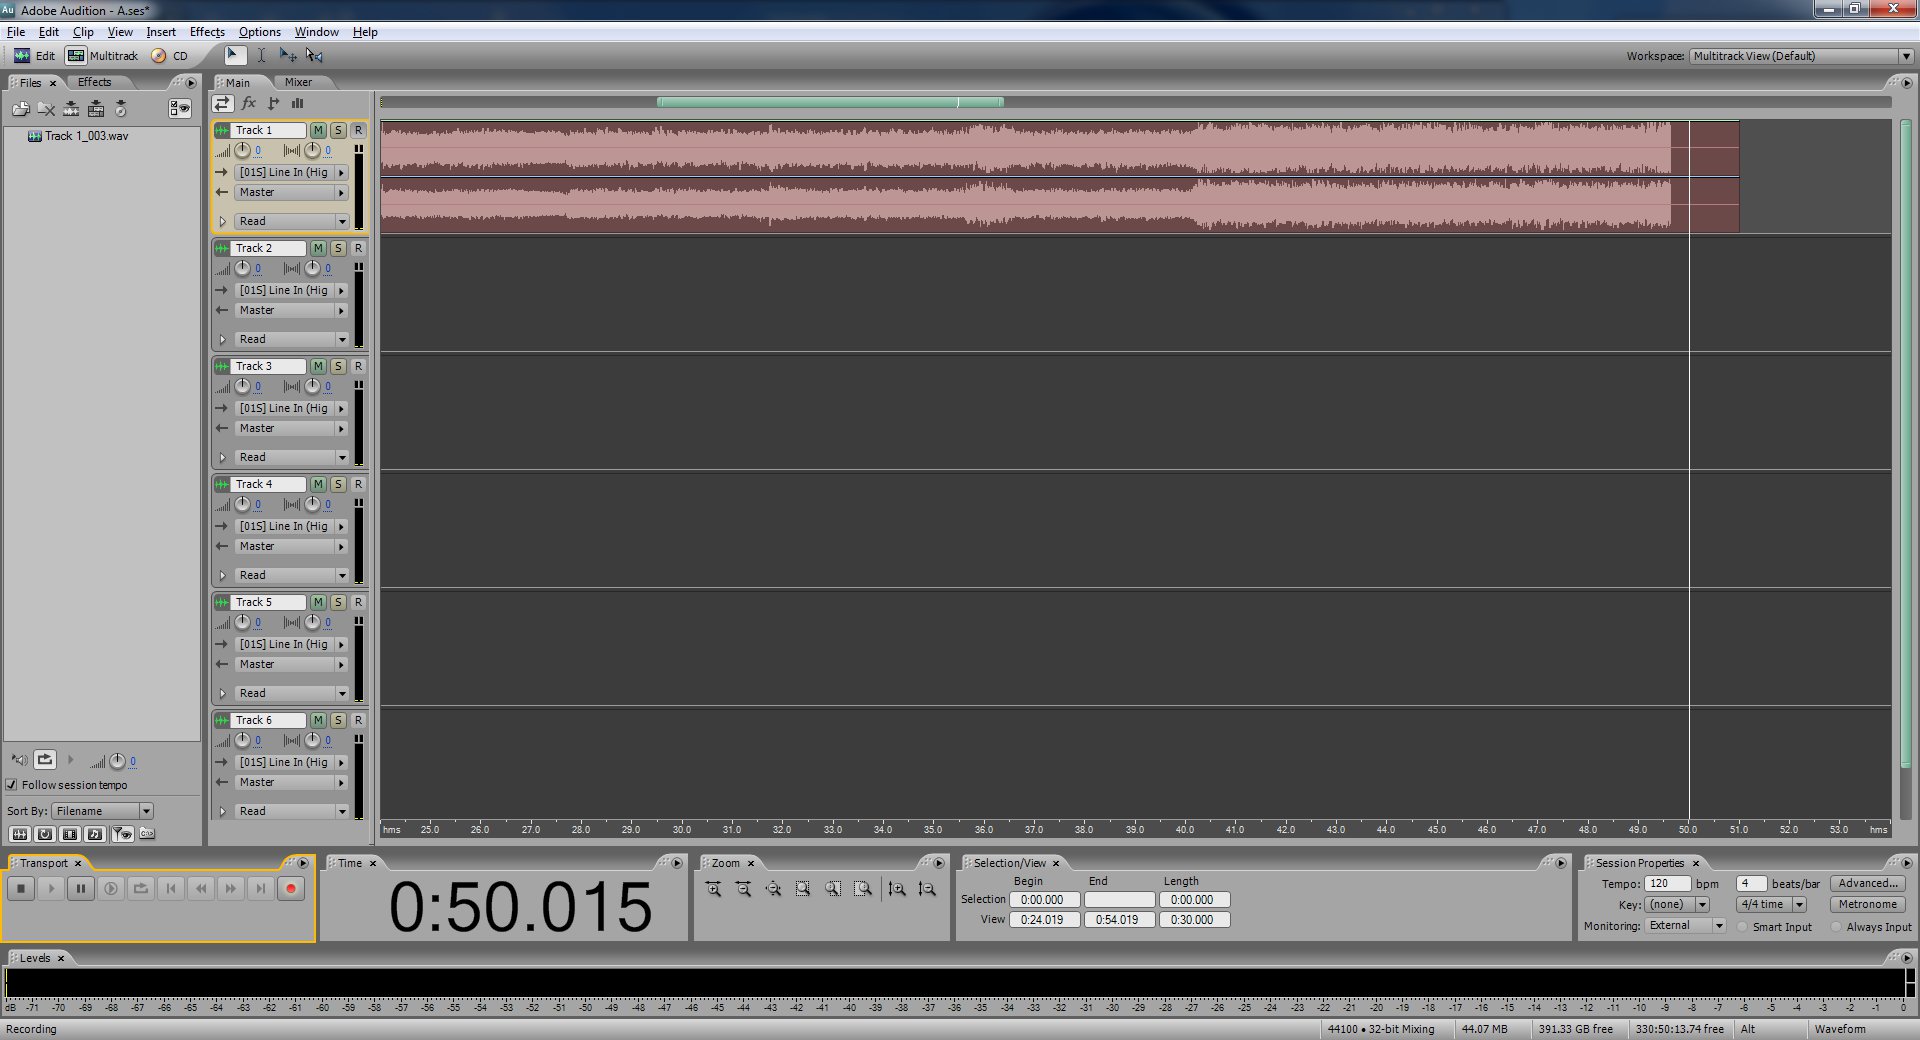
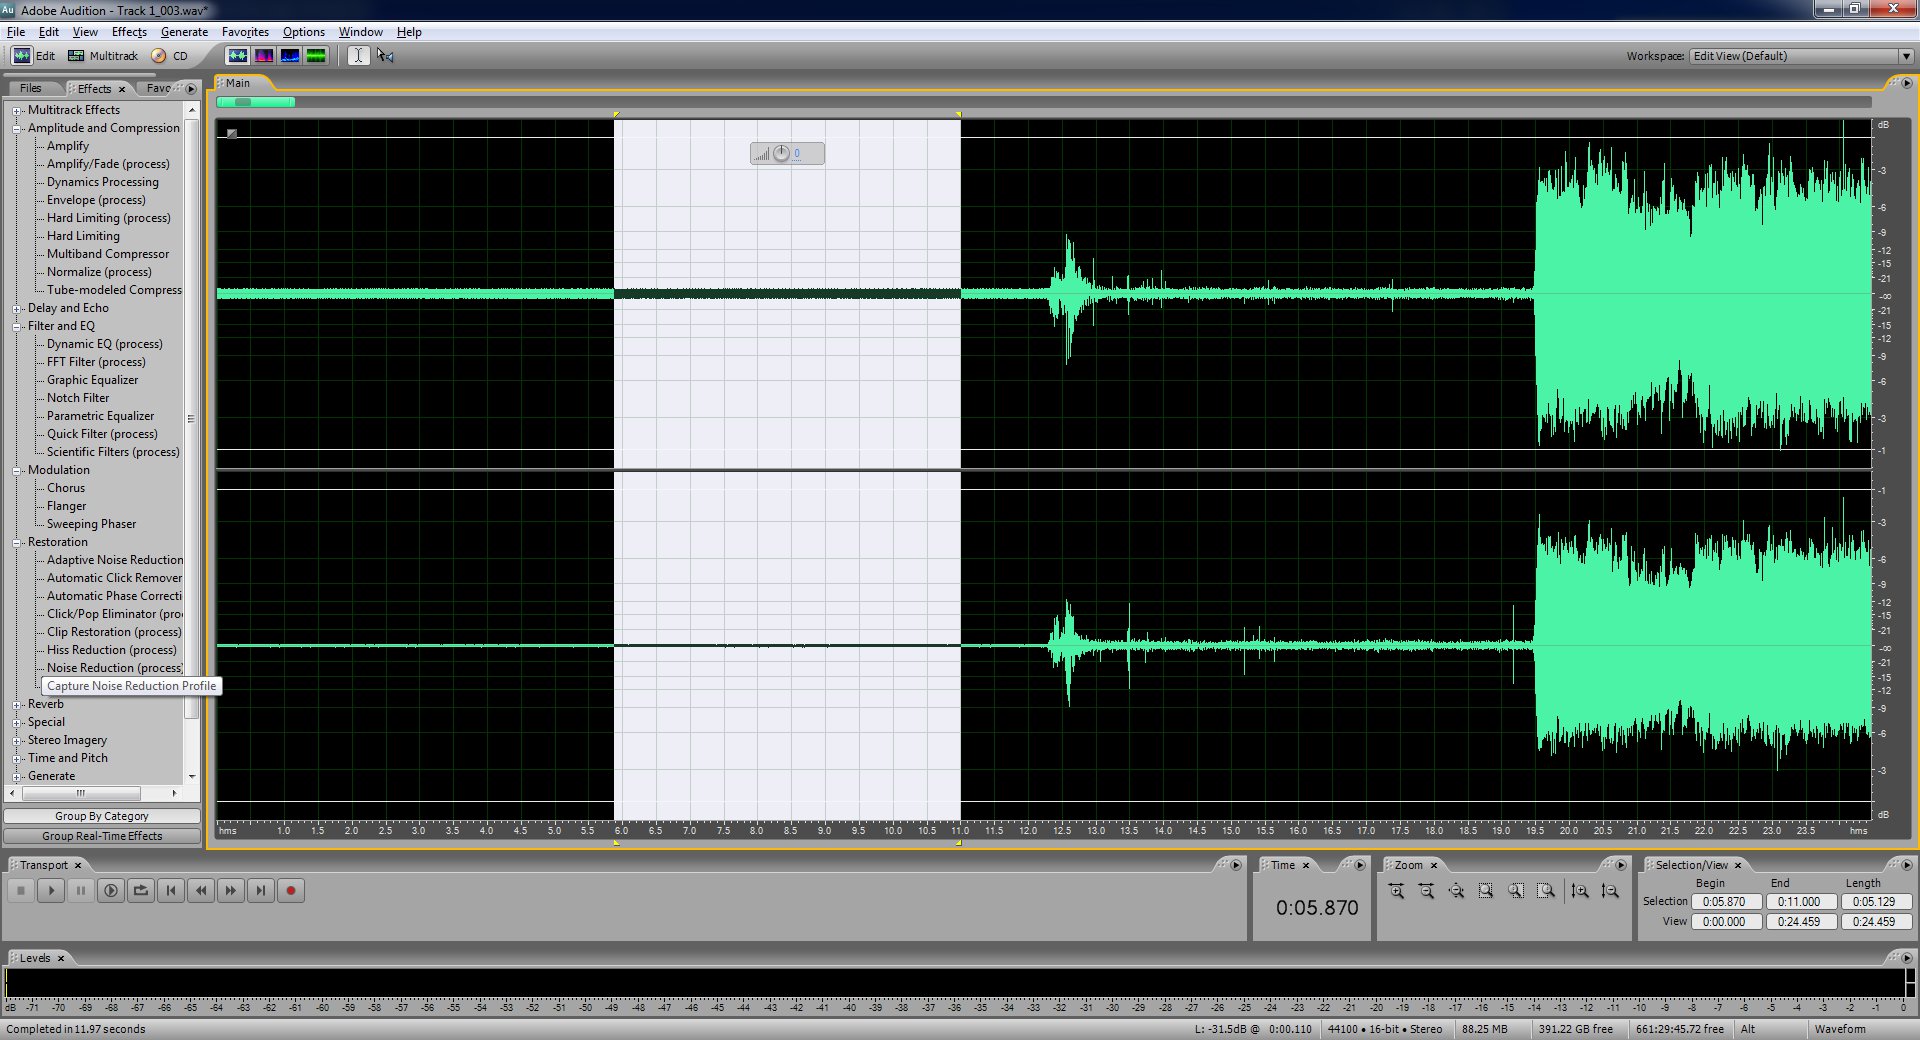
Now press play and let the record play till it's done. If while it's recording you see it constantly hitting 0dB or not getting close to 0dB at its peaks you should probably stop the recording and listen to what you've got to make sure the line in level is where it needs to be. If it's too loud and clips out or is too soft and can't be heard without increasing your speaker volume to the point where it makes lots of fuzzy noise then you'll want to adjust the line in level as needed. Sometimes I have to repeat this two or three times to get it right. If you take the time to do this now it'll mean your final result has a much better chance of sounding as good as it can.
This is what it looks like when the input level is too low.
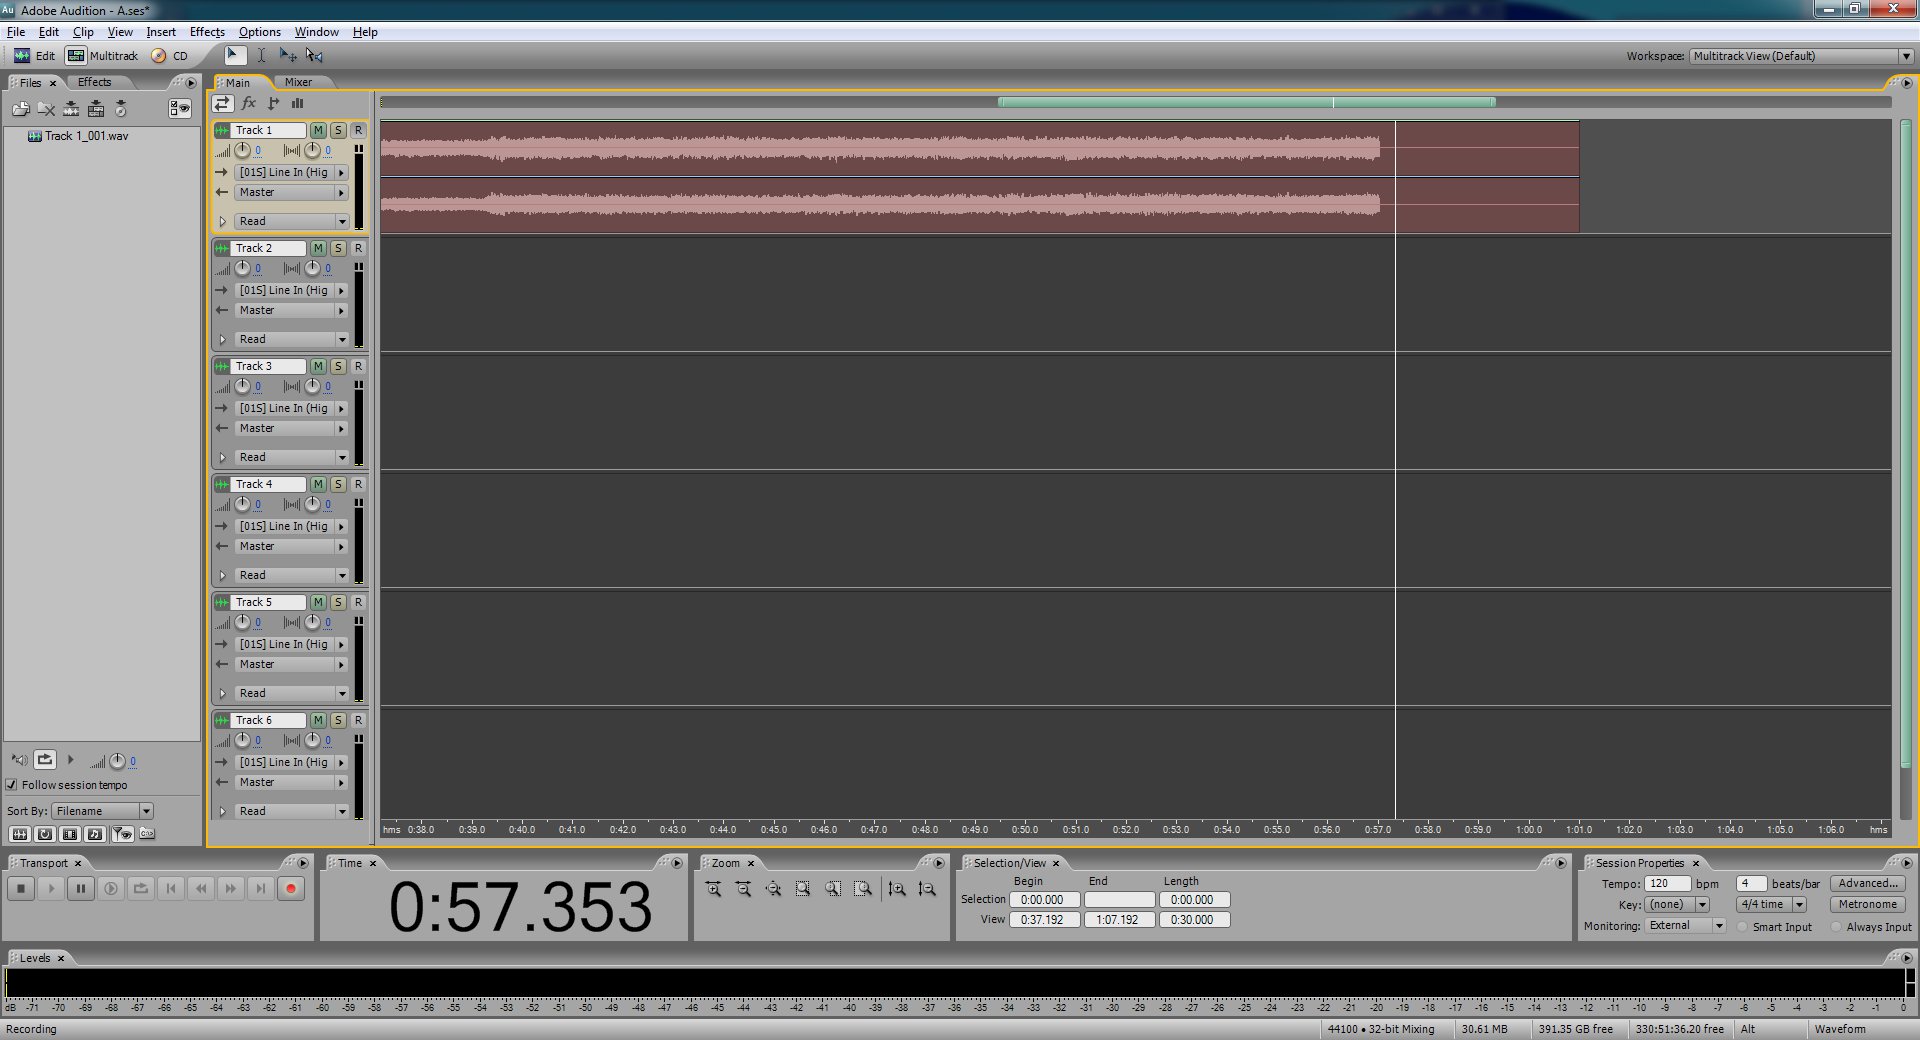
This is what it looks like when the input levels are just right.
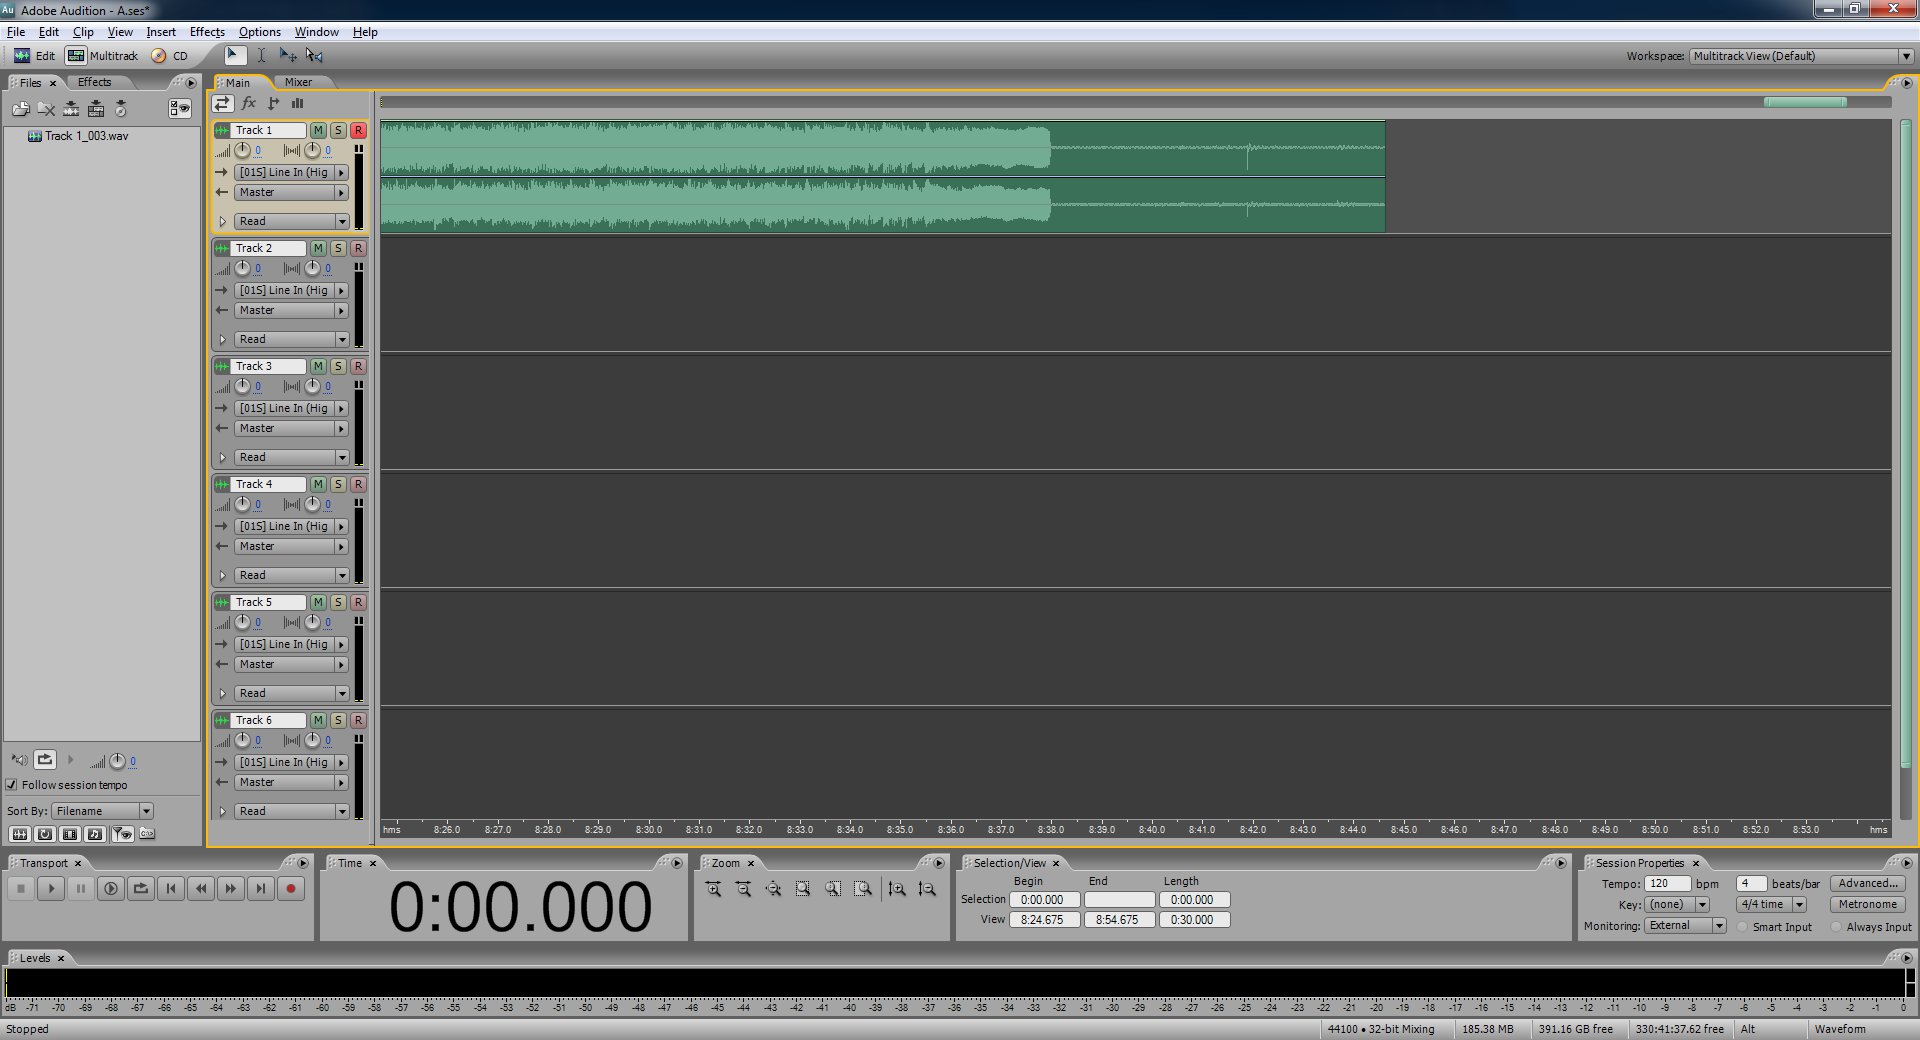
Stop your record player and stop recording in Audition.
Go to the Edit view.
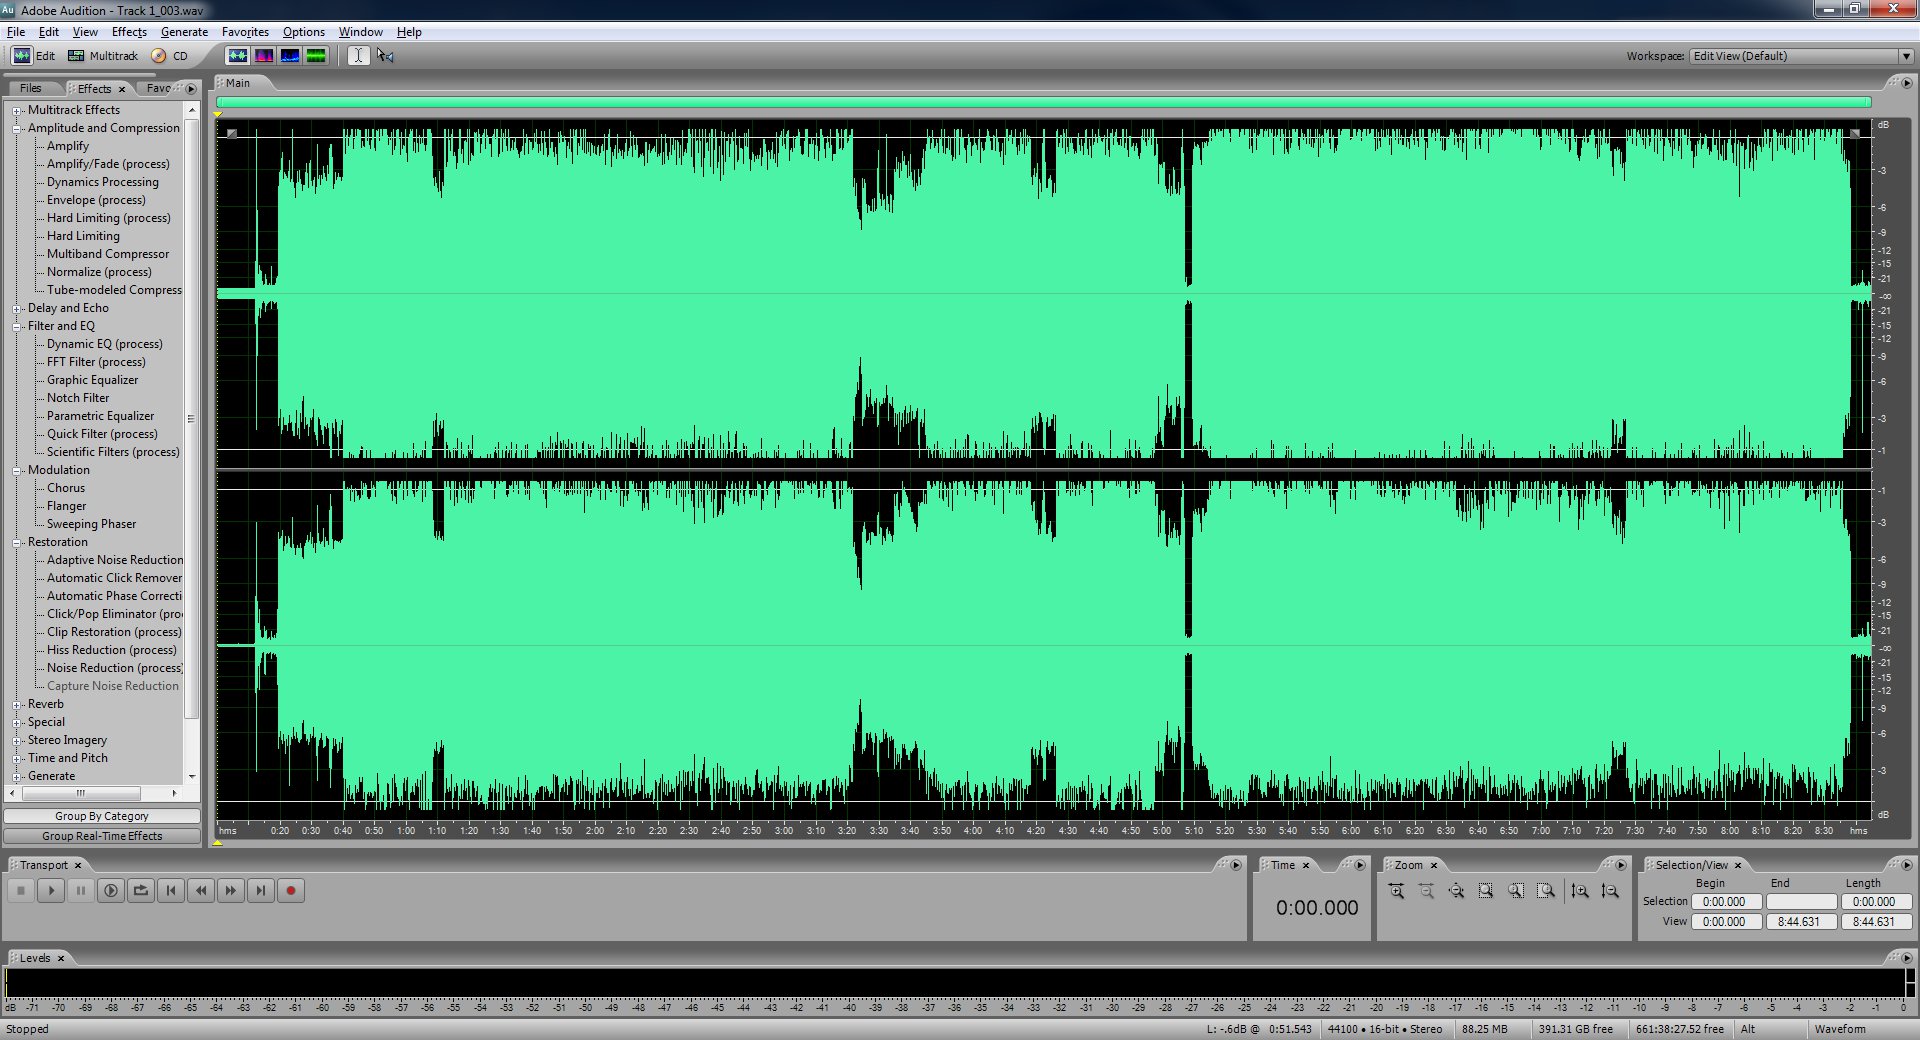
On the side you'll see three tabs, click the "Effects" tab.
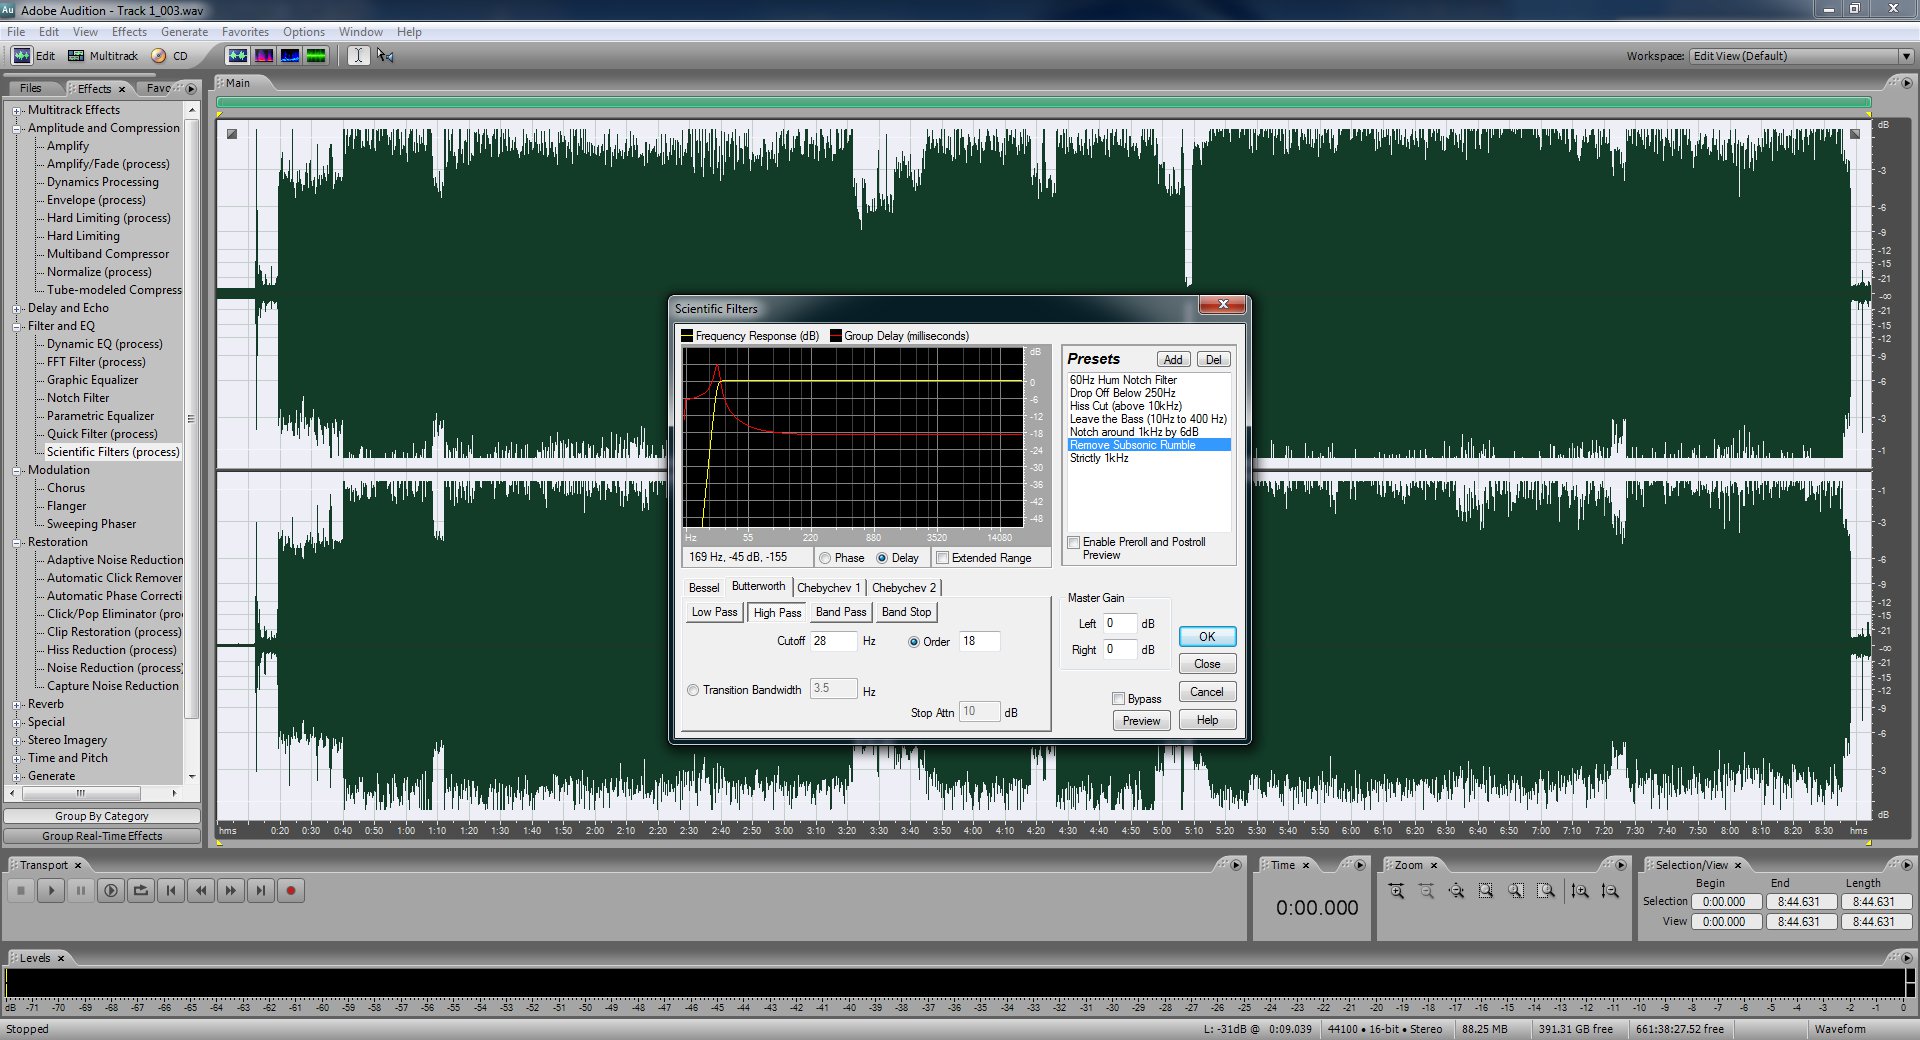
The first thing you'll always want to do is remove the subsonic hum. Every recording made through computer soundcards tends to have a 60 Hz hum that is just barely audible. Select the entire file (control + A). Under "Filter and EQ" double click "Scientific Filters (process)" and then "Remove Subsonic Rumble". Just click OK, you don't need to worry about the settings.
Now select about 4-5 seconds of the ten seconds of silence at the beginning of the recording. Try and get it somewhere in the middle and make sure it's flat with no bumps in the wavefrom. You can zoom with your mouses scrollwheel or with the slidebar on the top. Make sure to select both channels.
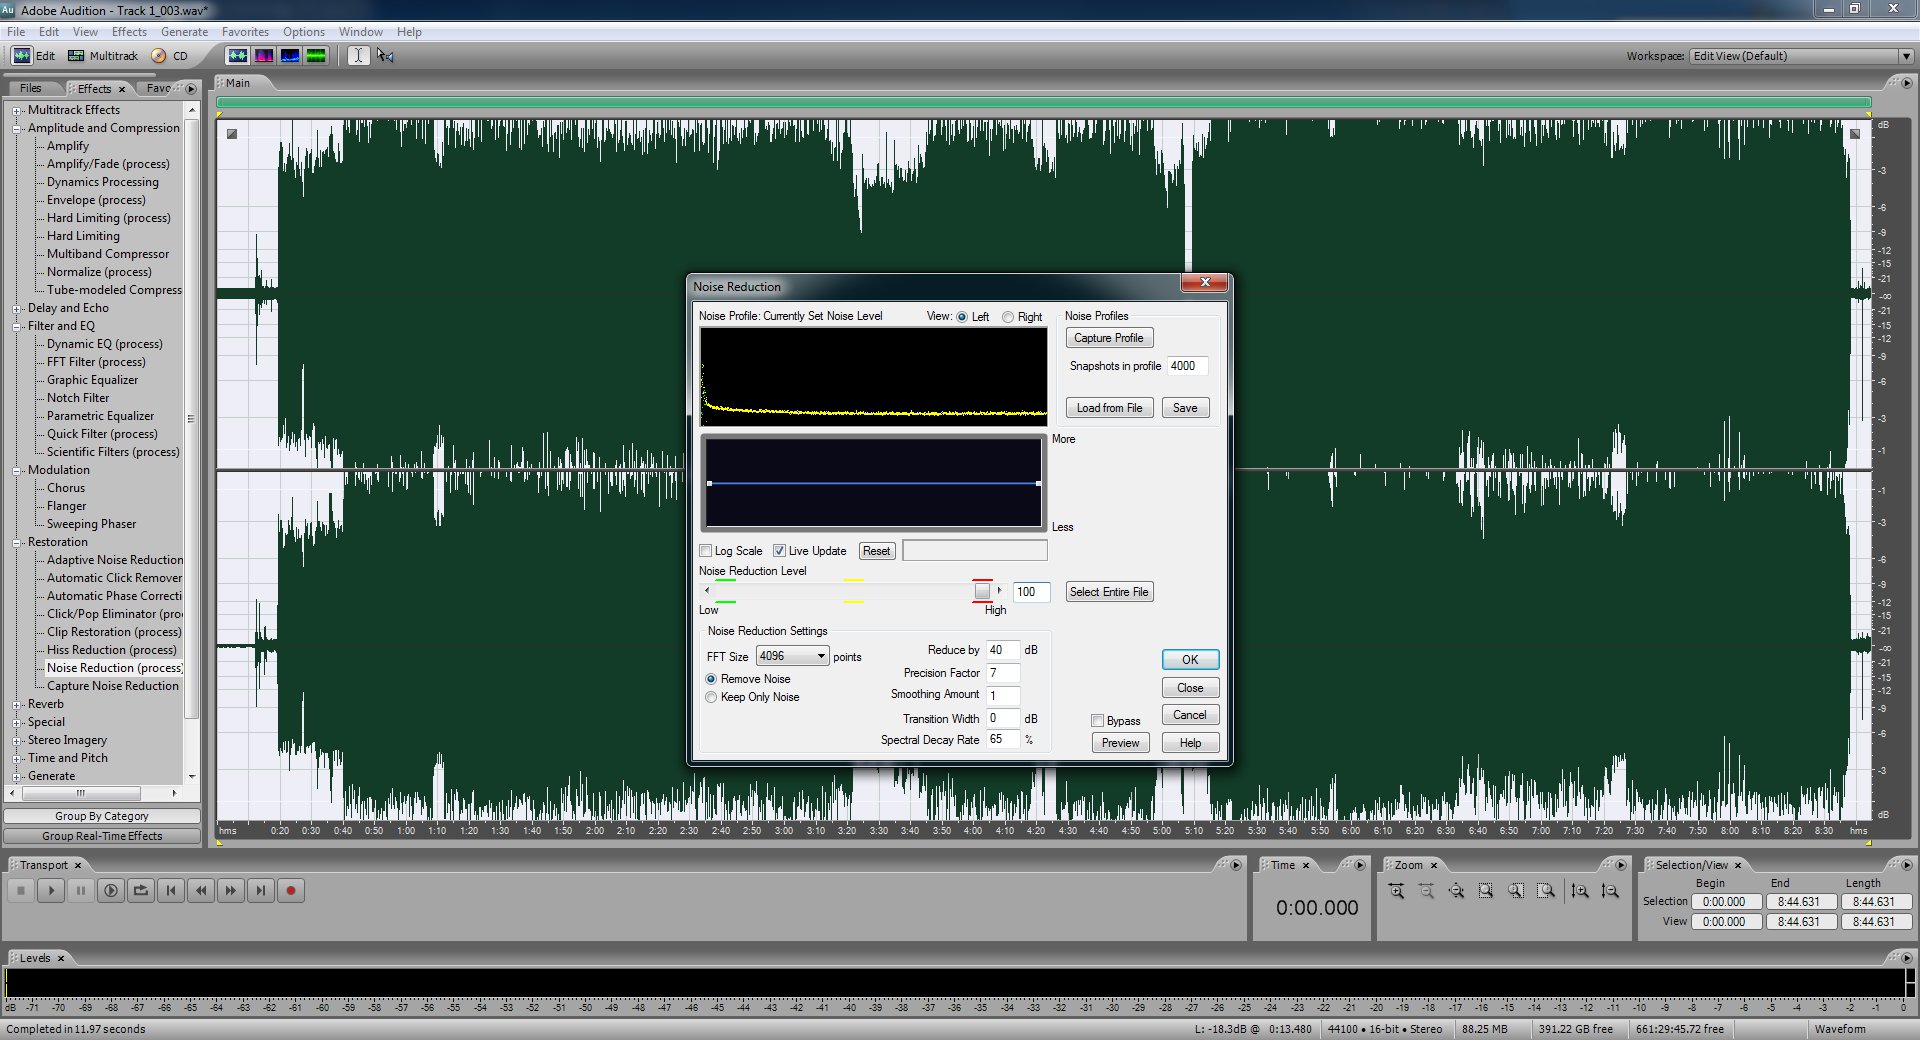
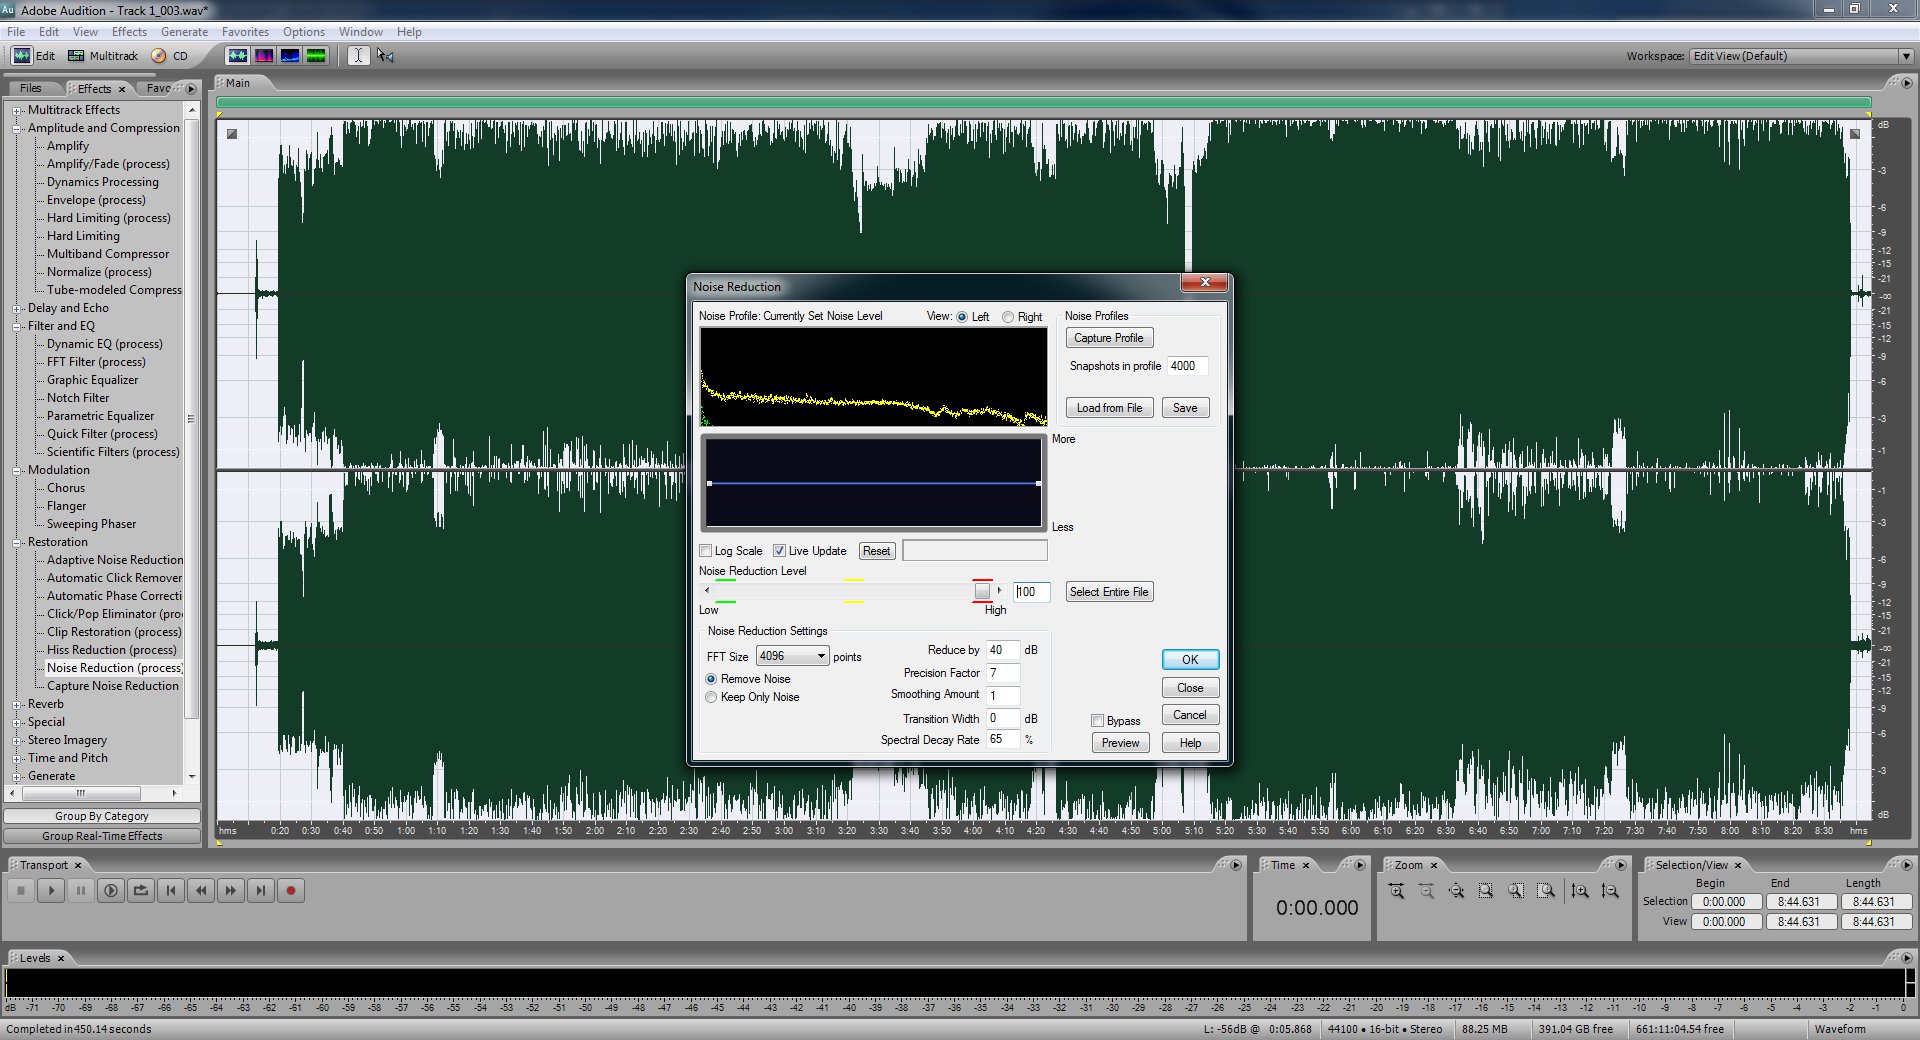
In the effects tab to the side under "Restoration" select "Capture Noise Reduction Profile". This will use the area we selected as the noise for the next step.
Select the entire file again and use the "Noise Reduction (process)" filter. I like to just leave the noise reduction level at 100%. You might want to change it if your setup isn't producing any appreciable noise. It probably is though. The other numbers you should probably just leave at the defaults. The reason we've just done this is because there is always a small amount of noise that comes just from the needle making contact with the record. This removes that noise so we can begin removing other noises caused during playback with greater accuracy.
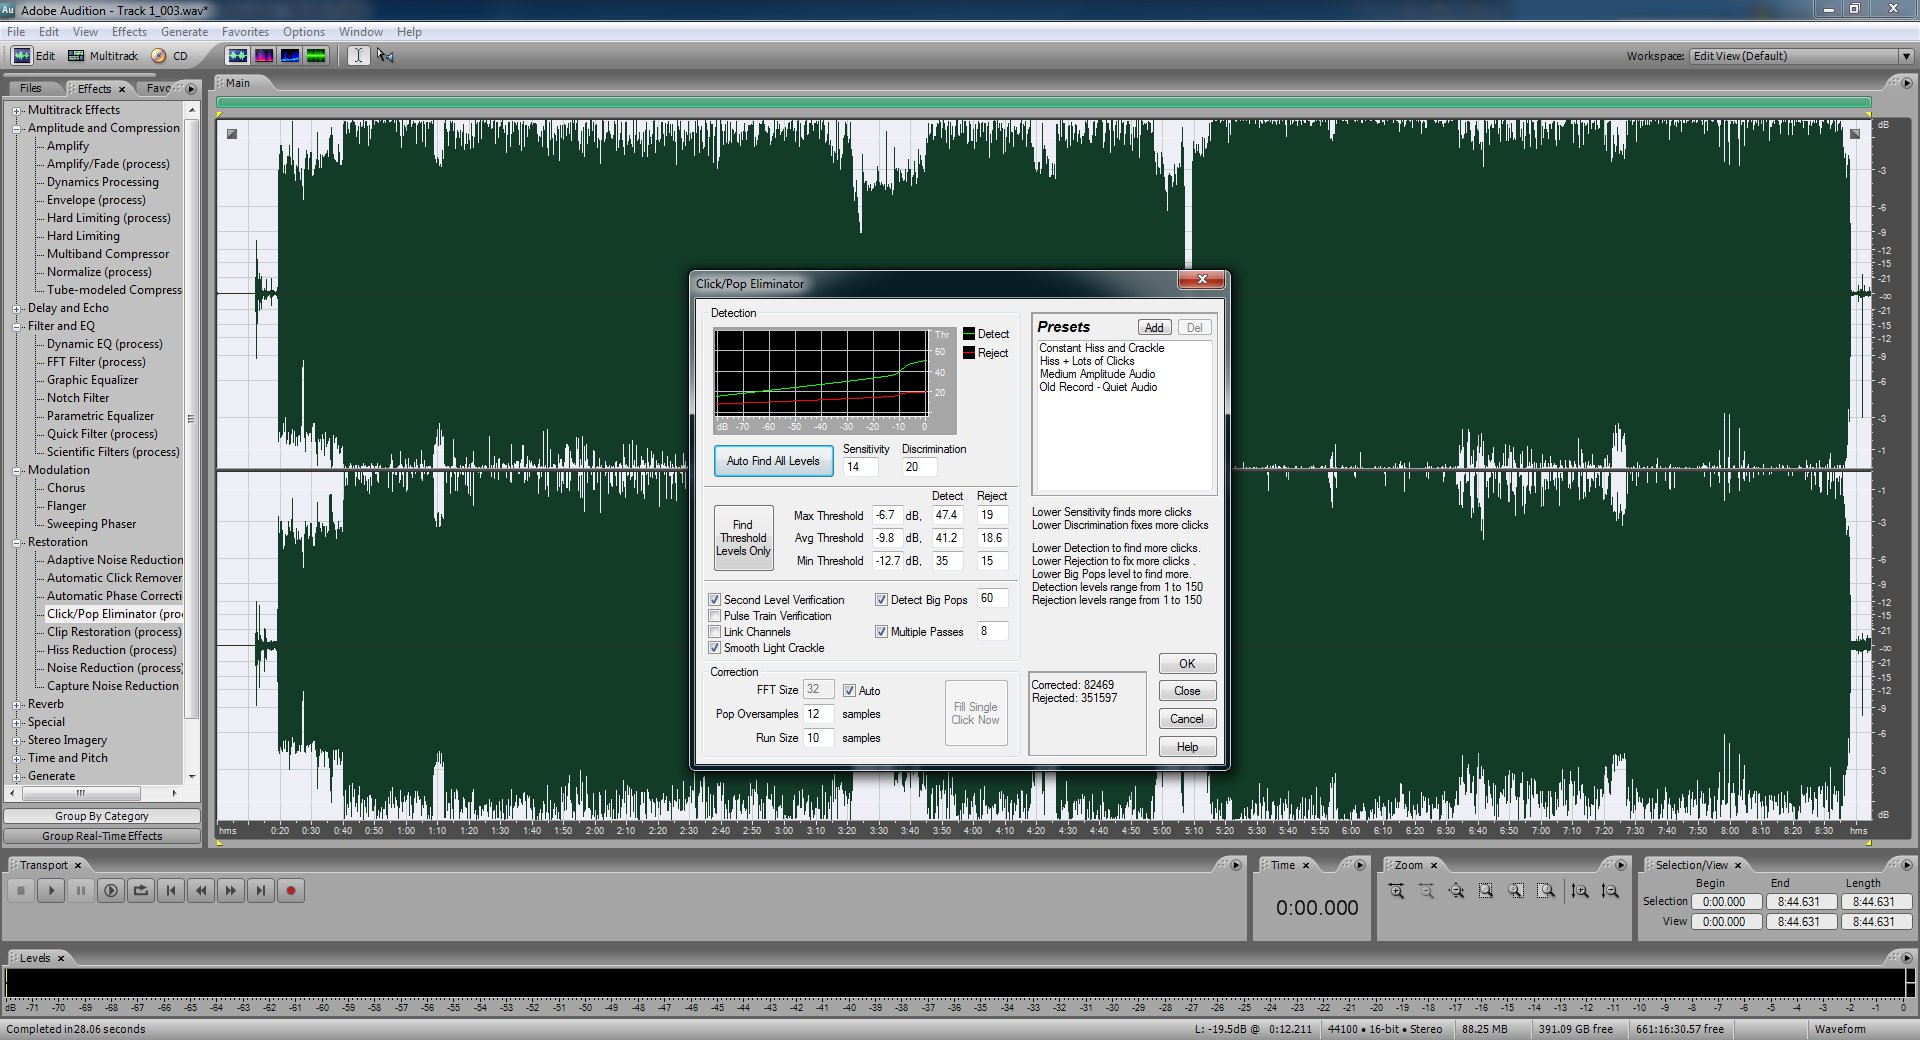
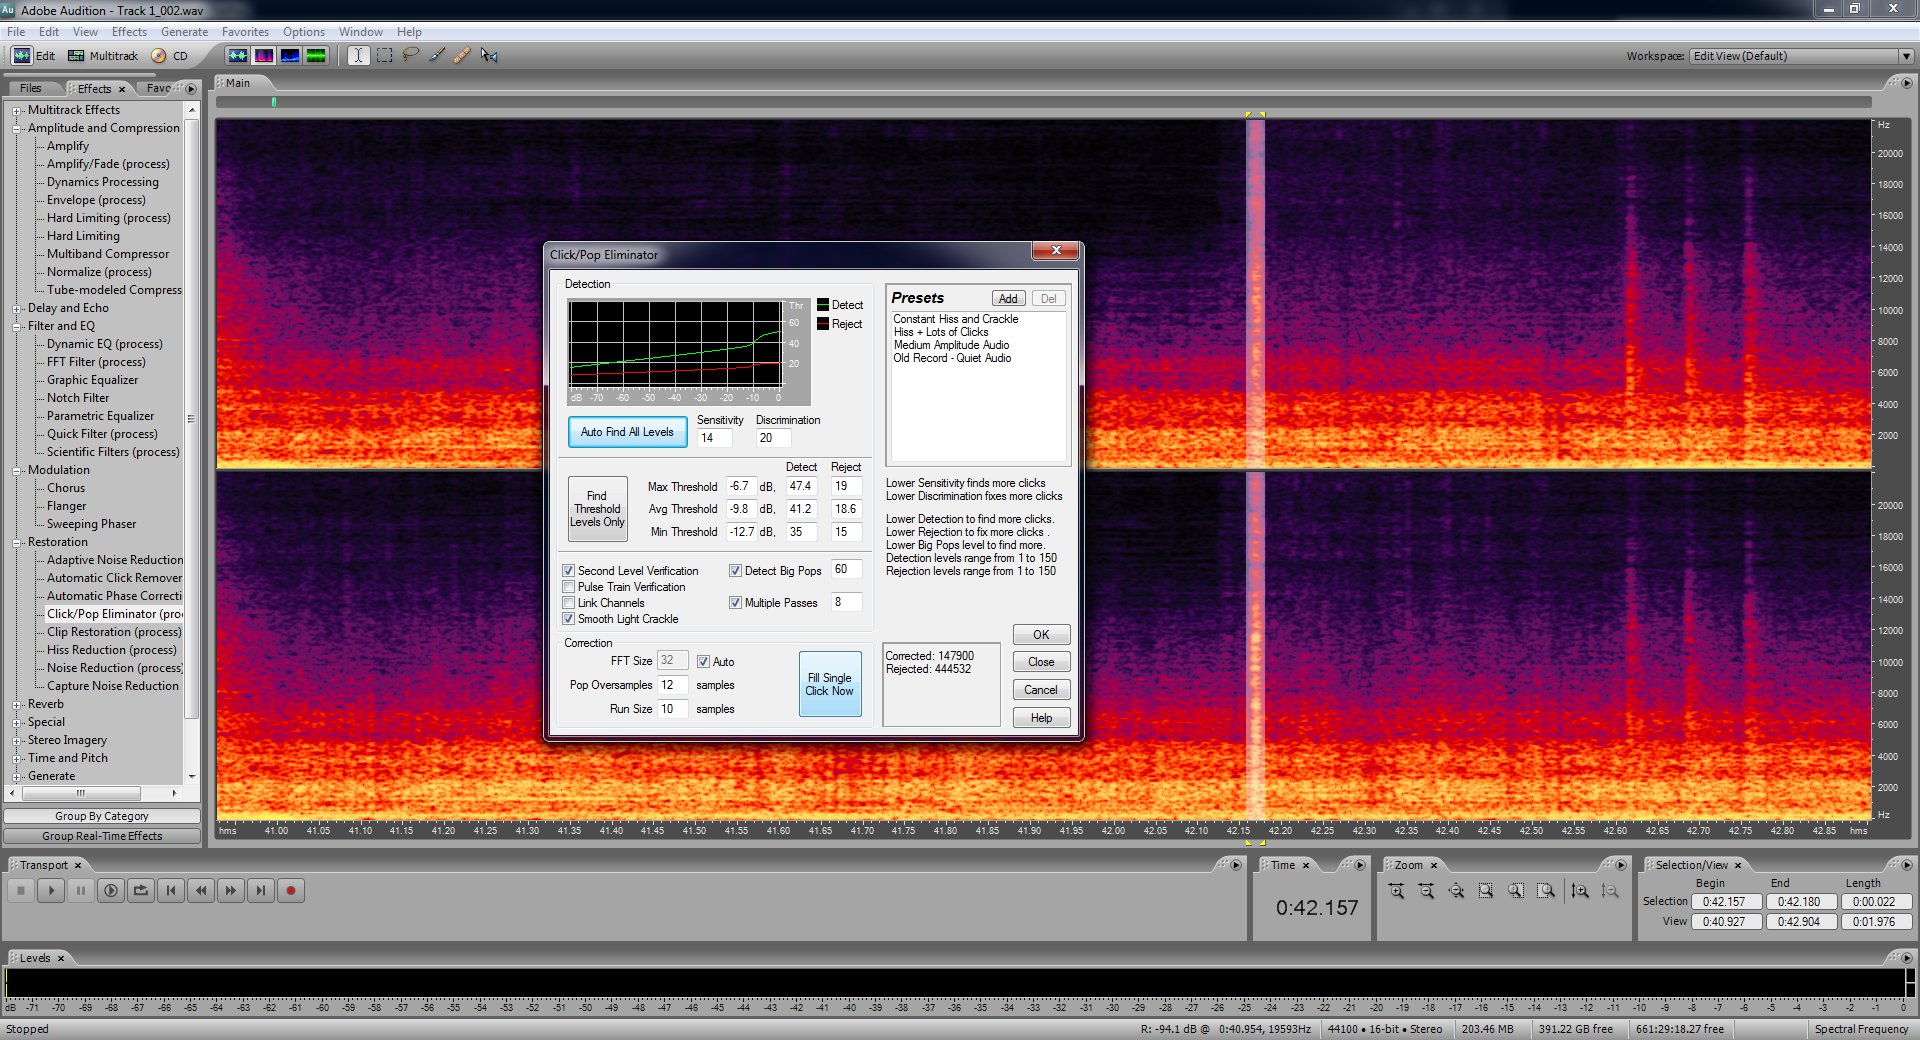
Next, make sure the whole file is still selected and then use the "Click/Pop Eliminator (process)" filter. This one will take a while so be prepared to wait. First click the "Auto Find All Levels" button. The filter will then scan the file and determine the loudness levels and thresholds for the pops and clicks. You could do this manually but you won't do as good of a job as the algorithm, trust me. When it's done click OK and wait for it to finish.
Now towards the beginning of the file, after the silence, and after the point where you pressed the play button on the record player there should be another bit of near silence before the music starts. Switch to the spectral frequency display (there should be 4 view modes at the top, it's the second one, see three paragraphs ahead for more on what this view means) so that you can see where to begins and ends. Zoom in if you have to. Select a few seconds of this spot, you might only be able to get one or two. Then capture the noise reduction profile again and then use the noise reduction filter again.
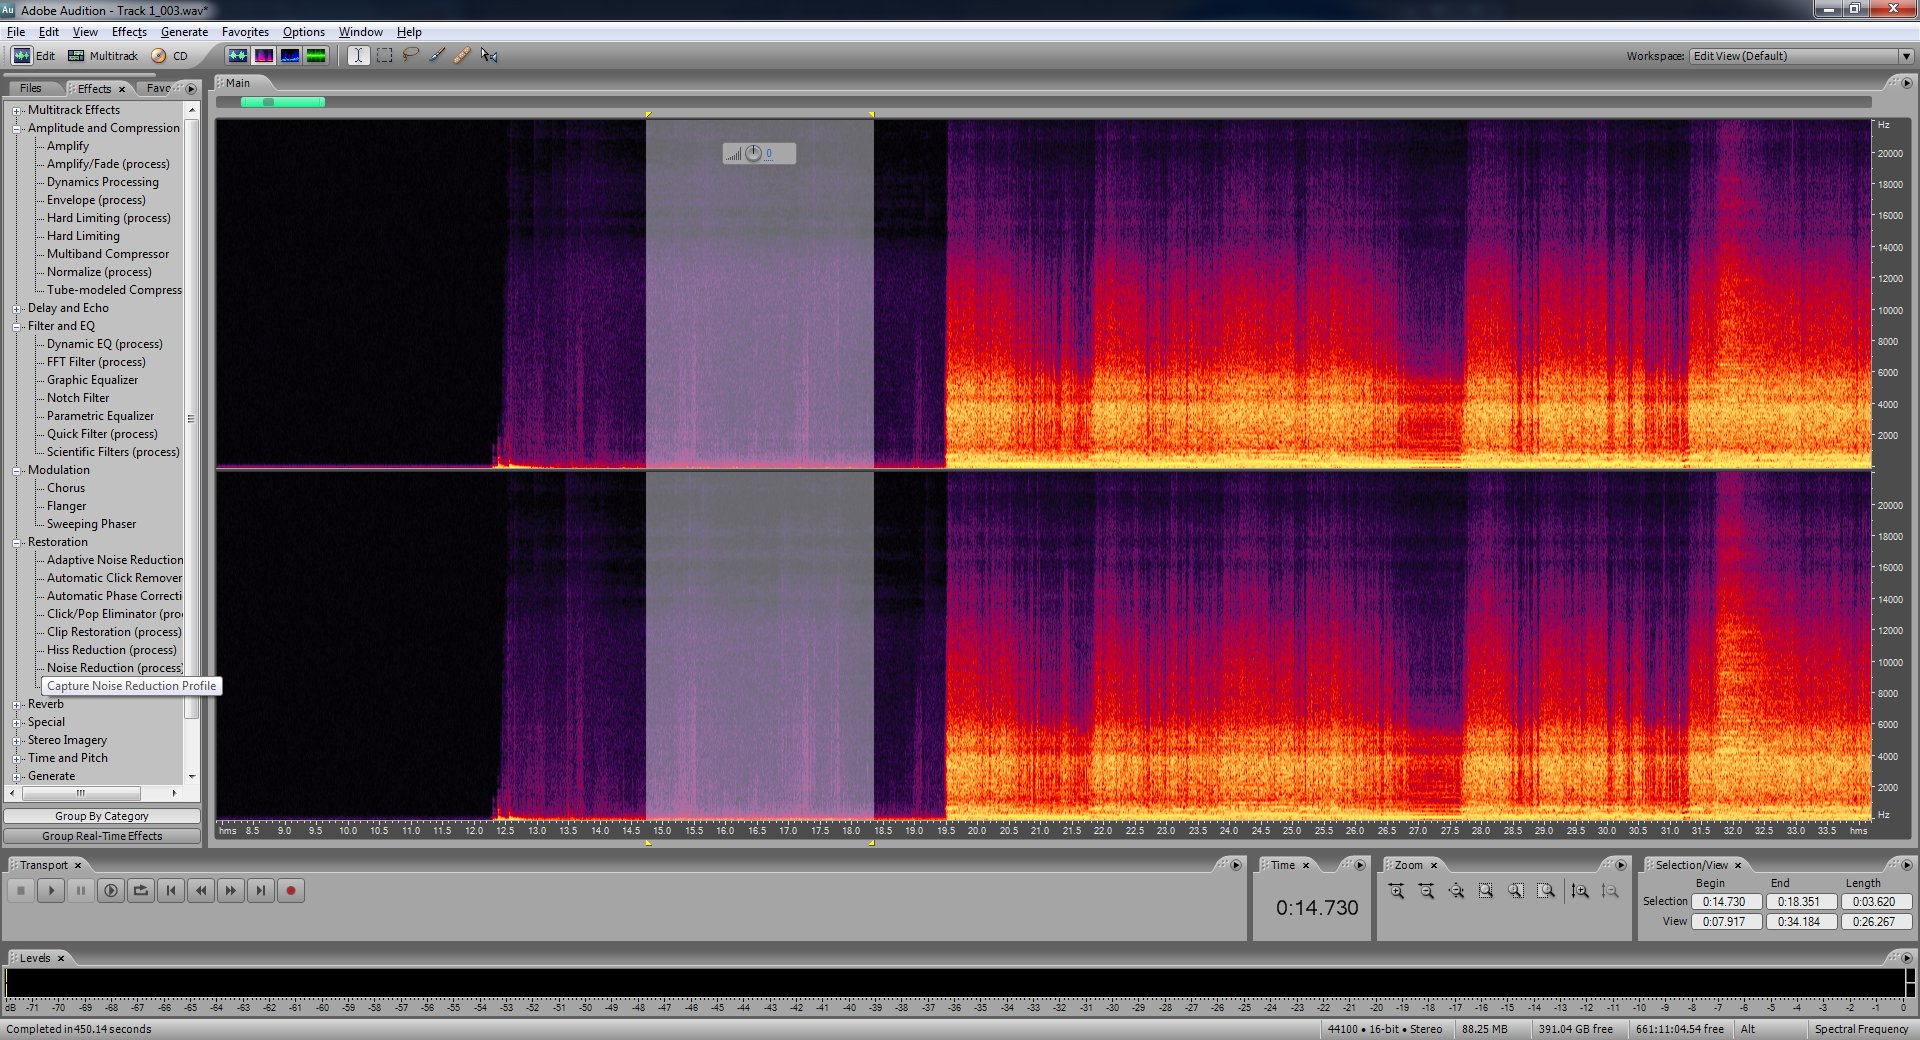
Notice how the noise reduction profile looks slightly different this time. This is because this noise is from the actual motion of the needle across the recod. We've already removed the noise that comes from just having the needle in contact with something. Other than the usual pops and clicks this is what causes most of that record player noise. So it is absolutely crucial we remove this.
At this point you're almost done cleaning up the audio. This is typically where I give things a listen to make sure it turned out good. If the sound level is giving you problems then start over from the point where you begin recording the record.
If you notice any more pops and clicks select the whole file again and run the pop/click eliminator filter one more time.
This next part is long and not always necessary. In fact I've only had to really do it for a handful of records that were all old and scratched.
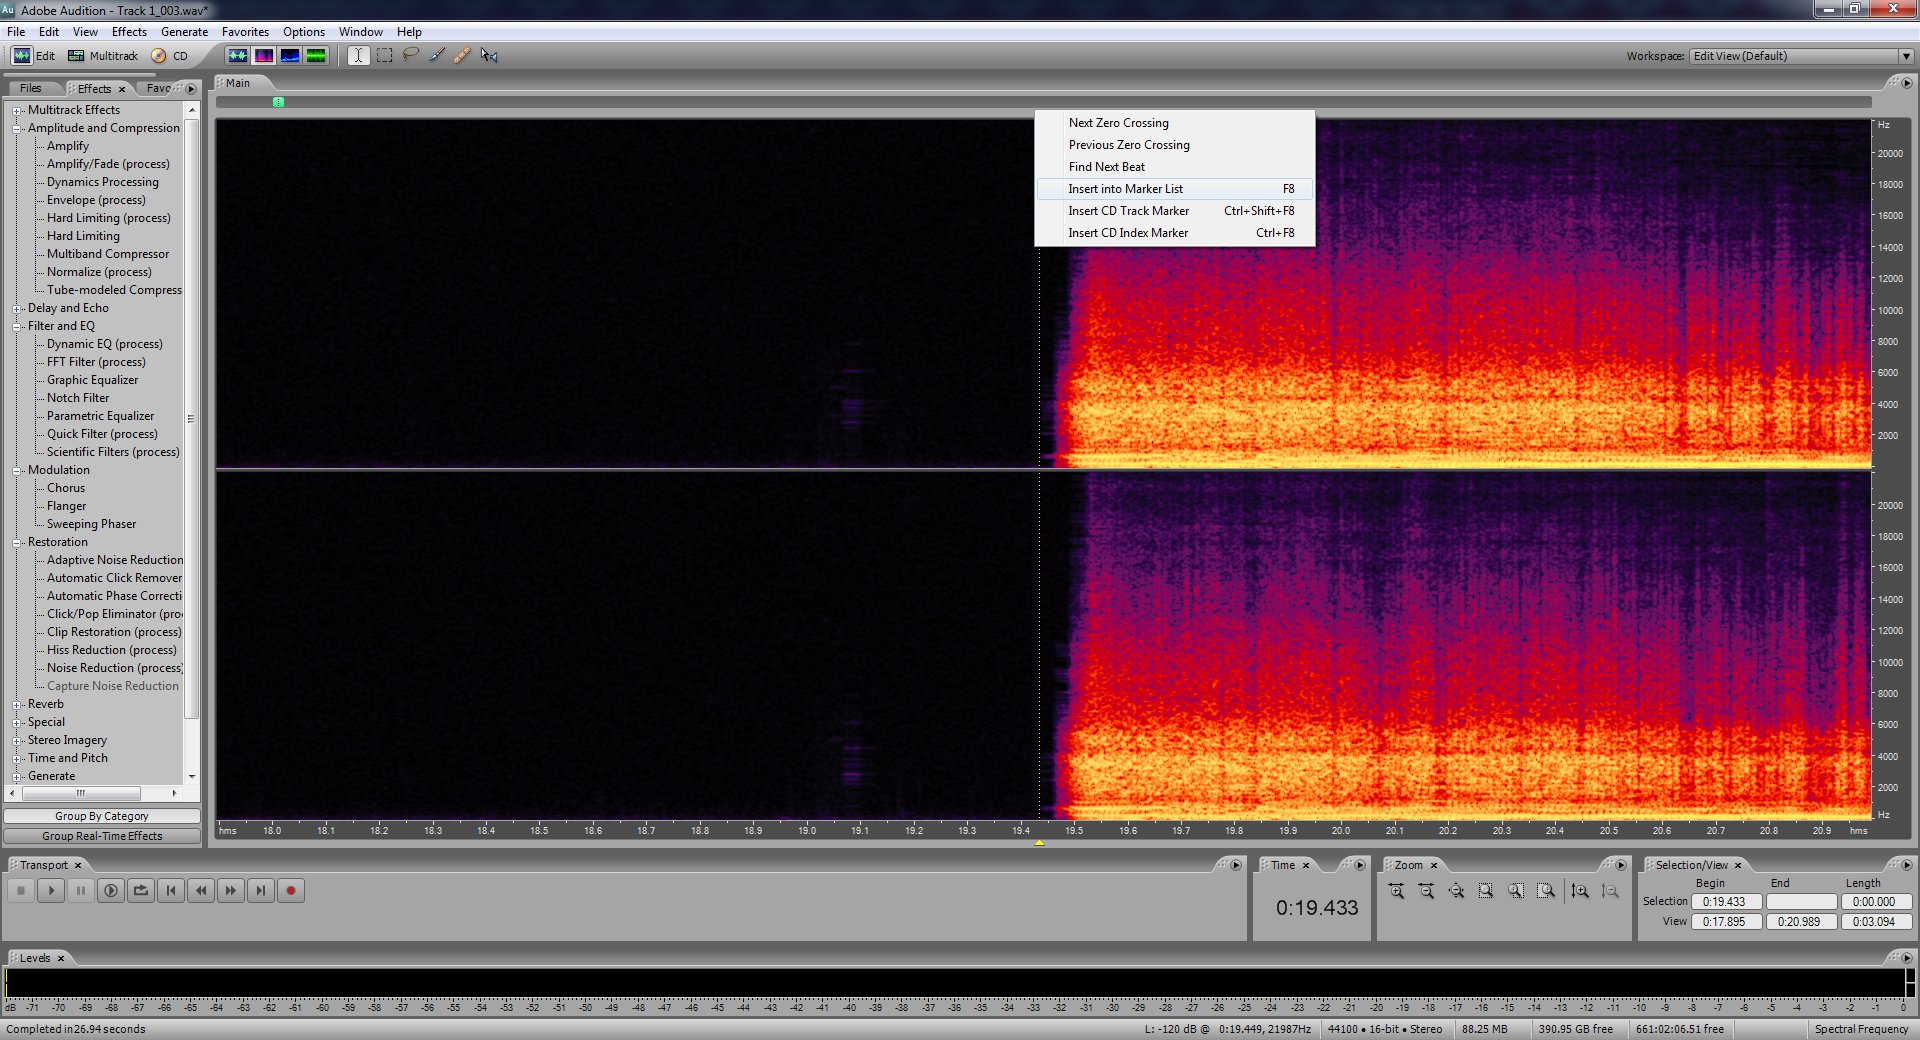
If you're still getting pops and clicks during when you play the audio I suggest switching it over the the spectral frequency display and watching it as you listen to the audio. Pops and clicks typically appear as bright yellow/red lines across all frequency levels. The bright vertical line immediately after the cursor is a rather nasty pop that the automatic remover just can't seem to get.
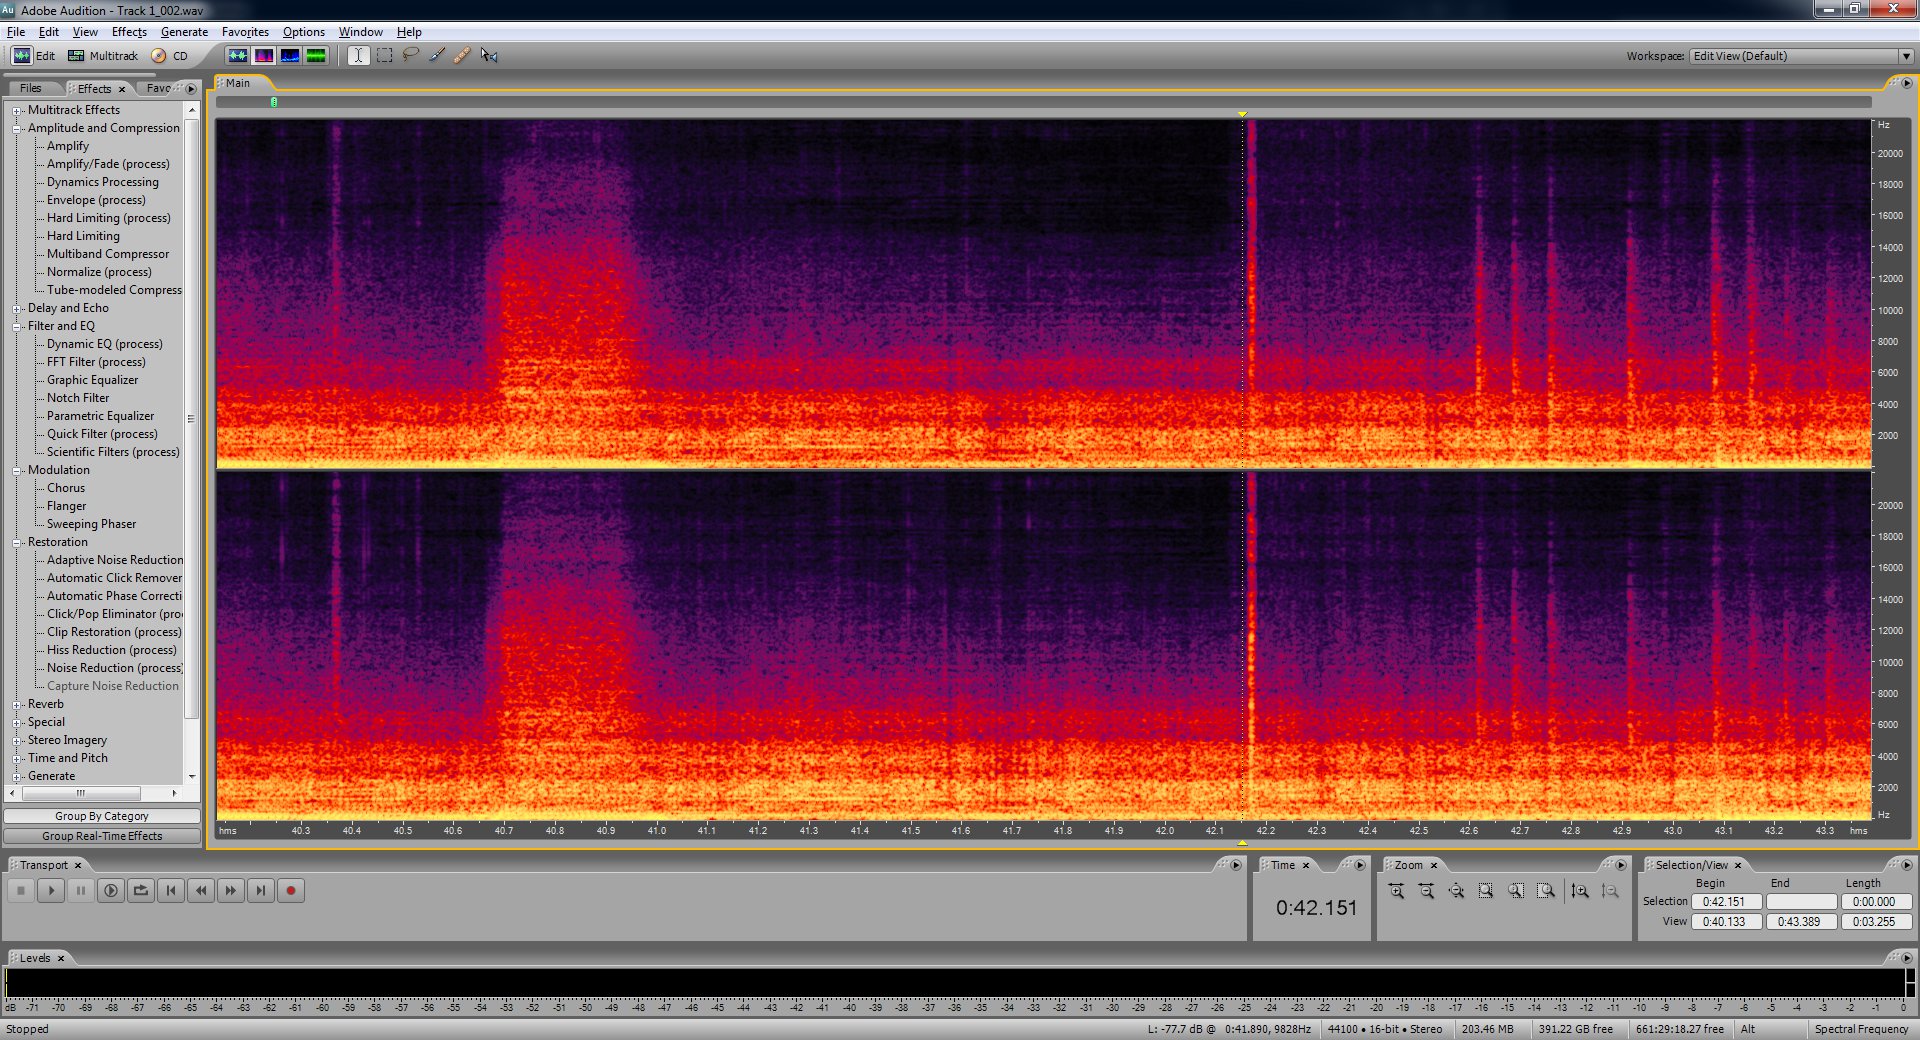
This view shows you amplitude of frequency over time. Time on the x-axis and frequency on the y-axis with amplitude on a color-based z-axis. The closer the color is to yellow the higher the amplitude. Black/purple is very faint noise and bright red/orange/yellow is very loud noise. Pops and clicks tend to stand out because you'll see most noises fading off well before reaching 24 KHz but they will be loud throughout all frequency ranges. Sometimes drum beats can appear the same way but if you're listening to the music while you're watching the display it'll usually be obvious where the troublesome pop or click is.
Once you identify the affected area select it carefully and then run the pop/click eliminator filter. Instead of clicking OK click the "Fill Single Click Now" button.
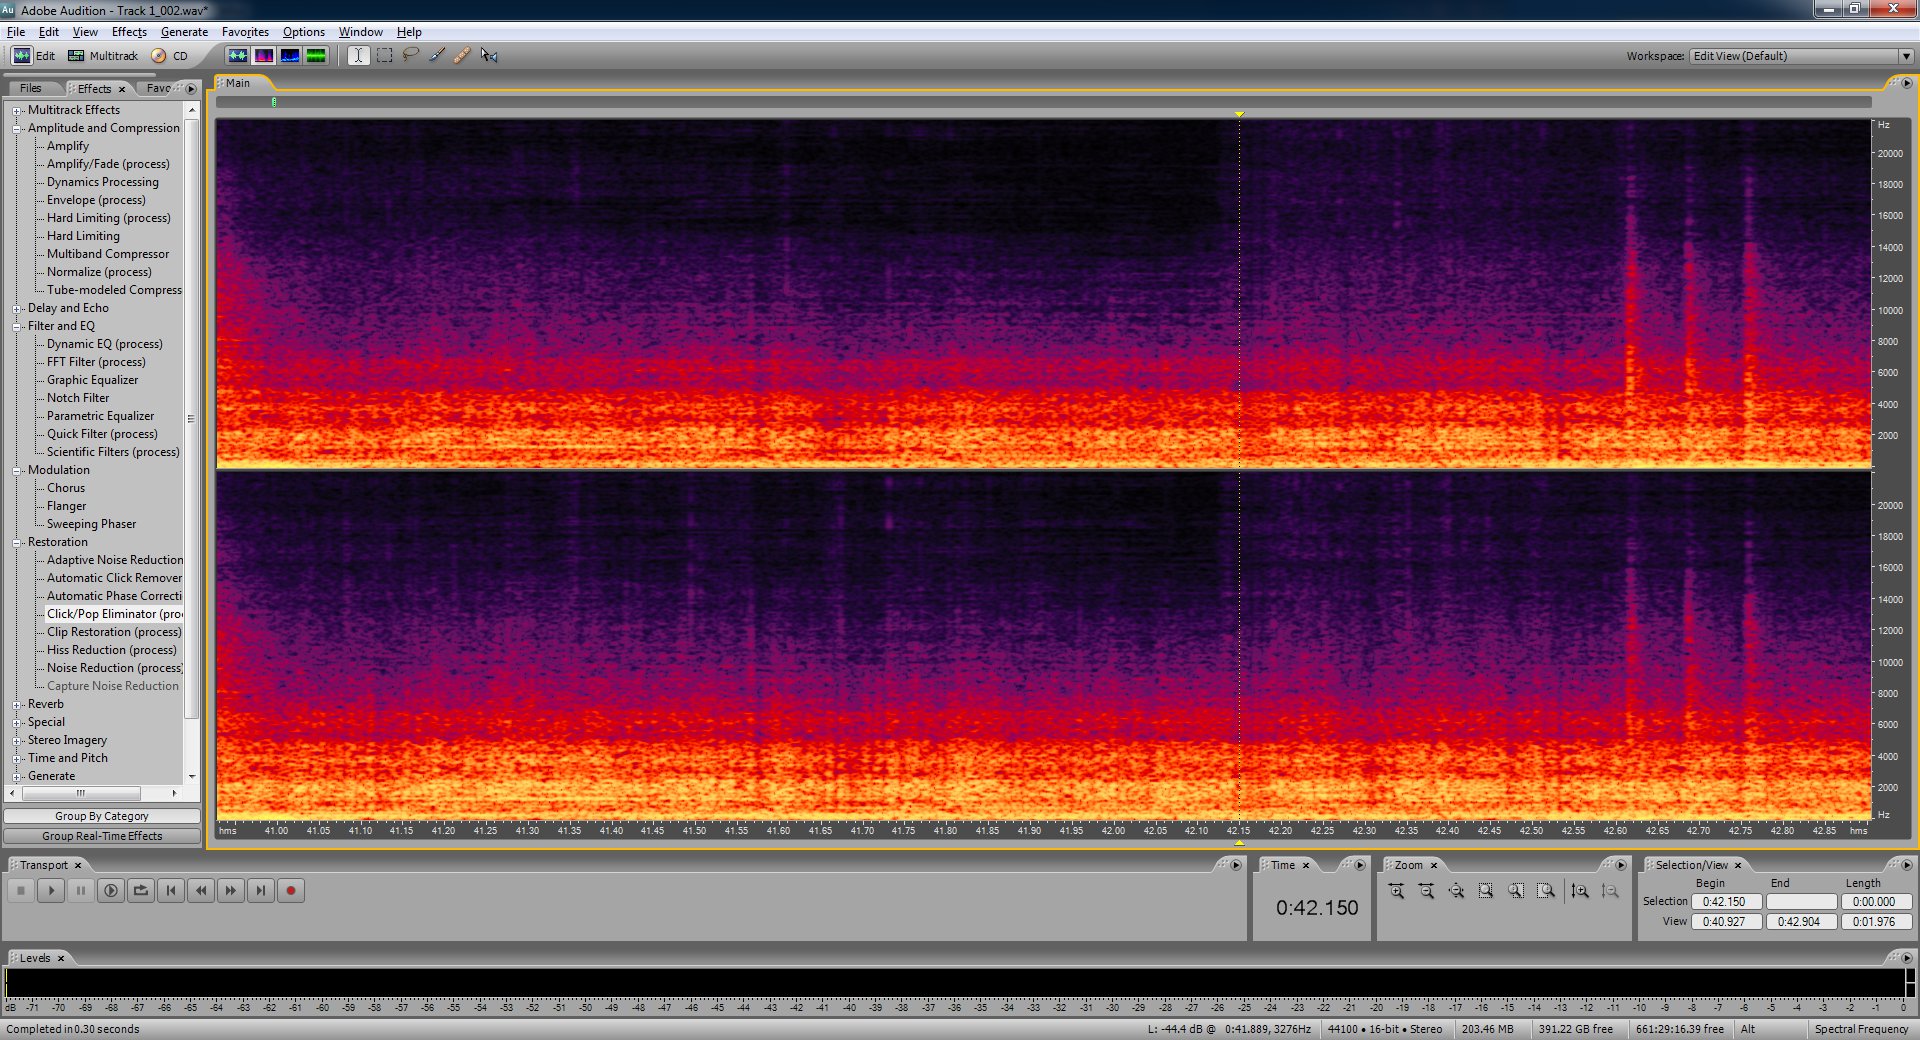
This will repair the pop or click. If there's a lot of them this can be tedious. But it is necessary for making old records sound like new. So repeat this for ever audible pop or click that still remains.
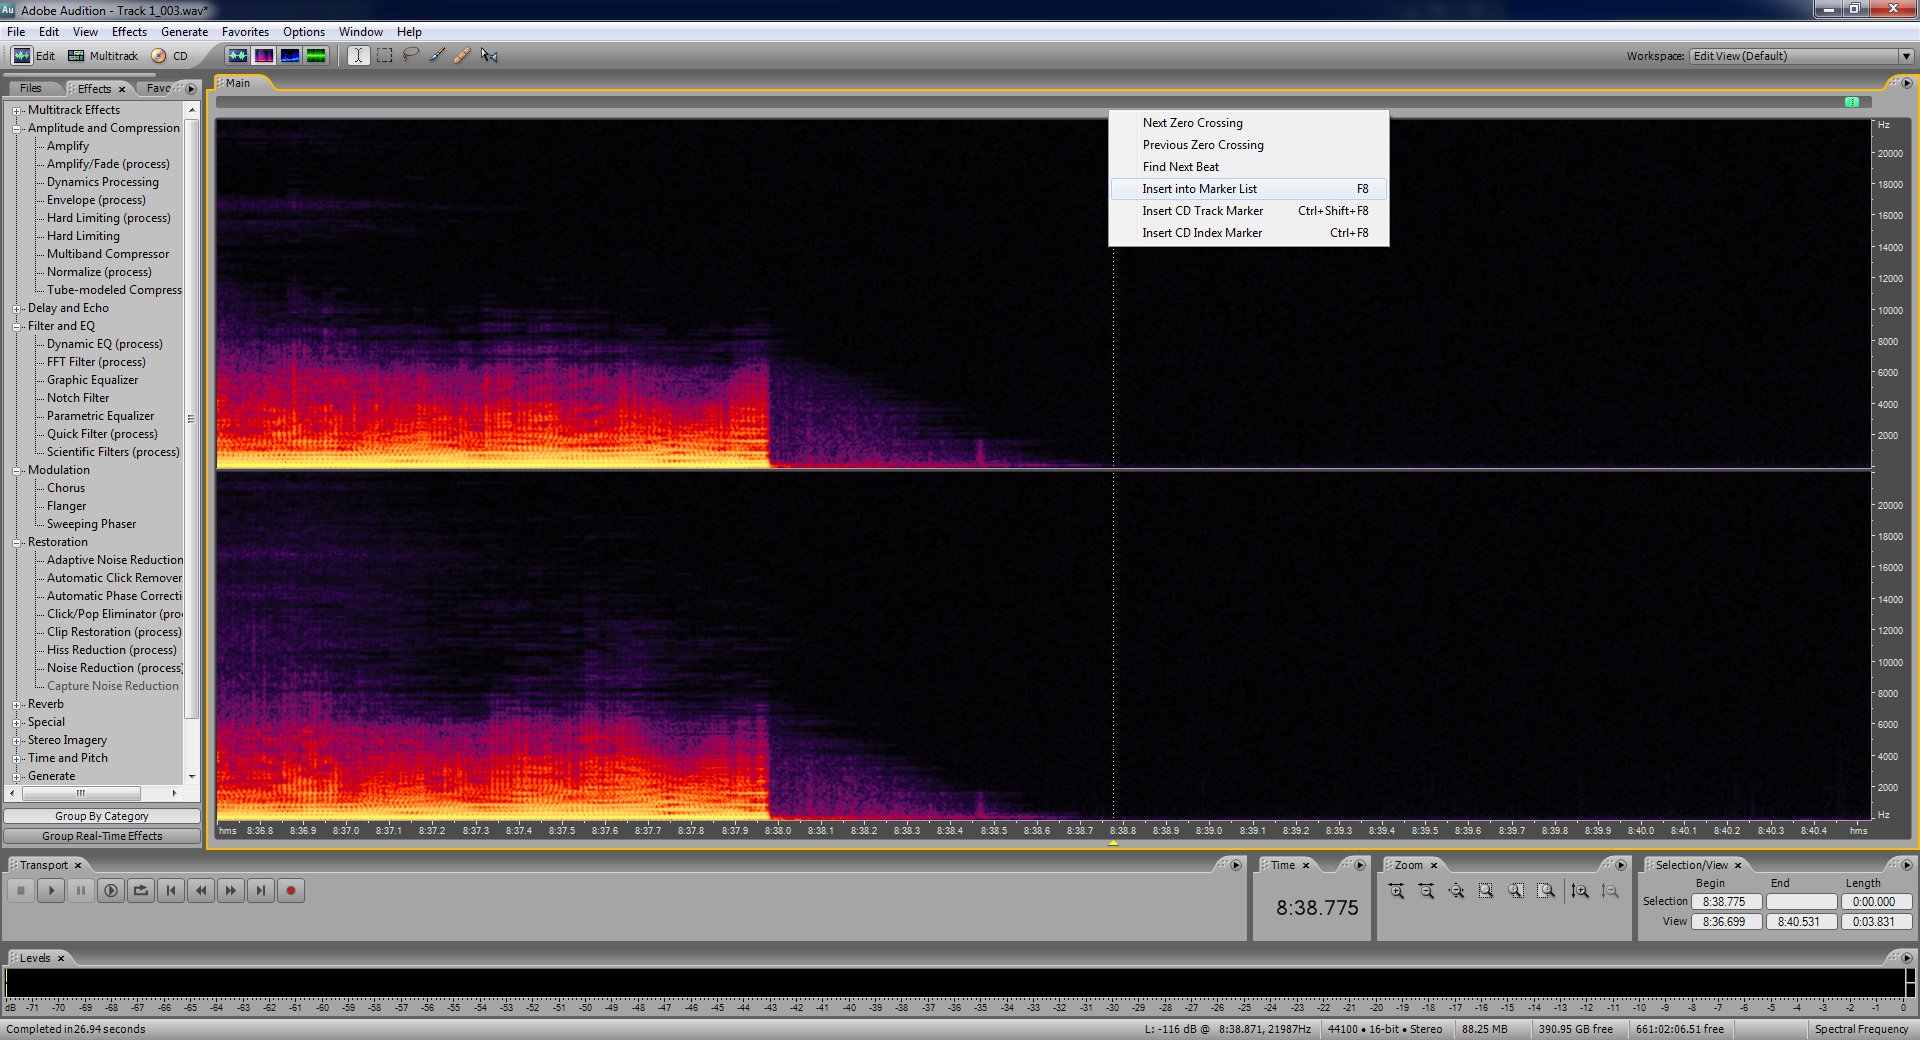
This is what it'll look like after a pop or click is repaired manually.
Give the audio one last listen to make sure it sounds good. When you play it back down at the bottom of the screen you'll see the output levels for each channel. These should never reach 0 dB. If they do the little red box next to the lines will indicate that it has. This means the sound has clipped off. If this happens too much it'll sound awful. Honestly it's okay if it happens a little bit. Especially on really loud music that has parts that get even louder. Just make sure it's not happening too much. It should look like this.
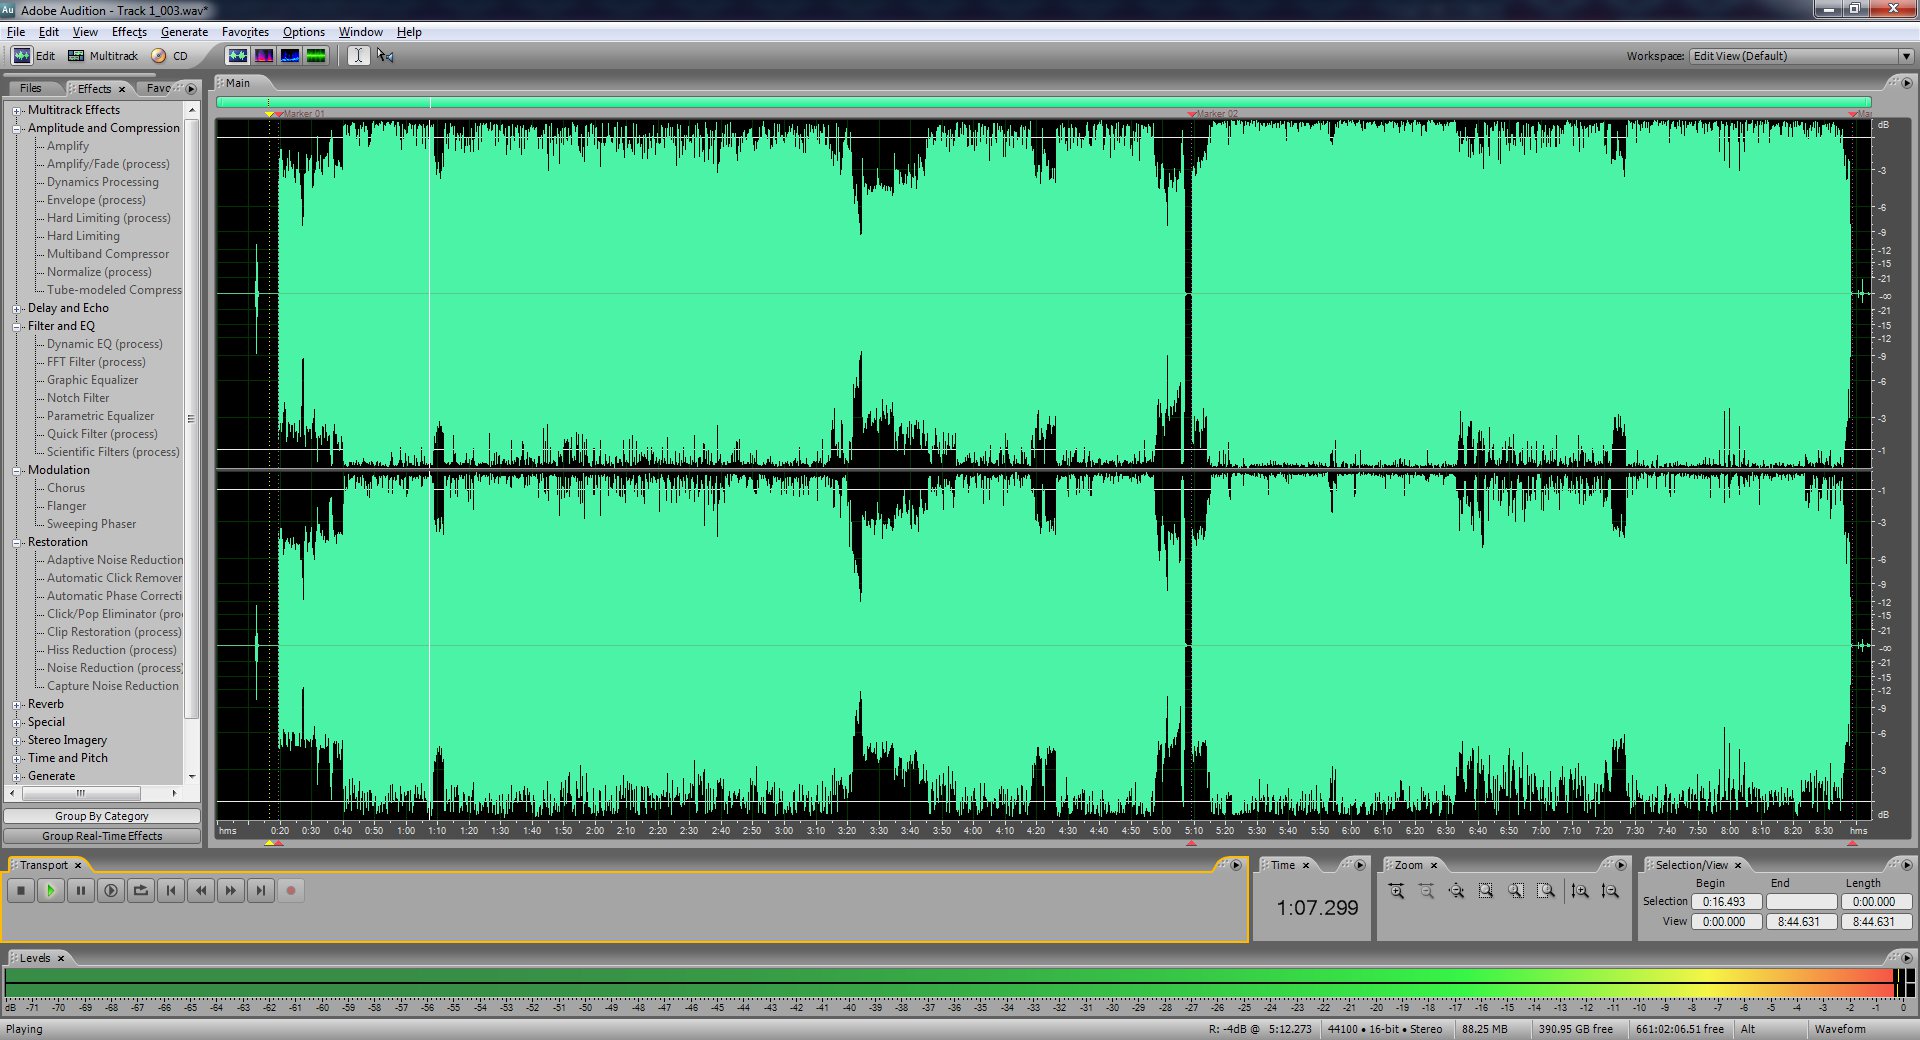
Now we're done with the cleaning of the audio. I suggest finding the beginnings of each song and placing a marker at the spot where they begin. Use the spectral frequency display to see where exactly they begin as the waveform display can be sort of deceiving. To insert a marker click the spot you want and then press F8.


When you've marked up the beginnings of each track as best you can and one for the end of the record now you'll want to select the second one. Copy it's begin position from the selection/view control at the bottom.
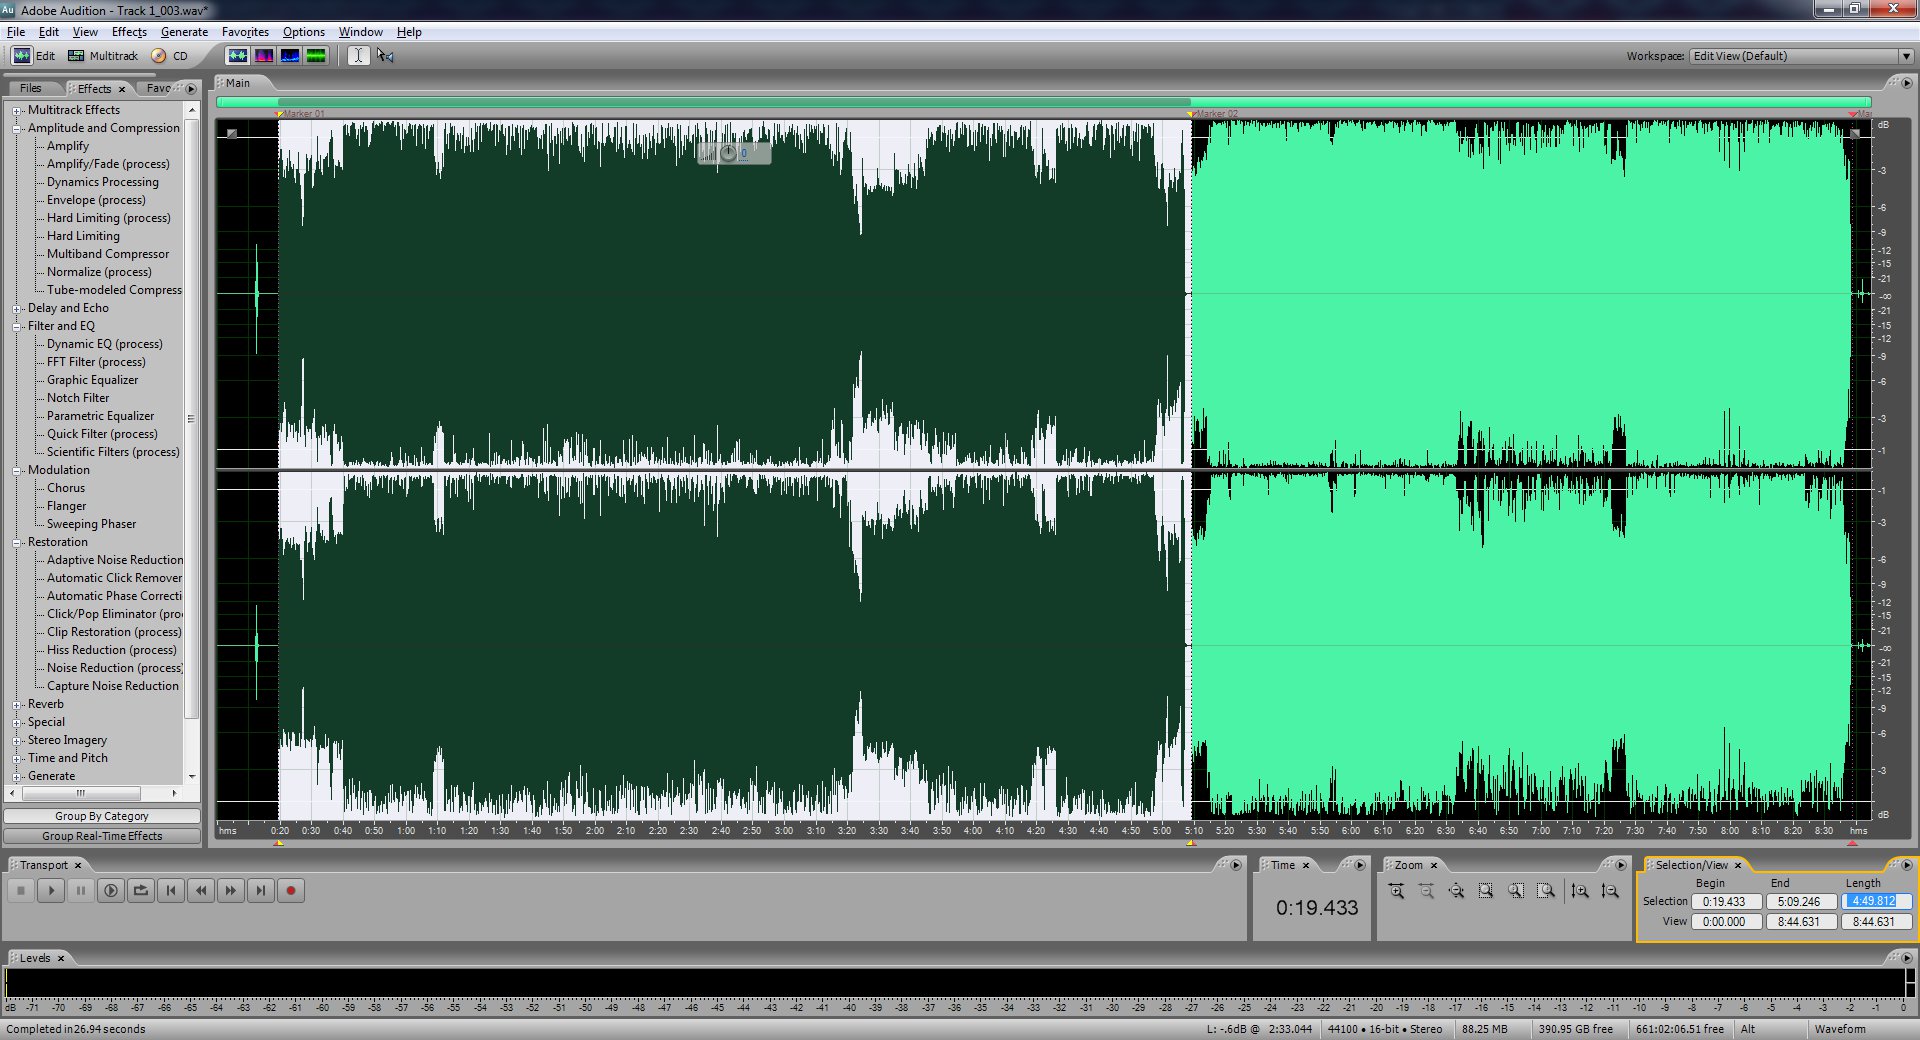
Select the first marker and then paste the value of the second marker's spot into the end to create an exact selection.
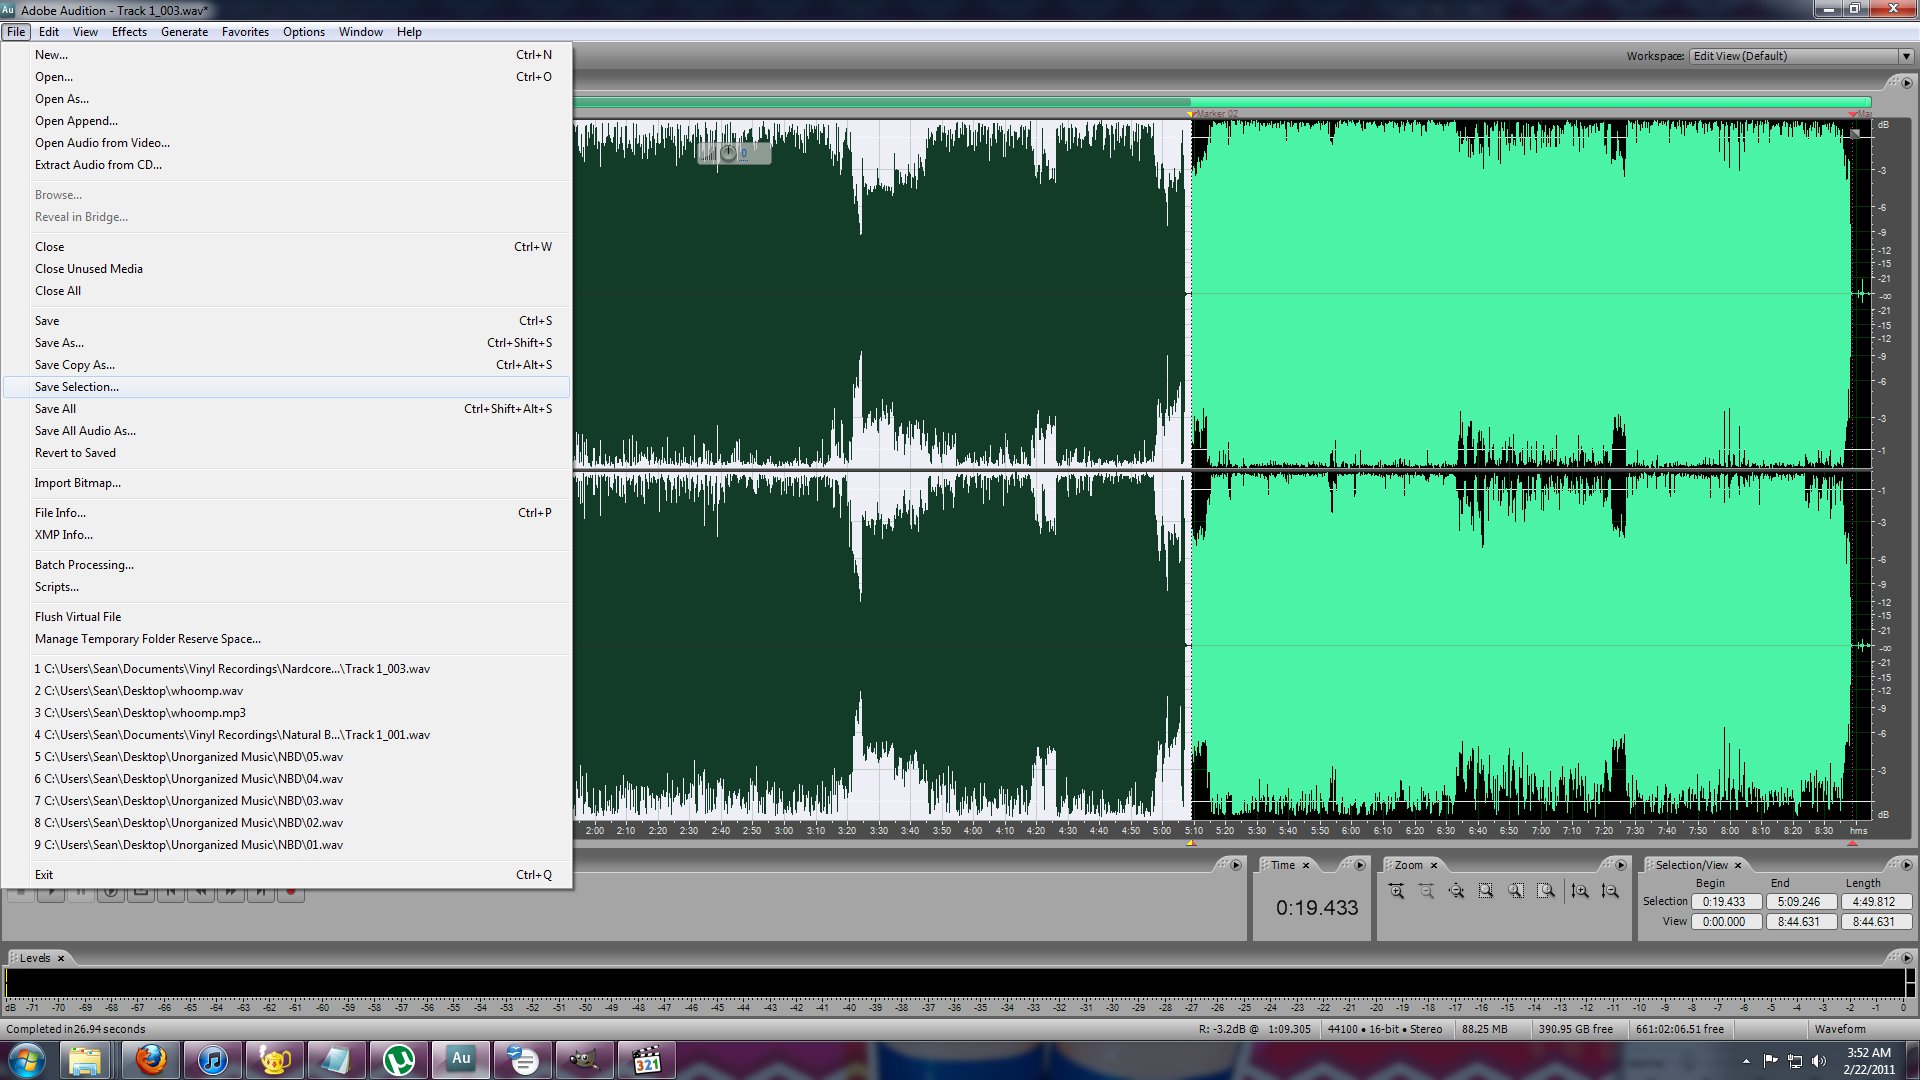
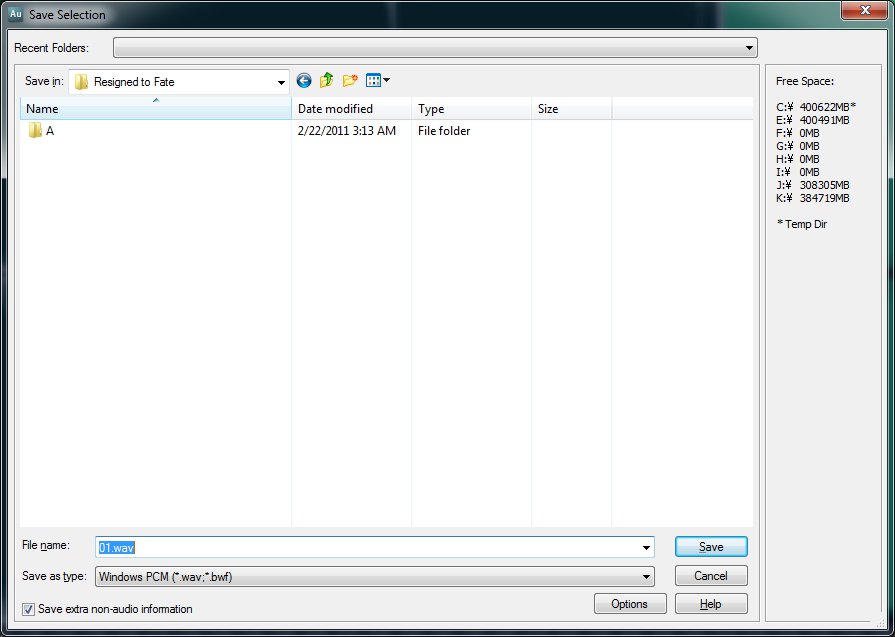
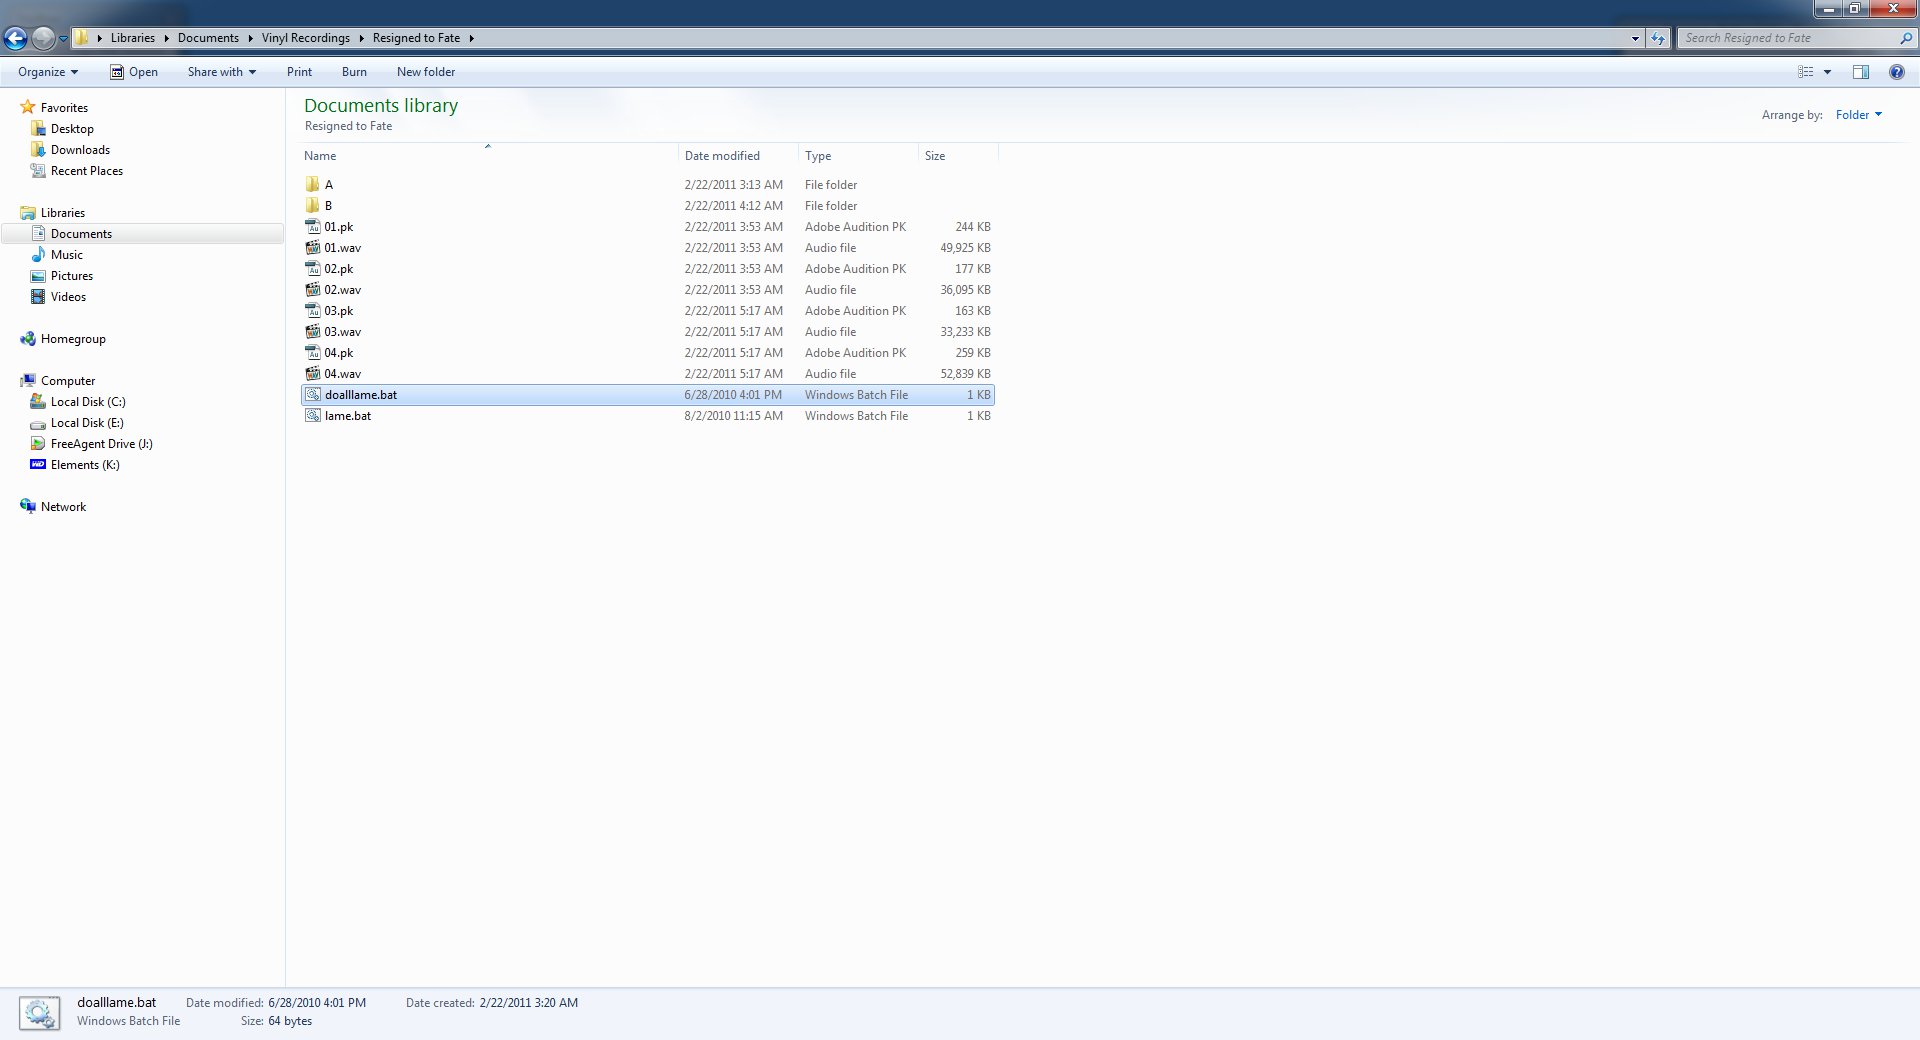
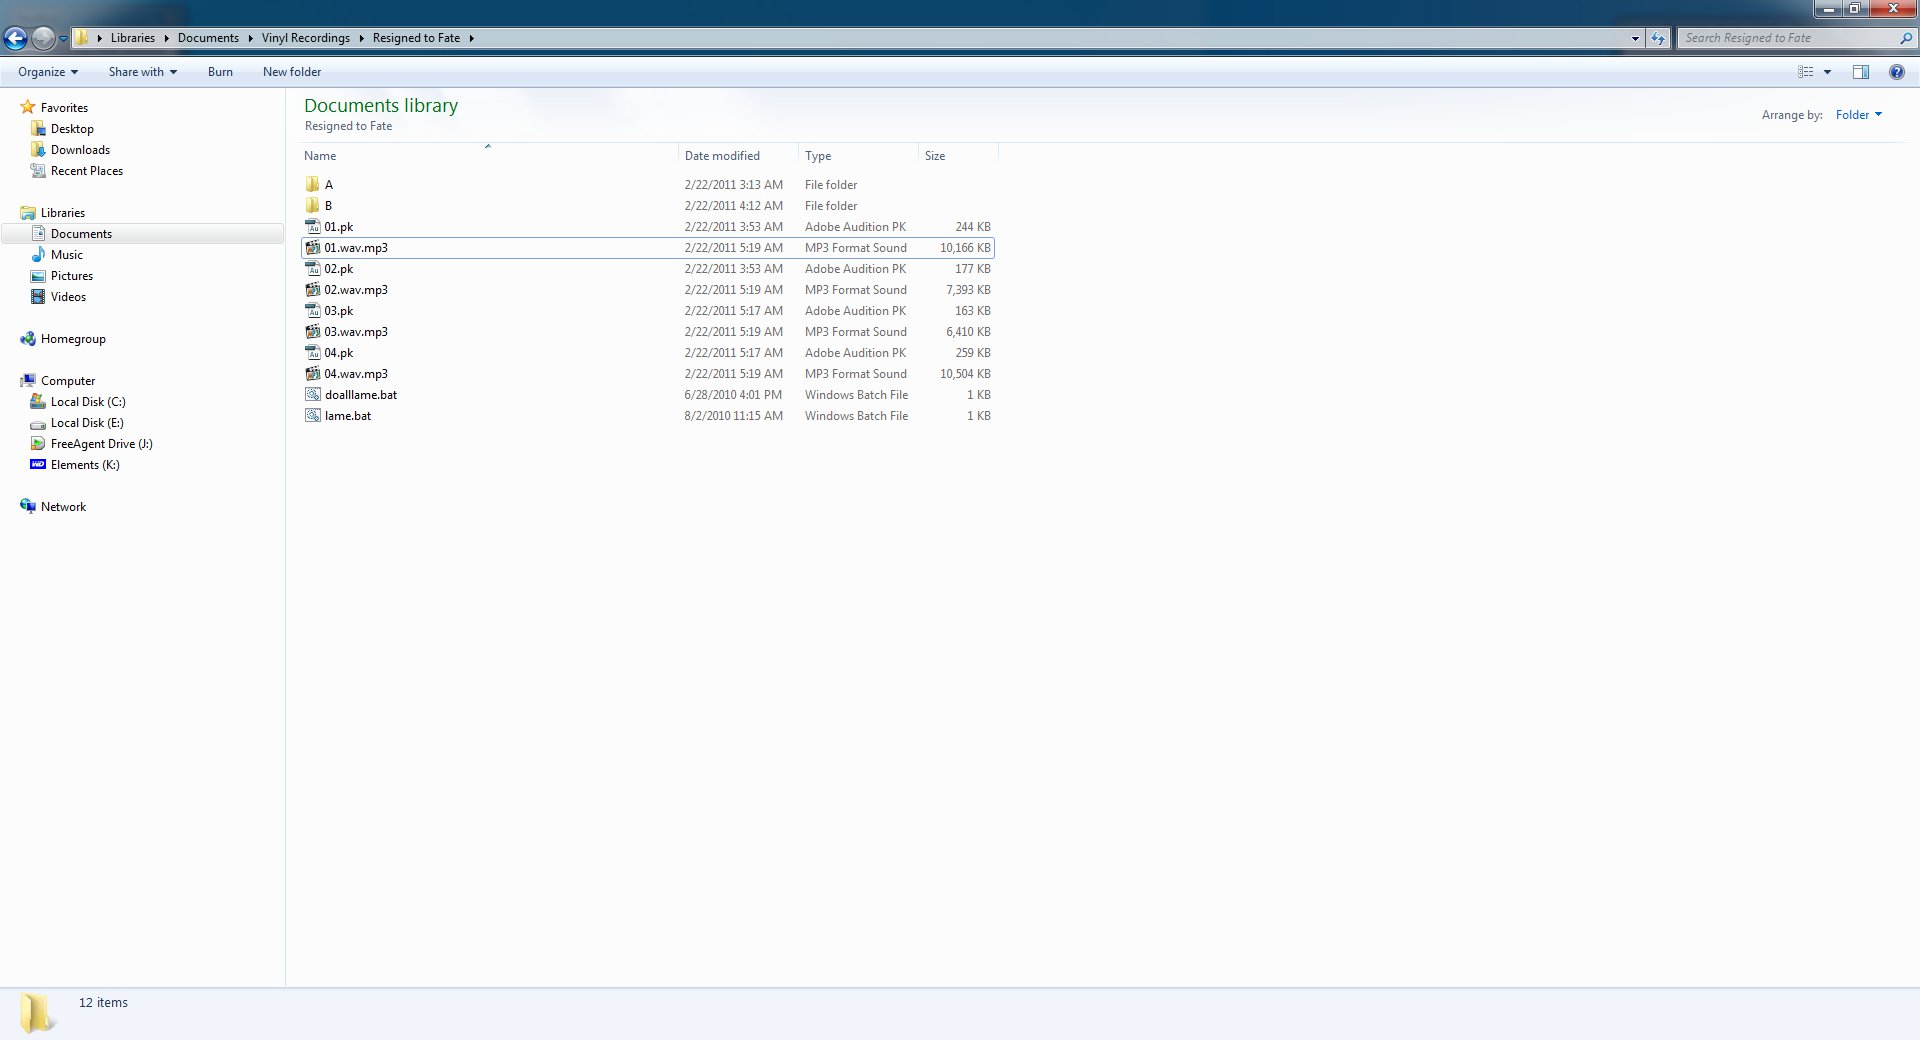
Go to File -> Save Selection As and then save it where you want it. I highly recommend just saving it as 01.wav, 02.wav, 03.wav, etc. depending on the track number.
When you're done repeat the recording, cleaning, and splitting process for the B side of the record.
At this point we're ready to convert the wav files to mp3. I won't cover how to convert to FLAC, but if you want to know just google how to convert wav to FLAC. It's almost the same.
Before we can do any encoding you'll need to download the latest stable release of LAME. Officially the LAME encoder is not distributed in binary form, only in source form. But you can download a Windows binary from here. If you're on Linux or OSX you can compile LAME from source.
Select the most recent one, either 32-bit or 64-bit depending on your system. As of this post the most recent version is 3.99.5. I would avoid alpha or beta versions as they are not guaranteed to be stable or reliable.
Unzip the archive to wherever you want.
Now we're gonna make two batch files so you don't have to do this by hand every single time.
Create a new text file named lame.bat.
Inside this file put the following:
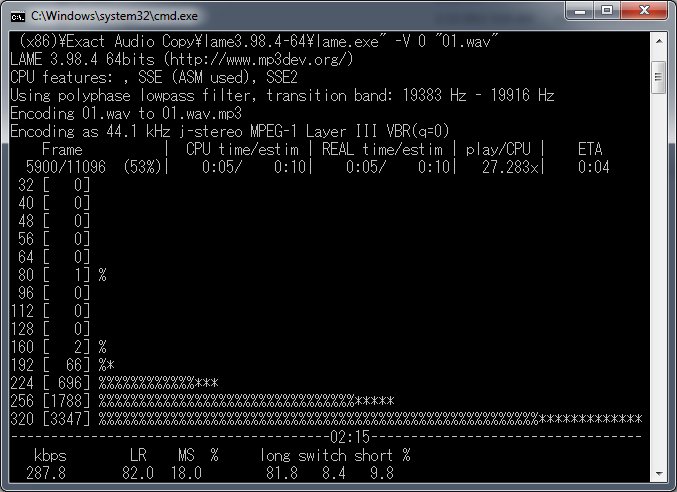
call "C:\Program Files (x86)\Exact Audio Copy\lame3.99.5-64\lame.exe" -V 0 %1
The path to the LAME executable should be wherever you intend to keep it. I have it in my EAC directory for when I rip CDs. All this does is run the LAME executable with the -V 0 option meaning it'll be a super high quality variable bit rate file. The %1 is the first argument passed to the batch file which will be the path of our wav files.
If you really want to encode the mp3s at another bitrate I suggest you read the LAME documentation since that is beyond the scope of this guide. If you want to be nice to everyone who cares about audio quality just leave it at V0. 320 kbps is often overkill, and anything less than V0 makes audiophiles cry.
Our second batch file can be called whatever. I call mine doalllame.bat.
Inside this file put the following:
for /f "tokens=*" %%a IN ('dir /b *.wav') do call lame.bat "%%a"
This will find all files that end in .wav in the folder the batch file is in and call the lame.bat batch file with the file name as the argument.
If you want to do a bit of cleanup and have the wav files automatically deleted add this line in after the first:
for /f "tokens=*" %%a IN ('dir /b *.wav') do del "%%a"
Pretty much the same as the first line, except it deletes the file. Make sure this goes AFTER the first line!
Now save and keep these batch files somewhere safe and just copy (not move) them to wherever you have the splitted wav files. I do this so I never lose the original batch files so I never have to remake them.
Double click the second batch file you made and let it run. It'll open up a command prompt window and you'll see the LAME encoder doing its magic.
Finally we have mp3 copies of the songs on the record!
At this point you'll want to tag them with whatever ID3 tag editor you prefer. I use Mp3tag which can be found here.